Rubber Ball Drum Sticks

Drum Stick (5)

We’ve been playing rock band a whole lot lately and needed drumsticks to go with our microphone!

This craft is perfect if you have a toddler who loves to use drum sticks on anything and everything, especially walls and furniture. The bouncy rubber balls are much kinder on a surface than wooden sticks!

To fashion them, poke a hole into two rubber balls – definitely a grown-up step. I saw this done on another blog where the parent used a drill, but I was able to poke into our rubber balls with just a little force and a screwdriver.

Drum Stick (1)

Insert two unsharpened pencils into the holes. To decorate, we first tried wrapping in string, which Travis had a surprising knack for.

Drum Stick (2)

But for more rock star flair, we abandoned the string in favor of shiny washi tape.

Drum Stick (4)

Travis loved the way the sticks gave a bounce with each tap!

Drum Stick (6)

String Telephone

String Phone (3)

I wanted to show Travis a bit about how sound travels by making a classic craft – a string telephone. The “phone” didn’t work quite as well as I hoped, but it was a neat way to explain to him the concept that sound can travel!

First, poke a hole in two plastic cups – this is definitely a grown up step, since plastic comes thick these days! I carefully hammered a nail into the bottom of each.

String Phone (1)

The only string we had that was long enough was floss. However, the floss may have impeded our sound from traveling as well as it should have. If you have kite string, try that instead!

String Phone (2)

Either way, Travis’s favorite part of the whole project was walking backwards away from me until we had a really long piece of floss.

I slipped one end of the string into each cup, securing around a paper clip, and then we gave our phone a test.


String Phone (4).JPG

The sound did make the plastic cups vibrate against your ear, but not enough for the words to really come through. Travis’s father insists I should have used tin cans, though I’ve seen this successfully done with plastic before. Next time we’ll nix the floss.

Rock Star Microphone

Rock Star Mike (8).JPG

Well, it’s happened. Travis has lost interest in music from his kiddie class, and now when we’re in the car, he only requests “grown-up music” (Dire Straits, to be exact). So on this rainy Saturday morning, I made my budding rock star his very own microphone!

To start, inflate a balloon until it is the right size to balance atop an empty toilet paper tube.

Rock Star Mike (1)

Cover the balloon with foil, and then secure with a rubber band or two.

Rock Star Mike (2)

Travis added extra bling to his microphone with sparkly gold washi tape.

Rock Star Mike (3)

Now it was time to hop on stage!

Rock Star Mike (5)

We had fun rocking out together for quite a while. A great prop for imagination and developing confidence!

Rock Star Mike (4)

Wild West Crate

koala west (11).JPG

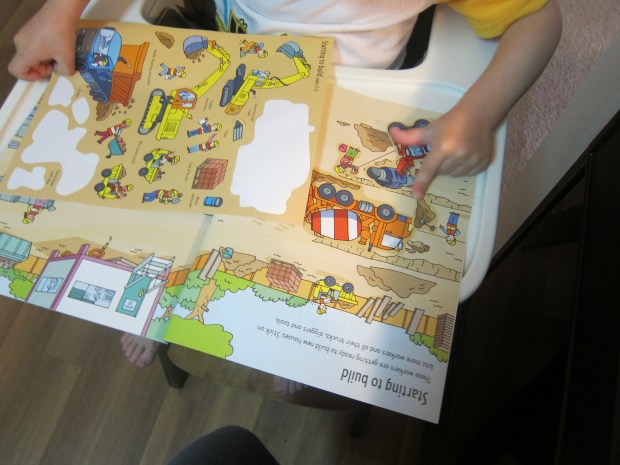
Our wild west-themed crate arrived from Koala this week, coincidentally on the very day that I bought Travis his first set of Lincoln Logs! I love it when the world syncs up that way. It was the perfect chance to delve further into who lived in log cabins and what the wild west was all about.

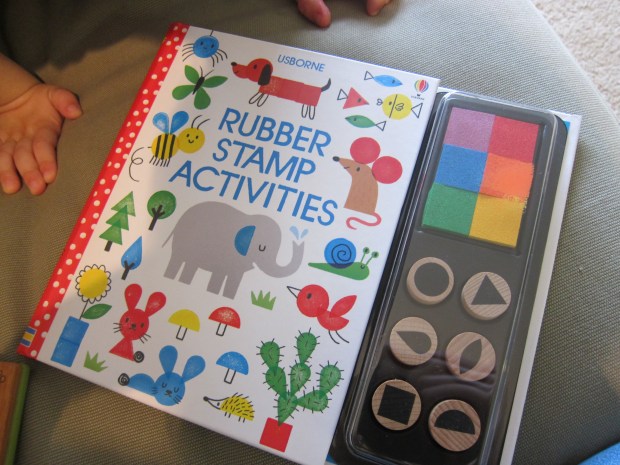
As with all Koala crates, you can replicate most of these activities with craft store finds, although the hobby horse will be the hardest.

First up was decorating our bandana, since every cowboy (or cowgirl) needs a bandana. The kit comes with a horseshoe stamp and a “spouncer” to dab on gold paint.

koala west (4)

To my surprise, Travis lost interest after making a few horseshoe marks, so I filled in a few extras before we set it aside to dry.

koala west (3)

We added a few dots with the spouncer too.

The little canvas sacks for a game of preschool “horseshoe toss” needed to be decorated in the same way, and left to dry. Here is the “spouncer” in action.

koala west (5)

Once dry, we filled the bags with wooden beads and took turns tossing onto the bandana.

koala west (14)

This game is a great opportunity for counting, too, seeing how many bags each player can get on the bandana. Come up with fun ways to make the game more challenging, i.e. moving further back or throwing with your non-dominant hand.

koala west (12)

The hobby horse was very complicated to put together, likely even for a child on Koala’s upper-end of four years old, so aside from the fluffy roving to stuff the horse head, Travis wasn’t interested.

koala west (9)

I used two cardboard tubes, a zip tie, the cloth horse head, and the provided felt stickers to make our horse.

koala west (7)

The final touch is brown yarn for the reins. Despite his lack of participation, Travis proudly told his father “we made this!” after, and climbed on for a ride or two!

koala west (16)

Overall, this crate was a little lost on Travis. We’ve never read about the wild west or seen any shows on the subject matter of cowboys and horses, so he didn’t have much frame of reference. I will keep the toys and crafts around for when he is older!


Phoneme Week 3: ST

ST (25)

We started out in the usual way, tracing an S and a T on Usborne’s wipe-clean alphabet cards, and juxtaposing them so Travis could see the two letters together. He liked that the S+T sounds is equivalent to “stuh!”

ST (5)

Phonics Book of the Week: Mole in a Hole. Now wait a second, there’s no ST in that title! This week I had to veer slightly off track since Letter of the Week‘s phoneme curriculum don’t always match up with the titles in Usborne’s Phonics box set. However, Mole in a Hole contained lots of perfect ST words: STick, STart, STone, STore, STuck, and STop. So we did numerous reads, and Travis started to sight read some of these gems.

Guiding Theme: STamp.

ST (2)

We started off playing with all the stamps we own, including alphabet stamps, some with pictures, and animal footprints! Then there is the other kind of stamp – postal stamps! – meaning we played games of post office galore. Travis even got to help pick out real stamps at the post office and use a few at home!

ST (11)

We of course had to truly decorate a letter, stamp it, and mail it.

  • We Read:
  • We Made:
  • We Learned:
    • For science of the week, we used a different ST word – STop! Stop germs, that is. This adorable visual on how quickly germs spread was probably Travis’s favorite activity all week.ST science (1)
    • For math of the week, we also used different ST words – STone and STick to be exact. Use any beautiful finds from a nature walk to create a simple pattern for your child. For example, set out: pinecone, stick, stone, pinecone, stick, stone. Your toddler will have fun deciding what comes next, while playing with his or her treasures!ST math
  • We visited:
    • The post office of course, to really mail a package!
  • We Ate:
    • STew
    • STir -fry
    • STrawberries

Other Words of the Week:

  • Stop: Aside from stopping those germs, we made a red stop sign and a green go (STart) sign and did a freeze dance to music. ST (16)You can also make a stop sign with the word writ large for your child, and set up a town with cars and roads.ST (19)
  • Star: We listened to an old favorite, Twinkle Twinkle Little Star and read about super stars in the Big Book of Stars & Planets. If you’re looking for star crafts, check out some of our oldies-but-goodies like Glitter Star Jars or the Numbered Stars Flashlight Game.
  • Station: We took a quick ride one weekend on our local station line! Of course we also had to listen to Down by the Station, and to read about a different kind of station – a space one that is! – with Shine-a-Light On the Space Station. We capped it all off with a visit to Grand Central Station, where Travis was ecstatic to see buffers, platforms, conductors, and other items he’s learned about in books.station (2).JPG
  • Steam: We played with steam in two ways: First, I ran a hot shower to fog up a mirror for Travis, which he absolutely adored, and let him paint away the steam with a foam paintbrush. ST (13)
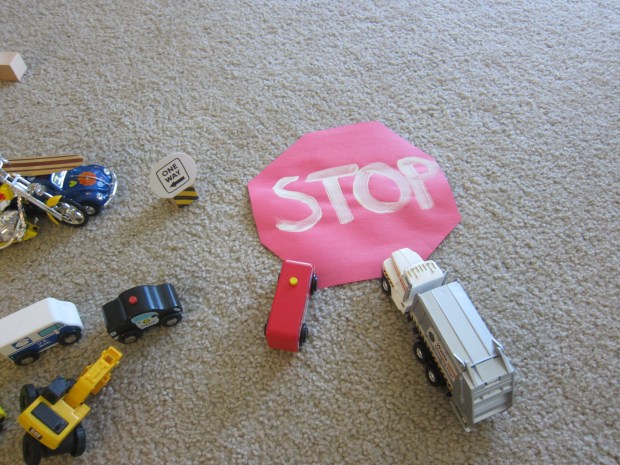
Supervise closely, as you’ll likely need to stand your child on a bathroom counter for this. Then we experimented by watching ice turn first to water and then into steam vapor.Ice Steam (5)
  • Sticker: Play with any and all stickers this week! If you’re looking for a great starter sticker book, those from Usborne are fantastic, with a line of text or explanation on each page, and with available in almost every topic imaginable. Travis completely filled in Building Sites and Nature over the course of our week! ST (7)
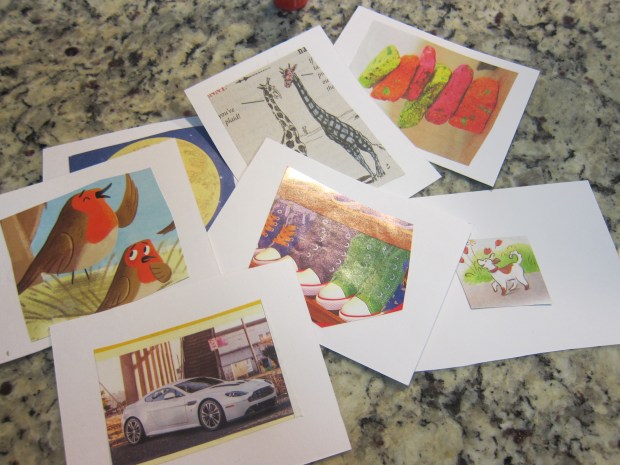
We also toyed around with variations on the word “sticky” by pulling out an old favorite game – a collage of random craft materials on sticky contact paper.ST (21)
  • Still: Need to calm your child down? Emphasize the word still this week! I encouraged Travis to hold still with child’s pose, which is great for relaxing kids prior to nap or bedtime.ST (22)
  • Story: Of course we read stories (including Tell Me a Story), but we also experimented with storytelling this week! First, we made beautiful “story stones”, a great way to teach even pre-readers about the order of words within a story. Then we played two more storytelling games, using fill-in-the-blank style activities.Fill In Story (4)
  • Stone: Don’t be fooled by the word ‘rock’ in several blog posts this week; while Travis and I did these activities, I made sure to use the word STone instead. Projects included a Rock On stone sculpture, storytelling stones, and a campfire made of sticks and stones – don’t forget the make-believe s’mores!ST (23)
  • Stem: Upcycle any stems from a STore-bought bouquet (or those found in nature) with this cute flower picture.Flower Making (4)
  • Store: Finally, head to the store just for fun this week… You don’t even need to buy anything; a mall excursion provides entertainment and atmosphere just from STrolling around. Travis got to ride in a “police cart”, see all the stores, and enjoy the treat of a smoothie (whoops, should have made it a strawberry one!)ST (20)

Flower Making with Corks

Flower Making (4)Travis always loves to play with the leftover stems and leaves after I bring home a bouquet of flowers, snip off the ends, and arrange the rest in a vase. This project was a cute way to upcycle the stems!

First, glue down your stem and a few leaves on white paper. Travis loved deciding where his leaves should go!

Flower Making (1)

We’ve been exploring different ways to stamp this week, so to make the flower petals, we dipped old corks into paint, and stamped on top of the stem (and sometimes to the side etc.)

Flower Making (2)

Very simple and perfect for spring!

Flower Making (3)

Storytelling, Two Ways

Tell Story (4)

We followed up our game of storytelling stones with two more neat games that will help activate your budding storyteller’s creativity, as well as foster a sense of narration and plot.

The first involved using index cards with pictures to fill in a line and change familiar stories in silly ways!

Fill In Story (1)

I cut pictures from magazines and glued to index cards. You can add the word on the other side of the card, for preschoolers who are beginning to read.

Place the cards in a hat, and then pull out a favorite book – it helps if it is a story your child knows well, so they can anticipate the next word or line.

Fill In Story (3)

At various points in the story, stop and pull a card from the hat, changing the story as needed. For example, “If you give a mouse a cookie…” might become “If you give a mouse a car…”

Fill In Story (2)

Travis couldn’t stop laughing, and requested several books in a row.

Next we started a tag-team style story. I prompted Travis with a sentence, and then asked him what he thought might happen next. The first few times I attempted the game, he didn’t get it… until I presented him with a little booklet to draw what was happening.


Tell Story (3)

Don’t be surprised or dismayed if the story doesn’t go how you had planned. I started what I thought might be a sweet story about a bear, and Travis said the bear had fire coming from him!

Tell Story (1)

Hey, at least it was creative! He wanted to keep drawing and making up stories (some nonsensical, others more clearly in story format) until all the yellow paper had been colored in.

Fill In Story (5)

I will definitely continue both these games as Travis gets older.


Storytelling Stones

Story stones (1)

I loved this beautiful storytelling idea I found, drawing on Native American symbols to tell stories, especially because it’s a way for pre-readers to weave sentences together and understand that different places and characters are the building blocks of a narrative.

I looked up a few easy Native American symbols online (based on my limited artistic ability!) and painted them on stones, and then let them dry before showing Travis. Together we looked at the website at what some of the symbols meant, and I arranged the stones for him.

Story stones (2)

I put together our first story in a random order that popped into my head. He was quite intrigued, and asked for a few variations. With easy words like “sun”, “day”, “mountain”, “butterfly”, and “eagle”, it was easy to make up cute stories with simple plots.

Travis hasn’t been much into painting lately, so to my surprised then asked if he could paint the rocks! I asked if he’d like to make up symbols of his own.

Story stones (3)

His “symbols” really meant covering the entire rock in white, but I asked him what “story” was happening on each rock, and he made up cute answers, drawing on the items that were around us in the kitchen.

Story stones (5)
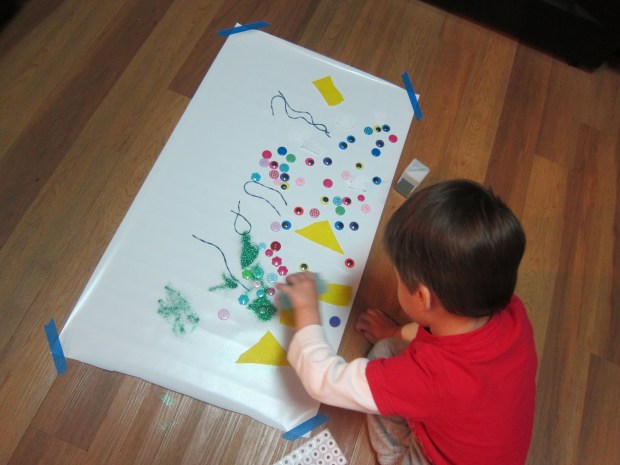
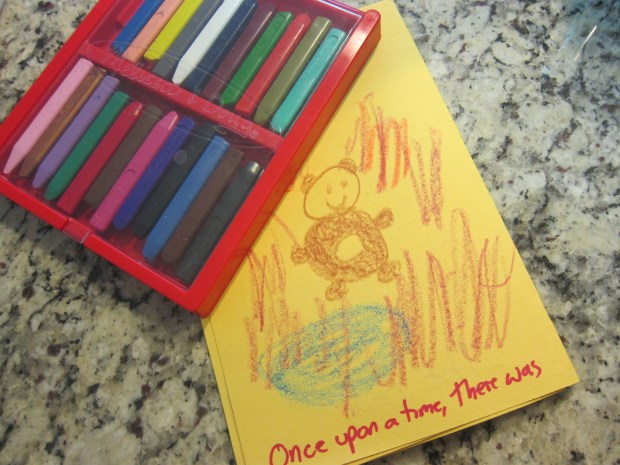
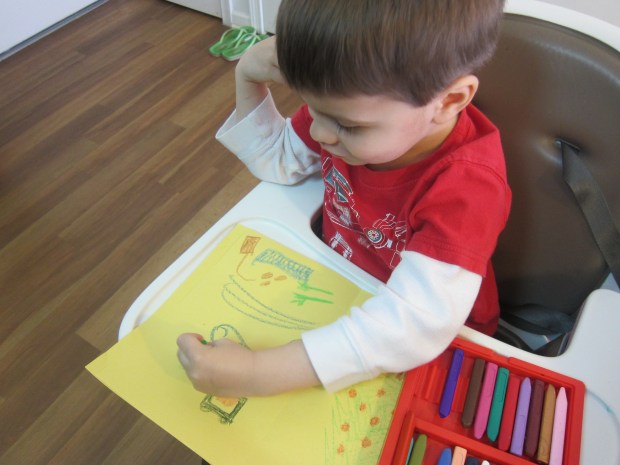
A great early intro to creative writing!

Rolling Pin Stamps

Rolling Stamp (3)

Our stamping fun continues! This time we used old foam stickers to make a 3-D stamp, and used paint instead of ink.

First, apply any foam stickers in fun shapes to an old rolling pin (or one you don’t mind getting dirty!).

Rolling Stamp (6)

In order to roll the entire length of the rolling pin in paint, I slopped the paint down on newspaper – this already made the craft exciting! Once it’s very painty, roll your rolling pin across a piece of sturdy paper or poster board.

Rolling Stamp (1)

“Flowers!” Travis said with delight.

Rolling Stamp (4)

We didn’t have any additional poster board, but he still liked testing out the rolling pin over extra sheets of newspaper, keeping up the fun for quite some time.

Rolling Stamp (5)

Overall, a super cute DIY stamp.

Stop That Germ!

ST science (1)

This game gives an adorable visual to kids who are learning about germs, or when to wash their hands, or good hygiene. I recommend doing the game soon before bathtime – you’re going to need to clean off after, anyway!

When I told Travis we were going to play with glitter, he couldn’t wait to start. I asked him what makes us sick, only half expecting an answer, and was so pleased when he announced, “Germs!”

I told him our glitter was going to represent germs, and we were going to see how quickly they spread. Pour glitter onto your child’s hand, and then shake hands with them. Oh no, now mommy is sick with germs too!

ST science (2)

Of course we had to repeat with a second color of glitter on his other hand.

ST science (3)

And then we had to dump glitter on the ground for a while. Eventually, we got to the key part of the lesson. How could we stop the glittery germs from spreading? By washing our hands of course!

ST science (5)

You can keep up the play with other variations. Fill a spritz bottle with water, pretend to sneeze, and spritz your child. It’s another great, visual lesson on how quickly germs can spread. How will you stop the germs this time? By covering your mouth when you cough or sneeze!

ST science (4)