Recycled Bird Feeders

Recycled Bird Feeder (7).JPG

After our recent pine cone bird feeders didn’t get much nibbling from neighborhood birds, we wanted to give our feathered friends more of a perch to stand on while having a late autumn snack! This project from Barefoot Books is a great way to recycle juice or non-dairy milk cartons.

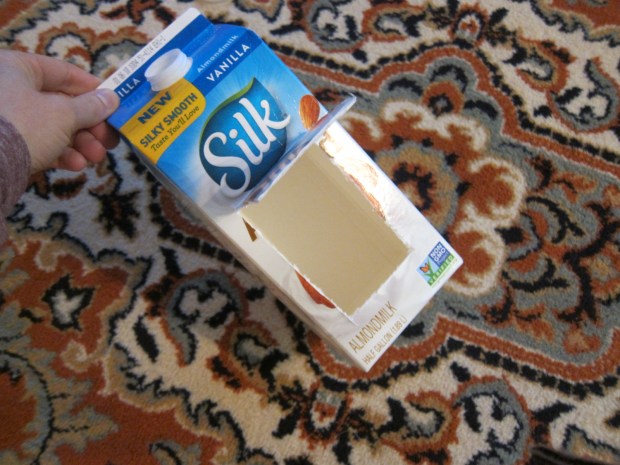
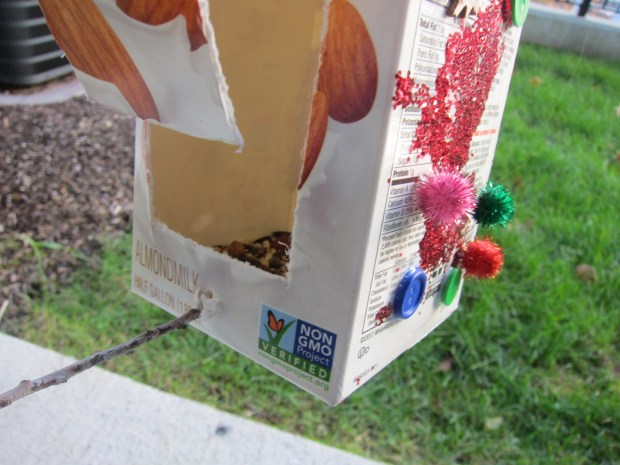
Adults, cut a rectangular opening in one side of a clean, empty carton, making sure it’s about 2 inches from the bottom of the carton.

Recycled Bird Feeder (1)

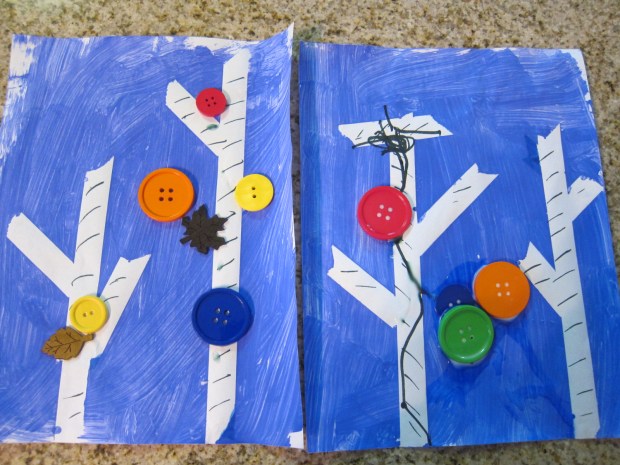
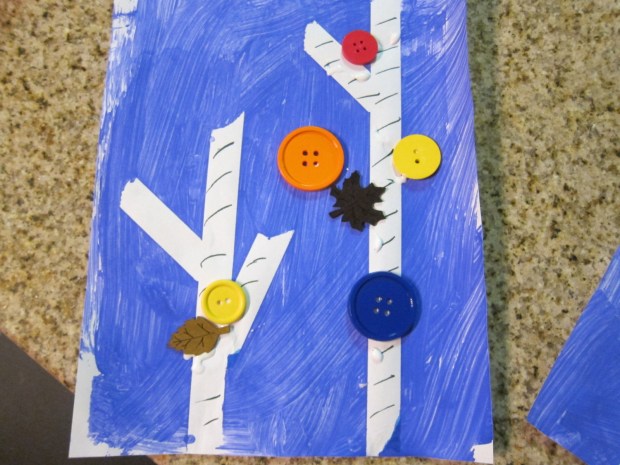
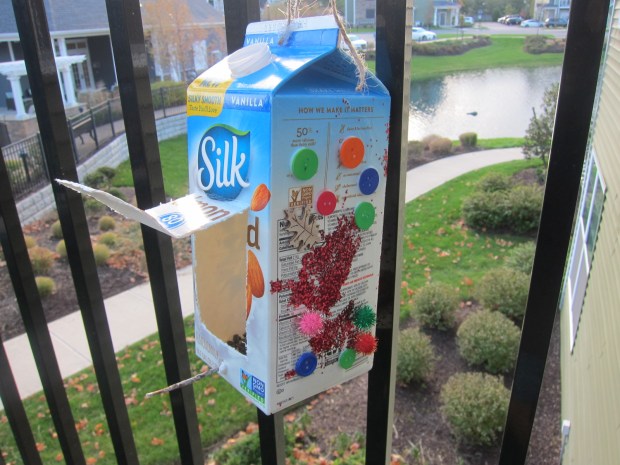
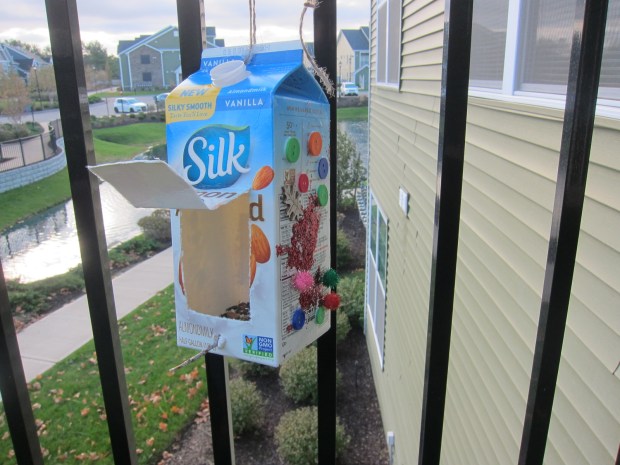
Now give your child carte blanche to decorate however they please. We wanted to make our carton bright and vibrant for the birds, so added colorful buttons and pom poms.

Recycled Bird Feeder (2)

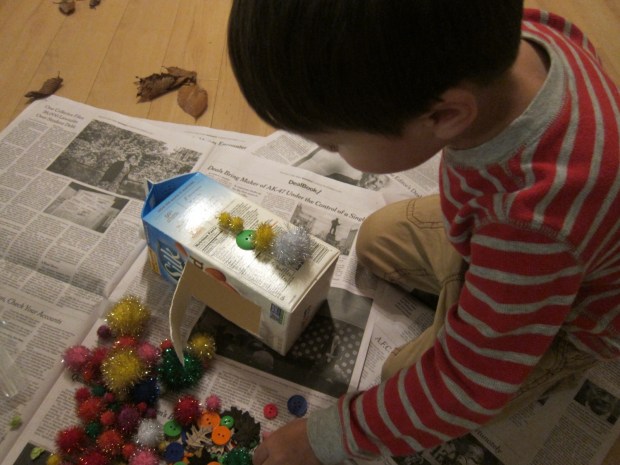
And then Travis decided we needed glitter… lots of glitter!

Recycled Bird Feeder (3)

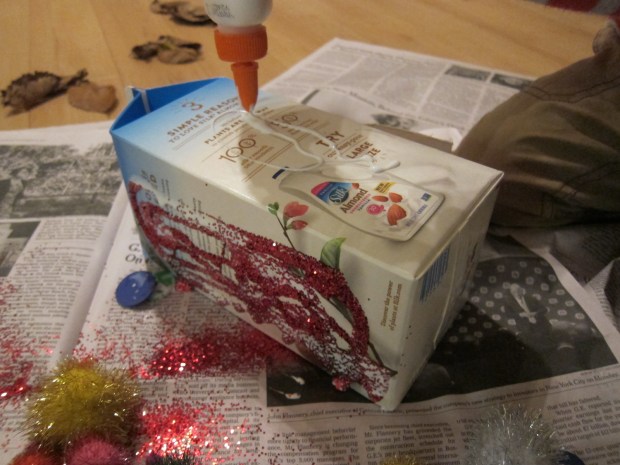
At this point we left the carton to dry overnight. The next day, poke two holes in the bottom of the carton. Select a stick from outside to be the perch; insert through the holes.

Recycled Bird Feeder (4)

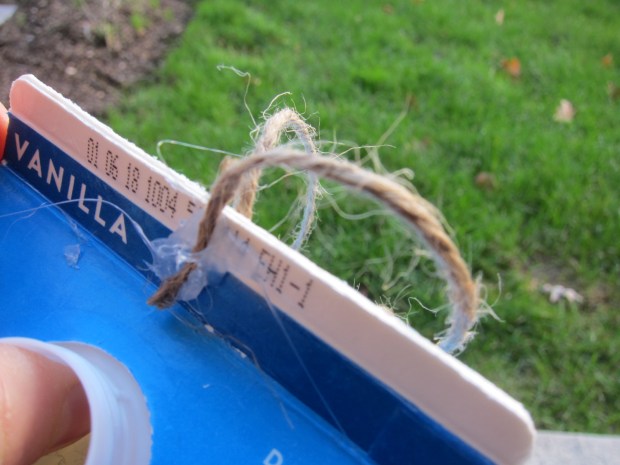
Use a hole punch to make a hole in the top of the carton, and thread with string. My milk carton was so thick that I ended up hot gluing the string instead, which worked in a pinch.

Recycled Bird Feeder (5)

Now find a beautiful place to hang it, and fill with  birdseed!

Recycled Bird Feeder (6)

To continue the fun, consider purchasing a kid-friendly field guide to birds, and check off the visitors you receive over the winter.


Potato Corn Chowder

Corn Chowder (1)

This creamy blended soup is perfect almost any time of year. Use fresh corn in the summer or canned corn when it’s out of season. Although the ingredient list is longer than I generally strive for with kids’ meals, it comes together fairly quickly.

Ingredients:

  • 2 tablespoons olive oil
  • 1/2 cup chopped white onion
  • 1 minced garlic clove
  • 2 small red potatoes
  • 1/4 teaspoon salt
  • 1/4 teaspoon black pepper
  • 1 (15-ounce) can corn
  • 1 cup vegetable broth
  • 1 cup unsweetened almond milk
  • 2 tablespoons nutritional yeast
  • Sliced green onions (optional)
  • Chopped, cooked vegan bacon (optional)
  1. Heat the olive oil in a large saucepan over medium heat. Add the onion and garlic; saute for 3 minutes.
  2. Peel and chop the potatoes. Add to the pot, along with the salt and black pepper; cover and steam for 4 minutes.
  3. Stir in the corn, broth, and milk; bring to a boil, then reduce heat and simmer for about 5 minutes.
  4. Transfer the mixture to a blender, along with the nutritional yeast, and process until smooth. Note: If you prefer, puree only a bit of the soup (about 3/4 cup), and leave the remaining soup chunky.
  5. Ladle into bowls, and top each serving with green onions, bacon pieces, and additional corn kernels as garnish, if desired.

Corn Chowder (2)

More Fall Leaf Fun

Fall Fun (5)

I posted about our Fall Find It walk a few weeks back, but now the fall colors are even more vibrant so we set off in the woods again. Forty degrees felt warm after an early arctic blast, making us doubly sure to get out into the sunshine. We added in a few suggestions from Parents magazine to add novelty to this particular walk!

First, we decided to see if we could find the whole rainbow, ROYGBIV, that is. Blue proved to be elusive, but we did wind up with this neat line-up. Finding a purple shade was a particular triumph.

Fall Fun (1)

Then we searched for the biggest leaf, and kept dropping contenders whenever we spotted one that was even bigger. We were impressed to bring home this one at 9.5 inches… until reading about a record-setting maple leaf that was 20 inches!

Fall Fun (4)

Perhaps the most fun suggestion was to find shapes in the leaves, similar to the game you’ve most likely played identifying shapes in the clouds, but with an eye to the ground this time. We spotted this little fellow that looked like a bat.

Fall Fun (3)

I found one that I thought looked like a rooster, and Travis decided the frilly one looked like a caterpillar! All in all, some simple and good fun that I recommend for your next nature expedition. What other leaf games do you and your family play? Please share in the comments!

Fall Fun (2)

Autumn Ants on a Log

Autumn Ants on a Log.JPG

Put this cute autumn spin on an old kid favorite – in this version, raisins turn into deep red cranberries and brown pecans to capture the hues of the season!

Ingredients:

  • 1 celery heart
  • 1 tablespoon peanut butter
  • Chopped pecans
  • Chopped dried cranberries
  1. Trim the celery stalks and cut into pieces about 2 inches long.
  2. Divide the peanut butter evenly among the slices – you may need a little more or a little less peanut butter, depending how much celery you have.
  3. Chop the pecans and cranberries and divide evenly among the celery slices.

If only all ants were this adorable!

Birch Tree Tape Resist Picture

Birch Tree (8).JPG

We haven’t done tape resist art in a long time, so it seemed like the right moment to return to an old idea in a new form. A cold winter blast has me thinking of lovely winter birch trees, always my favorite, and tape resist is the perfect way to create these white tree trunks.

First, create the outline of trunks and branches on white paper by covering with tape. Any masking tape or patterned washi tape will work fine – you’re going to remove it at the end. Travis was surprised when we made our trees blue to start (but shh, don’t spoil the surprise for your child yet!).

Birch Tree (1)

Next we painted over the tape and the rest of the paper for a blue sky background. We used tempera paint, but you’ll get a more wintery, softer feel if you use watercolors.

Birch Tree (2)

Let the paint dry, then it’s time to peel back the tape for the big surprise – white-trunked trees!

Birch Tree (3)

Travis was so excited to see our birches, and helped sketch on little black lines in the bark.

BIrch Tree (4)

As the finishing touch, decorate your trees – we used buttons and little leaf cutouts.

BIrch Tree (6)

He told me the first picture was done, but then got more impish with the second, layering on big piles of glue and buttons… Love watching this kiddo’s creativity!

Birch Tree (7)

PB&J Bowl

PB&J Bowl

This smoothie bowl puts a novel twist on classic peanut butter and jelly flavors, and will perk up mornings if you’ve fallen into a breakfast rut!

Ingredients:

  • 3/4 cup vanilla almond milk
  • 1/2 cup frozen banana slices
  • 1/2 cup frozen strawberries
  • 2 tablespoons peanut butter
  • Strawberry or grape jelly
  • Sliced grapes
  1. In a blender, combine the milk, banana, strawberries, and peanut butter; process until smooth and thick.
  2. Divide the mixture evenly among 2 or 3 bowls. Top each serving with a dollop of your favorite jelly, and sliced grapes if desired.

Bird-Beak Buffet

Bird Buffet (7)

Some recent fun with a homemade bird feeder has us talking about birds, the various things they eat, and why some birds’ beaks look very different from others. It was the perfect opportunity to pull out this cute game from our Barefoot Books’ Kids Garden kit!

I recommend gathering all your materials ahead of time so you can lay all of the following items in front of your child at once. Otherwise, there is bound to be some curious exploration and possible trouble! First, you’ll need 4 beaks:

  • 1 pair of chopsticks (“Heron Beak”)
  • 1 eyedropper (“Hummingbird Beak”)
  • 1 slotted spoon (“Pelican Beak”)
  • 1 pair of tweezers (“Sparrow Beak”)

BIrd Buffet (1)

Then set out 4 bowls of bird “food:

  • 1 plate of unshelled nuts as pretend field mice for the Heron
  • 1 tall bottle with a narrow top filled with water as flower nectar for the Hummingbird
  • 1 bowl of ping pong balls floating in water as fish in water for the Pelican
  • 1 bowl of sesame seeds and grass clippings as seeds in the grass for the Sparrow

Bird Buffet (2)

I recommend having a towel under your play area, since two of these bird meals involve water! Now let your child experiment with which “beak” is best suited for each food. The ladle and ping pong balls were an easy first guess, and Travis had fun pretending to be the pelican.

Bird Buffet (3)

The most enjoyable challenge was using the tweezers to grip the grass clippings and sesame. He was very focused on it, and so proud each time he could move some grass or a sesame seed.

Bird Buffet (4)

The eyedropper was a delight of course, and we talked about the hummingbird’s long narrow beak being well suited to dip inside a flower.

Bird Buffet (5)

The one that gave us consternation was picking up nuts with the chopsticks. We decided we wouldn’t want to be herons!

Bird Buffet (6)

From there, Travis had fun mixing and matching his birds. He used the eyedropper in the “pelican’s” big bowl of water, and loved using the slotted spoon to move unshelled nuts from the dry bowl into the bowl of water, then fishing them out with a utensil or his hands.

BIrd Buffet (10)

He also mixed water into his sesame seeds, and found other ways to have fun with the eyedropper (as a spoon etc.), resulting in lots of enjoyment even after the stated purpose of the game was done.

Bird Buffet (8)

We hope to follow up with some bird watching outside once the weather warms up, paying close attention to the birds’ beaks!

Red Lentil and Rice Hummus

Red Lentil Hummus (2)

This recipe features the same tahini sauce that I used a while back in a rice and lentil bowl. Make a big batch of the sauce now, and reserve the rest for a lentil bowl supper tomorrow night!

Ingredients:

  • 1/2 cup tahini
  • 2 minced garlic cloves
  • 1/2 cup fresh-squeezed lemon juice, divided
  • 1 teaspoon ground cumin
  • 1/2 teaspoon salt
  • 1/2 cup cooked red lentils
  • 1/2 cup cooked white rice
  1. In a food processor, combine the tahini, garlic, 1/4 cup lemon juice, cumin, and salt. Transfer 1/2 cup of the tahini mixture to a blender; reserve the remaining tahini sauce for another use.
  2. Add the red lentils, rice, and remaining 1/4 cup lemon juice to the blender with the tahini mixture, and process until smooth.

Try serving this with crackers or veggies – we particularly like this one with bell pepper strips! It also makes a great sandwich spread.

Note: Looking for another way to use up that leftover tahini sauce? Try this easy lunch idea: Spread a little sauce on a whole wheat tortilla. Place a little bit of cooked rice and cooked red lentils in the center of the tortilla, then top with mixed greens to taste. Roll up to serve.

Red Lentil Hummus (4)

Apple Pie Oatmeal

Apple Pie Oatmeal (2).JPG

This microwavable oatmeal-in-a-mug is as easy as those instant oatmeal packets, but since it’s homemade, you’ll have the added benefit of fresher taste and no added sugar.

Ingredients:

  • 1/2 cup quick-cooking oats
  • 1/2 cup unsweetened almond milk
  • 6 tablespoons unsweetened applesauce
  • 2 tablespoons apple juice
  • 1/4 teaspoon salt
  • 1/4 teaspoon cinnamon
  • Diced apple
  1. Combine all of the ingredients except the diced apple in a microwave safe mug. Cover and microwave for 2 minutes.
  2. Stir and top with the diced apple to serve.

Apple Pie Oatmeal (1).JPG

One mug generously serves two hungry little ones, or one busy adult!

Jeweled Turtle

Jeweled Turtle (9).JPG

We seem to be on a bit of a reptile kick lately, and this jeweled turtle helped fill a lazy morning at home. Travis loves to play with clay and aluminum foil, so what a bonus to find a craft that combined the two!

To make your turtle shells, crumple aluminum foil into a ball, and then flatten slightly until you achieve the desired shape.

Jeweled Turtle (1)

Next we rolled little bits of air-dry clay to be the head, arms, legs, and tail of the turtle. Press slightly into the underside of the foil to adhere.

Jeweled Turtle (2)

We pulled out a few sparkly odds and ends from our craft bin to decorate the shell of our turtle, including sequins and glitter glue.

Jeweled Turtle (3)

Once our first turtle was finished (admittedly with lots of adult help), Travis immediately began making a second, and this time I sat back and just watched his imagination go wild!

Jeweled Turtle (7)

The turtle had several heads, bits of clay stuck on top of the shell, eyes in several places that didn’t necessarily make “sense”, and star beads pressed into arms and feet.

Jeweled Turtle (5)

I didn’t lift a finger for this second version, and absolutely loved seeing Travis make his own creation.

Jeweled Turtle (6)

What will your child’s turtle end up looking like? Please describe or post a picture in the comments; we can’t wait to see!

Jeweled Turtle (8)