Aluminum A

Aluminum a (4)

Travis is a pre-k grad, and although we intend to have lots of fun this summer, I also want him to avoid the “summer slide.” To keep him fresh, we’ll be working on the alphabet. This took me back to our journey through the alphabet when he was a toddler! But now the emphasis is different; he knows his letters and phonemes, but needs to work on the fine motor skills of tracing and writing.

After tracing the letter A, both upper and lower case, we designed one from a material that started with a – aluminum foil.

I showed Travis how to roll a sheet of foil into a coiled rope – fun!

Aluminum a (2)

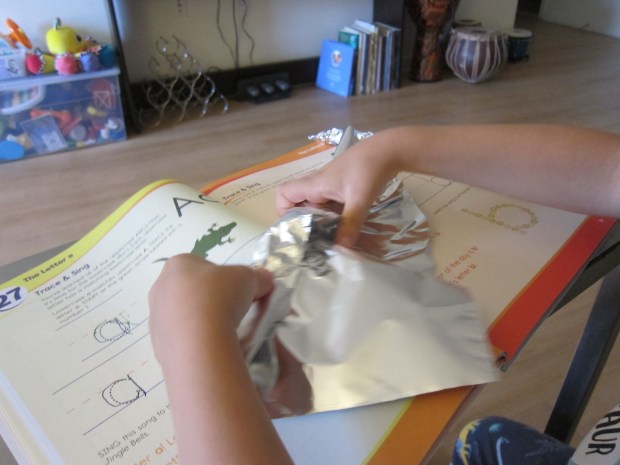
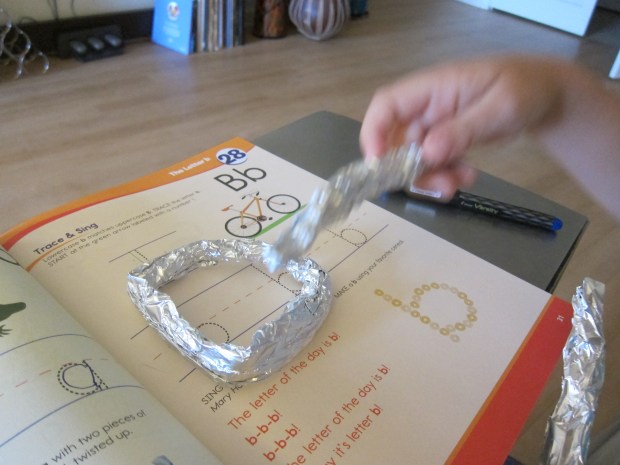
We looked at the “a” in his workbook, and he thought hard about how to shape his foil. For the majority of it, we twisted one coil until it made a circle.

Aluminum a (1)

The second, shorter coil would be the line on the end. Travis has a habit of putting this line closer to the middle of the a’s bottom, but this “close reading” helped him pinpoint that it should go on the side.

Aluminum a (3)

Next we made an Artistic upper case A, using a favorite art medium: crayons.

I presented him with three crayons – two long and one short – and challenged him to decide which should go where.

Aluminum a (6)

After initially making what looked more like an H, he was quite proud when he tilted the two long crayons to make an A.

Aluminum a (7)

One down, 25 to go!

Aluminum a (8)

Advertisement

Dine on Roasted Finger-Foods

Dine Roasted (2)

I mentioned previously that Veronika has little interest in purees, and refuses to be spoon-fed. It’s been finger-foods and Baby Led Weaning for this little girl! I’ve had to completely rethink how to introduce food, compared to when Travis was little, but such parenting curve-balls are a great chance to learn something new.

I’m planning to post a round-up of her favorite recipes soon, but here’s a quick, adaptable recipe that works with almost any veggie. Tonight I used:

  • 1 zucchini
  • 1 turnip, peeled
  • 1 parsnip, peeled
  • 1 carrot, peeled

Cut all of the veggies into 2-inch sticks. The carrot sticks especially should be long and thin, so they pose no choking hazard.

Dine Roasted (1)

Toss the veggies with 1 tablespoon olive oil in a baking dish. Roast at 425 degrees F for 25 minutes.

Transfer to paper towels to drain the excess oil and cool completely before serving.

Veronika loved choosing among the colors in this dinner veggie medley!

Dine Roasted (3)

Walk-and-Spot Game

Walk and Spot (4)

Aaah, those summer walks in the park or the woods. It seems like the perfect family pastime… until the kids tire out, amiright? Here’s the perfect new game to play if you need to motivate your kids through the miles!

One person is the spotter, and picks an item a little ways away without revealing what it is. The spotter tells the other players the color of the item, and then begins beeping.

Beep slowly when the item is far away. Beep faster as you get closer. Whoever guesses correctly is the next spotter. Well, Travis took to it right away! First he got us with this yellow sign.

Walk and Spot (1)

Then it was mommy’s turn – an orange cone!

Walk and Spot (2)

Don’t overlook little items, like purple flowers.

Walk and Spot (3)

Daddy picked something green. Hmmm, what could it be? Beep beep beep. The green bench! Travis guessed.

Walk and Spot (5)

This game kept him happy for ages and easily ate up the last mile of our excursion. What’s your favorite game to play on a walk? Please share in the comments!

Summer Memory Jar

Summer Jar (8)

School’s out for summer! 

My boy is officially a pre-k graduate, and we have two glorious summer months ahead before Kindergarten. To make the most of it, we made this summer jar to fill.

First, glue a ribbon around the top of a mason jar. I purchased a large jar, in anticipation of lots of little mementos.

Summer Jar (1)

Use puffy paint to decorate the jar. I suggested to Travis that we make a yellow summer sun across the front, but Travis had other plans: big drippy blobs in lots of colors.

Summer Jar (3)

It took forever to dry, but why not – it’s his summer!

Summer Jar (5)

Once dry, I used marker to add “Summer 2019” across the top of the jar. We also tried writing “summer” with puffy paint, but this proved to be too drippy.

Summer Jar (4)

Now we’ll fill it, moment by moment and experience by experience.

On the first full day of summer, we did a family walk at a national park, and Travis very carefully selected the best rock to add to our jar.

Summer Jar (6)

I will post an update to this blog at the end of summer!

Summer Jar (7)

What’s in your summer jar? Please share in the comments!