How To… Throw a Boomerang

Boomerang (4)

The latest “how to” from Highlights magazine was more of a feature article about a professional boomerang thrower. Travis was so inspired that we picked up a cheap one online and headed outside to try our hand at it!

Carefully, we read the tips. Hold the boomerang vertically with the decorated side facing you, then pinch it between thumb and index finger.

Boomerang (2)

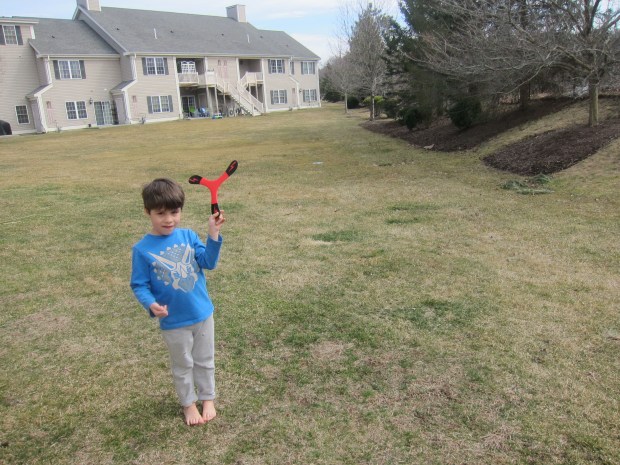
We even took a moment to check that the wind was on our right cheek, not left, since we both throw lefty. Now throw overhand!

Boomerang (3)

Well, it turns out that it’s very hard to throw a boomerang and have it return to you. But we sure had a lot of laughs together, got some mother-son exercise which felt novel and playful (baby sister was painting on the patio, FYI), and had a blast. He loved chasing after it and was so proud when he could catch it, even when we did so more Frisbee-style.

Boomerang (5)

Finish off the fun with some videos from the pros!

Advertisement

Salty Cave Crystals

Salty Cave Crystals (3)

Travis has seen stalactites and stalagmites in cartoons and real life, so he was intrigued when we set out to make our own. You’ll need about a week for this project from start to finish, so it’s also a good lesson in patience!

For set up, add 1/4 cup Epsom salts to each of two paper or plastic cups. Fill with water and stir for 1 minute. There should still be some Epsom salts undissolved in the bottom, making this a supersaturated solution.

Salty Cave Crystals (1)

Add food coloring in your child’s colors of choice. Travis stirred in blue and green.

Salty Cave Crystals (2)

Tie a piece of yarn around two paper clips (or safety pins), and dangle the ends in the cups. Now set the whole contraption some place where it can sit undisturbed with the yarn dangling over an old jar lid between the two cups.

Alas, we didn’t have great results with this. Either something is wrong with Epsom salts in our apartment these days, or we’re making a mistake! But we could see crystals growing lightly along the string.

Salty Cave Crystals (6)

Interestingly, there was a leak in one cup and the best crystals formed around the base. So Travis declared these our stalagmites.

Salty Cave Crystals (8)

As a side note, we could also see the blue food coloring creeping up the yarn: capillary action in action!

Salty Cave Crystals (7)

What’s That Smell?

What's That Smell (2)

For some olfactory fun today, I presented Veronika with smells from around the house and we had fun naming each item as we smelled it. Unlike when she was little, now she can parrot these words back to me, hold the items herself, make yummy noises of delight, and more.

I wanted to clearly differentiate between edible and non-edible items in the game, so we started with the latter. I laid out a flower, tea bags, spice jars, and three different scents of soap.

What's That Smell (1)

One by one, I held them to my nose, then showed her how to do the same. For breakable items, like the spice jars, I waved the item under her nose. But she got the hang of it solo with the soap!

What's That Smell (4)

The tea bags were a big hit, so much so that I got out a bag of coffee and let her inhale that one deeply, too.

What's That Smell (5)

She looked so pleased when she smelled the cinnamon sticks, but she pulled back quickly from curry and a few other spices.

What's That Smell (3)

Next we moved on to items she could smell and eat. I set out a few pungent foods, like cooked vegan sausage and yogurt. Berries would be good, too. Or berry yogurt!

What's That Smell (6)

Veronika then found other fun ways to play with the items, and I was more than happy to watch her toddler brain explore. The cinnamon sticks were fun to take in and out of the jar, and the yogurt was fun to spoon through.

What's That Smell (7)

Finally, I made her a chart with a smiley face for the scents she had liked and a sad frown for ones she did not. Older toddlers will get a kick out of this part of the lesson, and may want to add to it on occasion.

What's That Smell (8)

Have fun continuing this kind of play no matter what room of the house you’re in, whether the bathroom or even outside.

Edible Finger Paint Activity on Foil

Baby Foil Painting (6)

Between an edible yogurt-based paint, pretty colors, an outdoor setting, and a shiny piece of foil as the canvas, what’s not to love about this project? The edible paint means it’s safe to play with toddlers or even younger babies.

It was warm enough that we took the activity outside to the patio, where a big beach towel could contain any mess. If it’s summer, you might consider stripping baby down to a bathing suit or diaper, in fact!

To make the paint, spoon non-dairy vanilla yogurt into containers or cups and add a few drops of food coloring to each. The pretty pastel colors felt just right for spring.

Baby Foil Painting (1)

For her “canvas”, I lightly crumpled up a piece of aluminum foil, then opened it back up again. This added lots of fun texture and shine to capture her attention. Note: I did also set down a brown paper bag in case she wanted to paint on that, too, but the foil was the definite favorite.

Baby Foil Painting (3)

She was eager to paint right away, and especially intrigued with using a brush instead of her fingers. Then she started painting her pants! Luckily it was warm enough to take them off and continue the activity.

Baby Foil Painting (5)

Next she loved pouring the paint cups right onto the canvas. After that we swished the yogurt around to even out the big blobs.

Baby Foil Painting (7)

Here is her final masterpiece:

Baby Foil Painting (8)

This activity was good yummy colorful fun.