Puffy Shamrock

Puffy Shamrock (6)

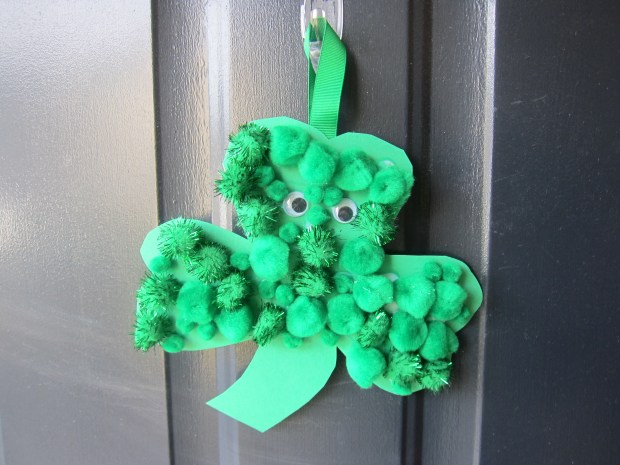
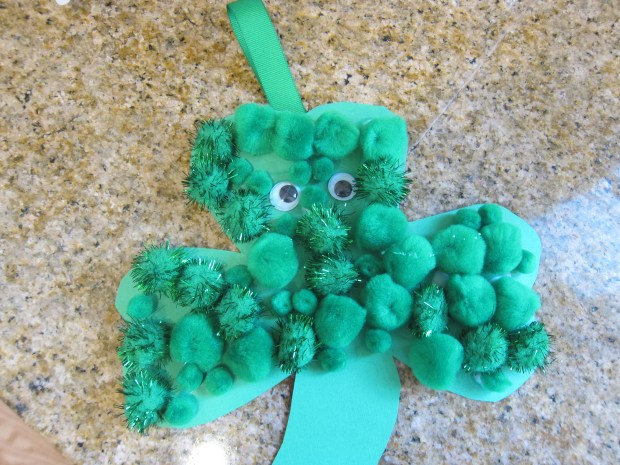
This easy shamrock makes the perfect good luck charm for your front door this St. Patrick’s Day!

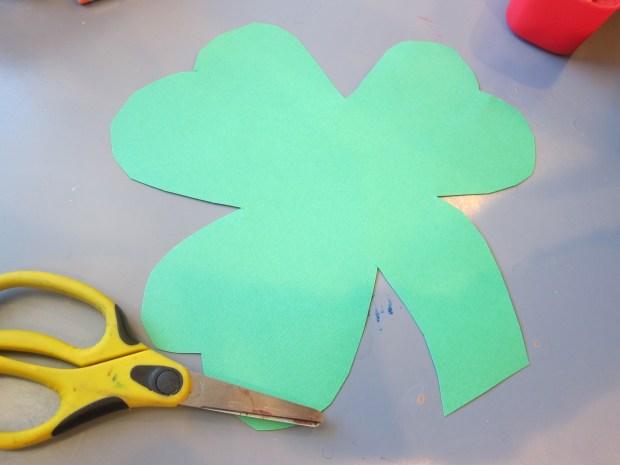
Older kids can trace a shamrock shape themselves on green cardstock, but I took care of that part for Travis and helped him cut out along any tricky curves.

Puffy Shamrock (1)

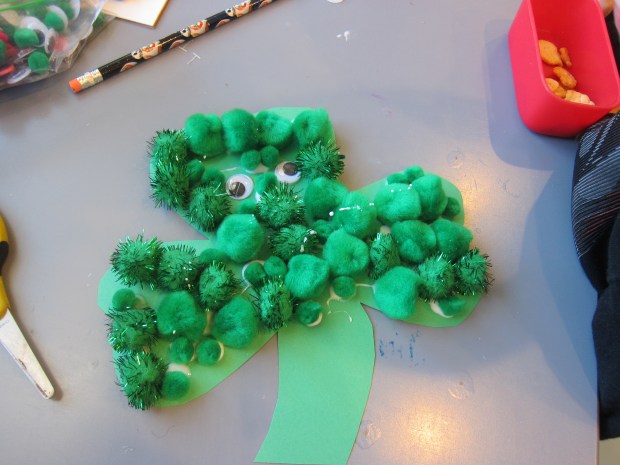
Originally the plan was just to cover it with green pom poms and we had quite an assortment: small ones, medium ones, and sparkly ones!

Puffy Shamrock (2)

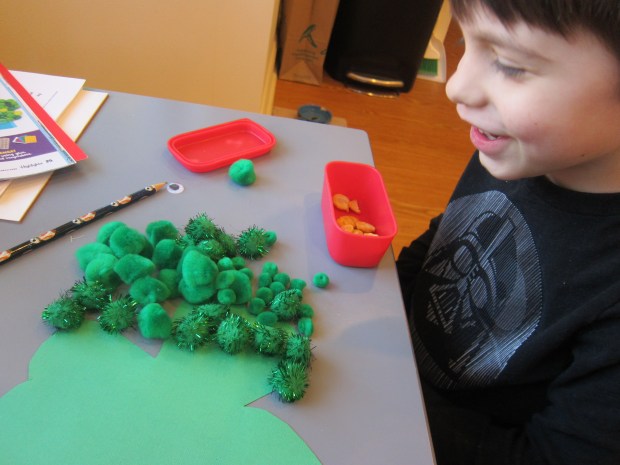
As soon as Travis saw some wiggle eyes in our craft bin, though, he knew our shamroock needed them, so those got glued on first.

Puffy Shamrock (3)

He began adding drops of glue and filled in all the remaining space of the shamrock with pom poms, sometimes having fun with a pattern (“3 sparkly, 1 plain!”), and sometimes just in random order.

Puffy Shamrock (4)

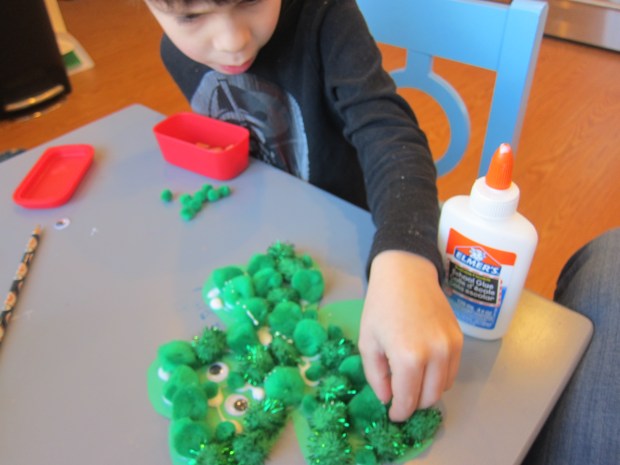
He was very precise about filling in any tiny gaps with the small pom poms near the end.

Puffy Shamrock (5)

Once the glue dried, I added a loop of green ribbon on the back so we could hang it from the doorway. Here’s hoping for the luck of the Irish!

Puffy Shamrock (7)

Advertisement

Ice Sun Catchers

Ice Suncatcher (5)

We’re in the very last days of winter here, so Travis and I wanted to try one last icy project! To start, he ventured outside to collect a few late winter/early spring nature finds, including old pine boughs, pine cones, and the first of the tulip petals!

Inside, we arranged these in the lids of Tupperware containers, along with a loop of ribbon for each. Travis was very deliberate about placing the items.

Ice Suncatcher (2)

If it’s still icy winter where you live, set them outside to freeze. We cheated a bit and used the freezer!

Ice Suncatcher (4)

Once completely frozen, run a little warm water around the edges of the lids and the sun catchers should release easily. Now hang them to sparkle in the sun!

Ice Suncatcher (6)

As a bonus, the nature items will simply fall back to earth once these melt, and all you have to do is collect the ribbons.

Ice Suncatcher (7)

Centerpiece

Centerpiece (4)

Veronika has only been walking for a couple of weeks, but she already has a few nature forays under her (tiny) belt. Today when we headed outside, I brought along a small bag so she could collect treasures along the way.

Centerpiece (6)

She loved dropping sticks and other finds into it!

Centerpiece (7)

Of course, she didn’t know that I had plans for these items once home. I set out the items she’d found, along with a bright red beach bucket to be a “vase”.

Centerpiece (2)

Note: You can use anything for the container, but I liked that the bucket wouldn’t break, unlike a glass or pottery vase. You could also try upcycling a milk carton for this project.

She’s at the helpful age where she likes to put things “in”, so one by one, she arranged the items.

Centerpiece (3)

I cheated a bit with a few tulips we already had at home, since these added a nice pop of color. But look at the centerpiece she was able to create!

Centerpiece (5)

I put this on the table as the family dined, and made sure she knew that it was her masterpiece. In sum, this was a really sweet way to engage a young toddler with nature.

Pipe Cleaner Sculpture

Pipe Cleaner Sculpture (6)

Pipe cleaners are a fantastic way to introduce your toddler to the idea of 3-D and sculptural art. Because the ends of pipe cleaners can be pointy, this is definitely an activity that you want to supervise the entire time, not something for a toddler busy box. I loved taking time today with Veronika to show her how to manipulate them.

To start, I dumped out a package of multi-colored pipe cleaners in front of her. So needless to say, the game was already a hit!

Pipe Cleaner Sculpture (1)

I started by making a few fun shapes. Using our imaginations, this one looked like a dog.

Pipe Cleaner Sculpture (4)

She got quite a kick out of mommy’s art skills as we made the pipe cleaner say “woof”!

Pipe Cleaner Sculpture (var)

Her next request was for a sheep, so I wound together white pipe cleaners into a semblance of a woolly lamb..

Pipe Cleaner Sculpture (3)

She then loved pulling off the curly “wool” pieces.

Pipe Cleaner Sculpture (5)

I tried to think of the safest way to make her a “sculpture” without resulting in any poking and pricking, and circles seemed ideal. Loop these together in a pattern or in rainbow order, or any other way that strikes your fancy!

Pipe Cleaner Sculpture (alt)

Veronika loved holding long chains of the loops, and also decided that individual circles made great bangles and anklets!

Pipe Cleaner Sculpture (8)

In sum, you’ll have a great time together discovering all the ways you can manipulate the pipe cleaners, whether tight curly-cues, or interesting shapes, or more.

Pipe Cleaner Sculpture (7)