The Gift of Gab

Gift of Gab (4)

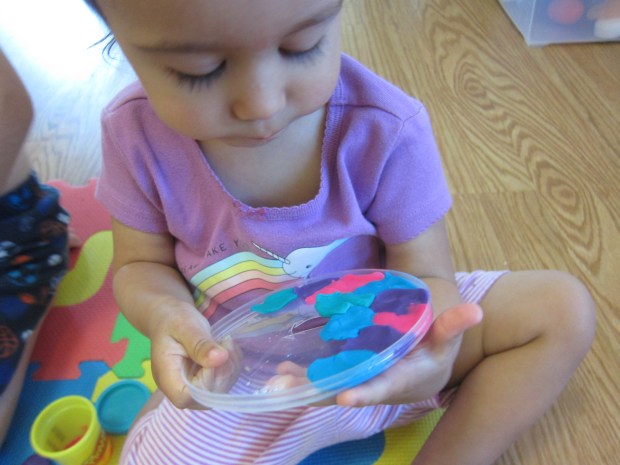
Veronika’s at that exciting age where she has enough words in her vocabulary to string together proper sentences. I had forgotten how thrilling it is to watch a child move from noun-noun to subject-verb-noun!

To nourish this milestone, I’m remembering to speak in clear full sentences for every point throughout her day. “What are you drawing?” I might ask her for example, and she comes back with a full, “I’m drawing a heart!”

Gift of Gab (1)

Or “Vivi [Veronika] yellow dress,” she might say. “Yes, you’re wearing your yellow dress,” I reply a bit more completely. “I’m wearing yellow dress!” she repeats. A full sentence!

Gift of Gab (2)

I love seeing her full sentences spill over into her solo play, too. She’ll speak to her dolls and other toys, sometimes still in gibberish, but mostly in words I can decipher. “Daniel and Baby! Daniel is falling, oh no!”

GIft of Gab (3)

Be sure to listen carefully for your child’s words. Often, only a parent can recognize the particular phonemes or syntax at this age, but the words are there if you’re attuned to them.

And you might just find they are in full sentences!


Lentils & Brown Rice

Lentils and Brown Rice

I used a rainbow of farm-fresh carrots for this recipe instead of just orange ones, but you can use only one color in a pinch.

Ingredients:

  • 1 cup short-grain brown rice
  • 2 and 1/4 cups water
  • 2 peeled and sliced carrots
  • 1/2 cup dried lentils
  • 1/4 teaspoon cumin
  • 1 tablespoon olive oil
  • 1 vegetable bouillon cube
  1. Combine all of the ingredients in a large saucepan and bring to a boil.
  2. Once boiling, cover, reduce heat to low, and simmer for 40 minutes. Let stand, covered, for an additional 5 minutes before fluffing and serving.

Wind Direction

Wind Direction (2)

Here’s a quick STEM experiment to teach kids how to observe wind direction… with some bubble fun thrown in!

First Travis helped make a bubble solution. The recipe was for an enormous batch (6 cups of water!) and I knew we would never use that much. Instead, I decided to make one-third of the recipe, using the following:

  • 2 cups water
  • 1/4 cup corn syrup
  • 1/2 cup dish detergent

My proportions weren’t exact, but we ended up with great bubbles so I guess it worked! Combine the ingredients in a jar and shake to combine, then let the mixture settle for at least half an hour.

Then it was time to head outside with the bubbles and a compass. I taught Travis how to locate north. He proudly then pointed to east, south, and west. So how could we tell which way the wind was blowing?

Wind Direction (1)

Dip a wand into the bubble solution and see which way your bubbles go. Ours headed west, nice and lazily.

Wind Direction (3)

So if our bubbles were floating west, I asked Travis where the wind was coming from. “East!” he correctly answered.

Wind Direction (4)

This led to almost an hour of play on the patio, blowing bubbles, popping them against our screen door, and otherwise having a blast.

Wind Direction (5)

Which means this is the perfect STEM activity for a summer day.

Wind Direction (6)

Tub of Delights


Tub of Delights (8)

We love to make indoor sandboxes and have played with multiple variations on the idea. This one was particularly fun because we combined three materials for the “sand” base: oatmeal, cornmeal, and rice.

Tub of Delights (2)

The other change I made today was using a larger, deeper bin (a storage bin from under the bed). The high sides meant easier clean-up at the end, and less mess on the floor!

As I layered in each of the three ingredients, I paused to talk about its texture with Veronika. Oatmeal was soft on our fingers. The cornmeal was finer and dusty, and the rice was smooth and pointy at the edges.

Tub of Delights (1)

Then we added scoops and funnels! Veronika loves to scoop and pour, whether with a measuring cup…

Tub of Delights (3)

…spoon…

Tub of Delights (4)

…or just her fingers!

Tub of Delights (5)

As you can see, the three ingredients didn’t stay in separate piles for long. For added fun, we then buried toys. I decided to make it a jungle theme and added wooden monkeys and a plastic giraffe and elephant. These were so fun to bury and then unearth. “Oooh, monkey!” Veronika said with true surprise each time she found one hidden under the cornmeal mix.

Tub of Delights (9)

I wouldn’t consider this an edible sensory bin, since the rice isn’t cooked, but at least you don’t have to worry if curious little mouths take a taste. Veronika quickly realized the texture wasn’t yummy after a little sample.

It all looked like so much fun that big brother Travis joined in!

Tub of Delights (7)

I loved watching them scoop and pour and imagine together. In sum, a great way to keep kids busy, and the high sides of the storage bin meant clean-up was a breeze.

Tub of Delights (6)

Watermelon Squish Bag, Two Ways

Watermelon Squish (7)

Summertime just begs for watermelon in all its forms, and today we decided to use watermelon as a theme not just to eat but to play!

I made two watermelon sensory bags for Veronika and although these didn’t turn out exactly as I hoped, she still had lots of fun.

The first was a true watermelon bag. Using leftover chunks from a big watermelon we sliced into for snack, I placed cubes of fruit in a zip-top bag. Seal with green duct tape to prevent your toddler from opening (and to look like a watermelon rind!). Then squish!

Watermelon Squish (1)

Veronika loved using this bag with her hands, crushing the soft cubes between her fingers. She also smashed at it with a toy hammer.

Watermelon Squish (2)

Then we made a pretend watermelon in a second zip-top bag. Fill the bag with clear hair gel and add a touch of red food coloring for a pink tint. Unfortunately my red turned out to look more purple, so next time I would color it with pink tempera paint.

Watermelon Squish (8)

As a result, the fact that we were trying to replicate a watermelon was lost on Veronika. Still, I added a few black seeds from the real watermelon, and she loved moving these around with her fingertips. Initially she thought they were bugs, but then she started saying “seeds!” as she squished at them.

Watermelon Squish (5)

Arguably, she liked this “failed” squishy bag better, holding it, squeezing it, and occasionally even draping it on her head.

Watermelon Squish (6)

So if the goal of a sensory bag is to keep a toddler busy, then this one was a winner.

Watermelon Squish (3)


Play Dough Suncatcher Craft


Playdough Suncatchers alt

You can never go wrong with a morning of play dough play, but to add a fun twist when I pulled out all the colors for Veronika this morning, I thought it would be fun to make suncatchers.

Playdough Suncatchers (1)

I showed Veronika how to press small pieces of color into an empty yogurt container lid.

Playdough Suncatchers (2)

She loved to help mush them in, which was great for fine muscle development!

Playdough Suncatchers (3)

Even more, though, she loves to tear play dough into tiny pieces.

Playdough Suncatchers (4)

That meant she unwittingly created the perfect size pieces for me to gather up and arrange in the lids, alternating colors as much as possible.

Playdough Suncatchers (6)

We filled two lids this way!

Playdough Suncatchers (7)

In order to hang them once complete, I cut two pieces of string and made a loop for each suncatcher, securing with an additional blob of play dough.

Playdough Suncatchers (9)

Let the play dough harden and dry overnight, and then you can hang these the next day to catch the morning sunlight.

Playdough Suncatchers (8)

At first I suspended them in the plastic lids. But then I realized the play dough had set enough that I could pop them out from these molds and simply hang in the window. Even prettier!

Playdough Suncatchers var


“We Love You Because…” Scavenger Hunt

We Love You Hunt (5)

This love-filled hunt was the perfect way to bring a smile to dad’s face this Father’s Day! You could also use this cute twist on a scavenger hunt for anyone’s birthday, or at Valentine’s Day.

I first traced hearts on construction paper using cookie cutters, making one large heart and 10 small ones. We used pink paper (for love of course) as well as orange because that’s daddy’s favorite color!

We Love You Hunt (1)

Travis helped me brainstorm a list of all the things we love about daddy. I loved leaving this up to him, ranging from the big (he’s daddy so we love him!) to the small (like references to games they play).

We Love You Hunt (2)

We then had fun secreting the pieces of paper all around the house in places that dad was sure to find them throughout his day, like on the coffee pot or near his desk.

We Love You Hunt (3)

Then it was time to surprise daddy with the large heart, which read, “We love you because…” And off he went to find the 10 reasons. The kids looked so proud leading the way on the hunt, and of course their dad loved it.

We Love You Hunt (6)

Who will you make a scavenger hunt for? Please share in the comments!

Tea Scented Ice Sensory Play

Scented Ice Play (7)

We’ve been busy with ice lately during a heat wave, and today we added an olfactory element to the fun: ice cubes scented with tea! You’ll want strongly scented teas for the best results with this activity. Think flavors like cinnamon, maple, ginger, mint, or other bold scents.

Scented Ice Play (1)

The night before, I brewed strong cups of 3 tea varieties, using 3 or 4 tea bags for each mug of hot water. Let cool and then pour into the compartments of an ice cube tray.

Scented Ice Play (2)

Partly to add a visual sensory element to the game and partly just so I would remember which cube was which, I also color-coded the three different teas with food coloring. Yellow was for peppermint, red for cinnamon apple, and blue for maple ginger.

In the morning, it was HOT out on our patio and the ice was frozen solid, the perfect combination.

Scented Ice Play (3)

The ice cubes came out of the tray within moments. I held each different scent up to Veronika’s nose in turn. Look how happy the maple ginger made her!

Scented Ice Play (4)

She loved leaning in for a big whiff of each, asking for “more more” insistently since at first the cubes were too cold for her to touch and lift.

Scented Ice Play (5)

Then she wanted to take a lick! She loved the peppermint best.

Scented Ice Play (6)

As the ice melted, the yellow, blue, and red coloring began to trickle off. I couldn’t decide if I was glad I’d used color or not. The kids were more into the smells and tastes anyway, not the sensory look of the colors, and it just meant messier fingers. But oh well!

Scented Ice Play (8)

And then they discovered that the ice on the hot patio melted in a matter of seconds.

Scented Ice Play (9)

I guess this disproves the theory that watching ice melt is dull!

Scented Ice Play (11)

Both kids loved smelling the tea and swirling the cubes and tasting until the last drop of ice had melted.

Scented Ice Play (10)

A perfect sensory experience for a hot morning.

Shaving Cream Fingerpaint

Shaving Cream Fingerpaint (11)

There’s more to this activity than just the sensory fun of shaving cream or the artistic fun of colors and “painting”; half the fun was doing the activity right on the tabletop!

I squirted about half a can of shaving cream onto the kids’ table, which immediately piqued everybody’s interest, Veronika and big brother alike.

Shaving Cream Fingerpaint (1)

The curiosity grew once I added drops of food coloring throughout.

Shaving Cream Fingerpaint (2)

Now it was time for the real sensory fun to begin! I demonstrated for Veronika that she could put her hands right in the mixture, either to swirl the colors around or just to get messy.

Shaving Cream Fingerpaint (3)

Interestingly, she was hesitant at first, but soon a little finger dipped in. Foamy!

Shaving Cream Fingerpaint (4)

The sensation must have made her quite happy because it merited a little swirling dance.

Shaving Cream Fingerpaint (8)

After that, though, I couldn’t quite tell if she liked the shaving cream or was a little afraid of it. She did lots of delicate dabbing, but never got as messy as I had anticipated.

Shaving Cream Fingerpaint (9)

Big brother Travis tried his hand gladly and liked creating “animal footprints” through the shaving cream.

Shaving Cream Fingerpaint (7)

Veronika preferred just having some of the shaving cream on her palms. She smooshed her hands together and admired both the creaminess and the color left behind. Then it was time to wash! And the shaving cream mixture wipes off of the table like a dream.

Shaving Cream Fingerpaint (10)

Overall, this wasn’t the best version of fingerpainting we’ve done as far as producing art. But it was still a great sensory experience.


Pool Noodle Seahorse

Pool Noodle Seahorse (5)

It was time for the last of our pool noodle crafts this morning, and it turned out to be the biggest and best yet!

To start, curl the end of one long pool noodle so it resembles a seahorses’s curlicue tail. Secure with garden Velcro strips.

Pool Noodle Seahorse (1)

For the head, curl down the top 10 inches or so of a second pool noodle; secure with a garden strip. We then glued on two foam eyes (alternatively, use sticky-back foam and eliminate the need for glue).

Pool Noodle Seahorse (3)

Travis loved helping with the mane; snip a piece of craft foam to create fringe, then make a slit in the seahorse’s head with scissors and insert the foam.

Pool Noodle Seahorse (2)

Now tape the head and tail pieces together securely with duct tape. Our original seahorse seemed a bit too tall, so I cut about 6 inches from each noodle and then taped them. Now it was the perfect height. Travis was immediately galloping his seahorse around!

Pool Noodle Seahorse (6)

Little sister loved it so much that we needed to make a mini version from just one pool noodle!

Pool Noodle Seahorse (4)

As with the Ball Toss game we made, yes you could use the seahorse in a real pool, but the kids were ecstatic even on dry land. So don’t feel like you need to wait for water before making this craft!