Glue Play

Glue Play (2)

Your toddler is going to be a using a lot of glue in the next few years, since it’s part of just about every nursery school and preschool project. But how often is glue itself the object of play? The point of this activity was simply for Veronika to explore glue… and yes, you can probably count on it to be messy.

I lined the bottom of a shallow tray with two pieces of construction paper just to contain some of that mess, and then showed her how to squeeze a glue bottle.

Glue Play (1)

Squeezing glue bottles is actually great for muscle development in the hands, and she was so proud when she could do this all by herself. “Dot dot dot!” she said.

Glue Play (3)

Then we opened up the nozzle and really let the glue pour out, which she found fascinating.

Glue Play (4)

From here, she wanted to touch it, and I used the word “sticky” as she played. She was not at all afraid to get hands-on with the stuff.

Glue Play (6)

Thinking to extend the play, I added a few plastic spoons and little pom poms she could sprinkle into the glue.

Glue Play (5)

But really she was mostly interested in the glue itself! Then it was time for a hand wipe and clean up.

Glue Play (7)

Stained Glass Window

Stained Glass Window (8)

Any project that involves kid + sunlight + reflective colors somehow makes me so happy. Hence why I returned to the idea of toddler “stained glass” today, even though I’ve done similar projects in the past.

For this particular version, I cut strips of thin cardboard from an old cereal bo and taped them into a square on the patio door as a “window” frame. I then cut squares of cellophane in various colors and simply showed Veronika how we could tape them one at a time into the frame.

Stained Glass Window (2)

The idea was to let her dictate where each piece should go, although I then had to be the one to tape it.

Stained Glass Window (9)

After starting in this way, I decided to just cover the space inside our frame with tape pieces so she could start to stick the cellophane on herself.

Stained Glass Window (7)

(Note: For this reason, I think it’s better to use contact paper as the background, instead of tape).

Stained Glass Window (10)

Of course, being a toddler, Veronika was also interested in the materials themselves.

Stained Glass Window (5)

She loved crumpling up the cellophane and handing it to me (“Trash!” she said), as well as the way it stuck to her feet.

Stained Glass Window (3)

Once the sun hit our “window” at just the right angle, we had beautiful colors projected onto our floor.

Stained Glass Window (11)

Like I said, I’m a sucker for any combination of beautiful reflected colors and an adorable toddler face.

Stained Glass Window (4)

Scribble Table

Scribble Table (2)

Veronika wants to scribble anywhere and everywhere these day, so today I made it easy for her – not to mention extra fun! – by setting up a low “scribble table”.

All you need for this activity is a table that’s about waist-high on your child, such as a coffee table or craft table. Cover it with long sheets of craft paper, taping securely and making sure that no tabletop shows through.

Add jumbo crayons and you’re ready to go!

Scribble Table (1)

Veronika was thrilled to learn she could scribble on a normally-taboo surface. She made lots of, well, scribbles of course!

Scribble Table (3)

She even experimented with holding multiple crayons at once.

Scribble Table (5)

I added a few simple drawings and depictions for her, but mostly I just left the craft paper blank as her canvas to fill in throughout the day.

Scribble Table (4)

Big brother did later realize he could use this as a backdrop for Lego games, making scenes of pirate ships and sea monsters. So we got multiple uses out of it!

Scribble Table (7)

One note of caution: You may want to avoid this game with a toddler who is too young to follow directions, otherwise they might start to think any table or piece of furniture is fair game for scribbling.

Rainbow Salt Tray

Rainbow Salt Tray (9)

Here’s a project I remember doing with Travis when he was a toddler, and the seeming “magic” of it never grows old. I told Veronika that today she was going to paint a rainbow!

To set up, line the bottom of a shallow tray with construction paper, arranging the pieces in rainbow order.

Rainbow Salt Tray (2)

Oddly, our pack of paper doesn’t include purple, so I quickly colored a white piece with purple marker to fix that! Tape down the pieces of paper so they overlap. It’s helpful to use clear tape along all the seams, so salt doesn’t slip in between the sheets in the next step.

Now just cover the paper with a layer of table salt!

Rainbow Salt Tray (3)

I showed Veronika the tray and handed her a paintbrush. “Paint?” she asked. She began swirling the paintbrush through and immediately saw blue.

Rainbow Salt Tray (4)

A huge smile appeared on her face. As she worked, she uncovered all the colors of the rainbow.

Rainbow Salt Tray (5)

Of course she got a little impish and enjoyed sweeping salt out of the box for a time, too.

Rainbow Salt Tray (8)

You can make this educational by drawing big letters or shapes in the salt. (Hint: it might make for good sightword practice if you’re homeschooling a kindergartner, too!).

Rainbow Salt Tray (7)

But mostly Veronika just had fun, seeing what color would magically rise to the surface next as she brushed through each portion of the tray.

Rainbow Salt Tray (6)

You’ll notice that the tray was great fun to sit in, even after we’d dumped the salt!

Rainbow Salt Tray (11)

Texture Touch

Texture Touch (13)

I have a neat set of fabric swatches for Veronika, featuring a pair of each item ranging from the nubby to the scratchy to the smooth. Today we played with the swatches in multiple ways, for games that involved both sensory play and learning.

Texture Touch (2)

First, I hot-glued one of each pair onto a baby food jar lid. Hot-glue a magnet onto the other side. Now, the swatches had become magnetic toys that Veronika can slide around on a baking sheet!

Texture Touch (6)

I set them out for her to explore at her own leisure, but then we took the time to go through the pile together, talking about each one. Rough and scratchy were definitely interesting.

Texture Touch (1)

Veronika also loved any that were soft and smooth. When she felt the fluffy ones, she said our cat’s name and started rubbing it all over herself!

Texture Touch (11)

There are then lots of ways to extend the play. I gave her the other half of the swatches (not glued to magnetic lids), and helped her find the match for each one.

Texture Touch (9)

Although the ability to find a match will probably be beyond your 18-month-old’s ability, there has to be a first time for introducing any concept! I made things easier by giving her a choice of only 2 or 3 swatches. “Which one is the pair?” I asked her.

Texture Touch (7)

Then we lined them up in order, going from softest to roughest.

Texture Touch (12)

She also loved transferring the magnets over from the baking tray to our fridge. After that, I left the little swatches in a bin which meant she could return to them throughout the day. I have a feeling we’ll get a lot more play out of these!

Texture Touch (8)

Painting with Trucks

Painting with Trucks (12)

Veronika loves her little set of construction trucks, and she loves paint, so today I thought we’d combine the two. It turns out she was more into finger painting than truck painting, but at least we had good fun.

I started out by taping two pieces of construction paper in a shallow craft bin, and setting out her trucks. Add blobs of paint directly on the paper and show your toddler how to roll cars or trucks through.

Painting with Trucks (1)

Tire tracks!

Painting with Trucks (2)

I thought Veronika would be fascinated, but the paint blobs themselves were just too enticing. Soon we just had two very blue hands (“Hello fingers!” she said).

Painting with Trucks (5)

I did get her to drive the trucks back and forth a few times, but it was always quickly back to smearing her hands right through all those tire tracks.

Painting with Trucks (3)

I thought she might get more into the tire tracks if she had a bigger surface to drive along. So we cleaned up the first version and set up a second. I taped a long piece of craft paper to the floor, and this time I only dabbed down a little black paint, just enough to drive through.

Painting with Trucks (8)

This time she did maneuver the cars for a few passes, and did seem to notice the tracks.

Painting with Trucks (10)

But even the little blobs of paint were irresistible for her fingers.

Painting with Trucks (9)

Soon we had smeary black hands!

Painting with Trucks (11)

Well, she had a blast, and of course half the fun is the “car wash” at the end. We put the trucks in soapy water and I gave her a few rags. This was arguably even more enjoyable than the painting itself!

Painting with Trucks (14)

So start to finish, it made for a great project.

Painting with Trucks (15)

Including a Toddler in Home School

Including Toddler (6)

Heading into the eighth week of home school, I have a much better idea now for how to entertain an 18 month old and teach kindergarten lessons at the same time. It felt like an apt time to share some of this newfound wisdom, breaking things down into six steps.

Step 1: Start with a “busy” activity. I’ve learned to find even mundane materials that keep little hands occupied, and this is usually enough to keep Veronika happy during the first lesson of the day. To wit: today she had construction paper to tear, put in a bin, and then attach to a sheet of sticky contact paper!

Including Toddler (5)

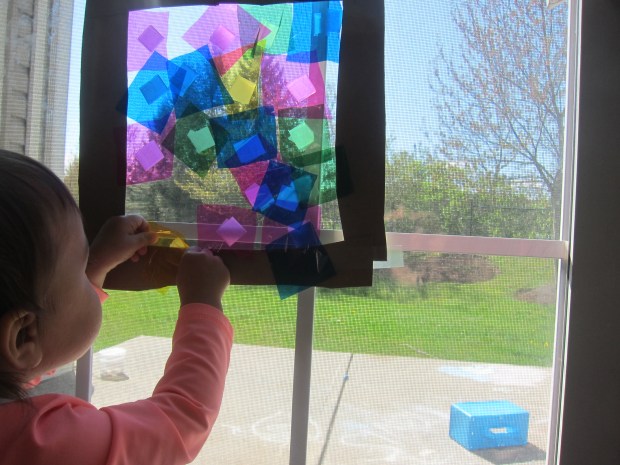
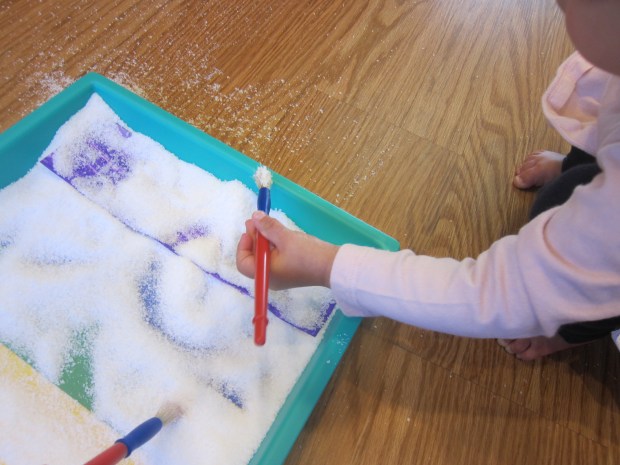
Step 2: Give them similar materials. This is usually the second tactic of the day to come into play, when Veronika tires of her busy activity. So, for example, today Travis had a math lesson involving gemstones. I gave Veronika an age-appropriate version: large wooden beads hidden in a set of nesting boxes that quickly became toddler gems and treasure!

Including Toddler (7)

Step 3: Give hugs. Inevitably about mid-morning, Veronika walks up to me and says, “Hug”. She’s tired just from watching all the home schooling!

Including Toddler (3)

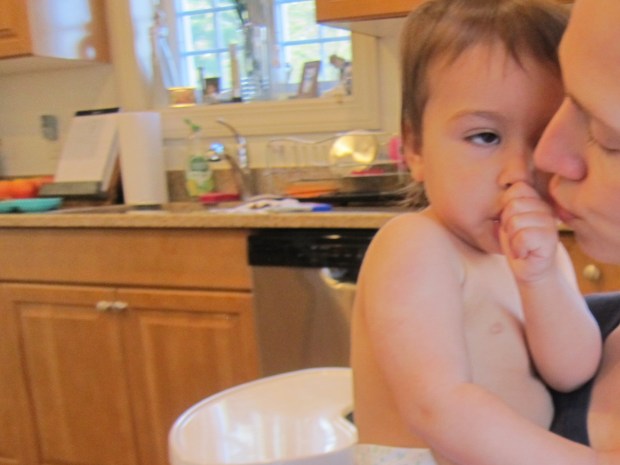
I sit her on my lap, and soon she’s feeling better. She might just suck her thumb and watch Travis work during this period, or flip through a toddler magazine quietly as we snuggle.

Including Toddler (4)

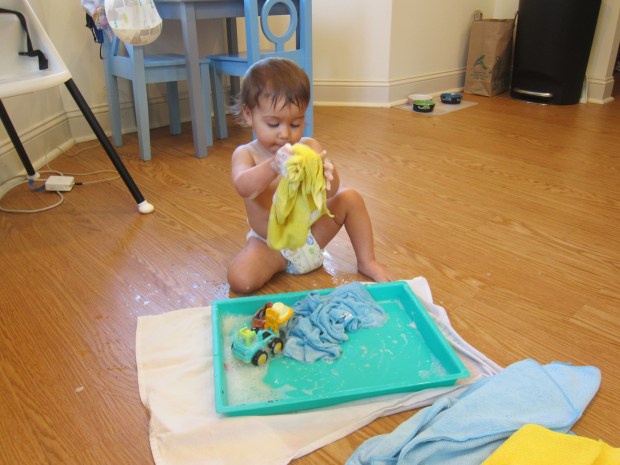
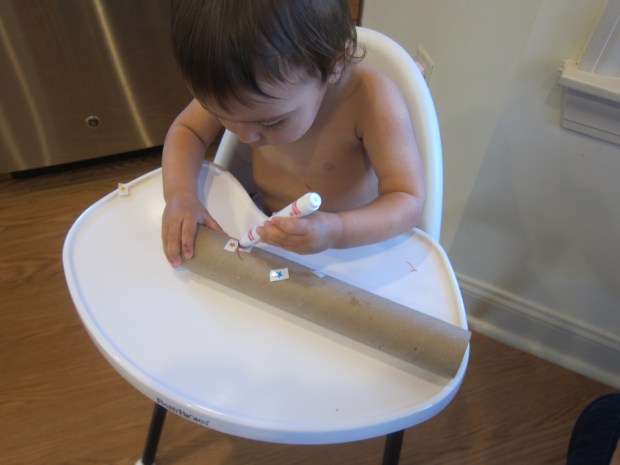
Step 4: Contain them in a high chair. If we’re involved with something messy, I strap Veronika into the high chair and make it her work station. Some go-to activities? An empty paper towel tube to scribble on with markers is perfect. Or stickers. Or both! Veronika can never have too many stickers.

Home School 35 c

But if she fusses about being contained we head to…

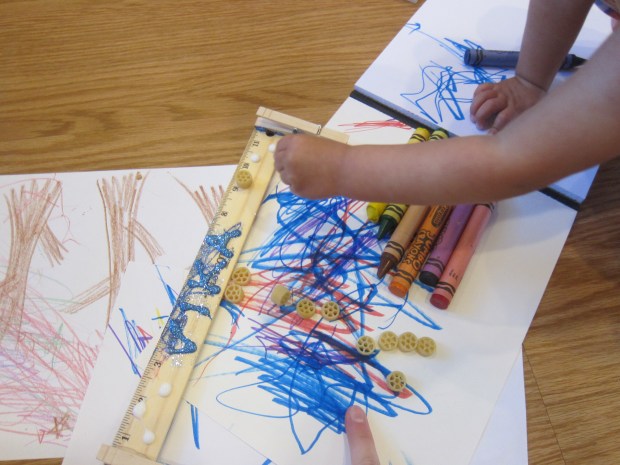
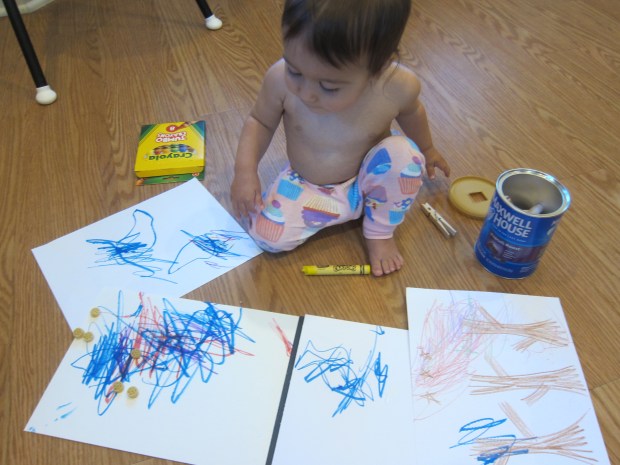
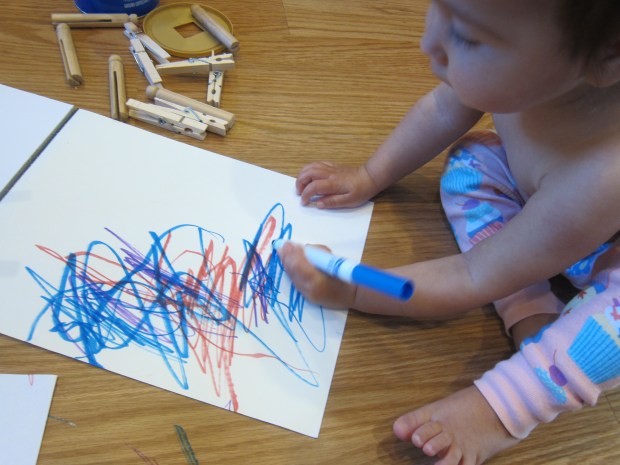
Step 5: Help them feel like a big kid. Give your toddler the same thing that the older sibling has, but once more in an age-appropriate way.  So if Travis is working with real scissors, she gets safety scissors. If Travis is using permanent marker, she gets crayons. You get the idea!

Including Toddler (10)

Step 6: Don’t forget the magic of food. I’ve learned to time Veronika’s snack around the lesson when Travis needs my focus the most each day. Set out favorites that your toddler can feed him- or herself. Favorite finger foods here are mini boxes of raisins, sliced olives, animal crackers, and juice boxes.

Including Toddler (9)

How are you keeping a baby or toddler occupied during coronavirus home schooling? Please share in the comments!

Including Toddler (8)

Drawing on the Floor

Drawing on the Floor (5)

Usually both my kids love to color in pages that we print from the internet, but with our printer out of ink, I had two kids clamoring for an alternative! This art project saved the day, and can apply to either a toddler or an older child, depending how you tailor it. Either way, half the fun is the novelty of drawing on the floor!

First, I taped a long sheet of craft paper down to the floor. At intervals, I added some fabric prints we have of Van Gogh paintings, like Starry Night.

Drawing on the Floor (1)

For younger kids, these pictures can simply serve as visual stimulation; I had no expectation that Veronika would do anything other than scribble, but hopefully she was inspired by the beautiful artwork around her.

Drawing on the Floor (7)

Certainly she loves to talk about colors these days (“Yellow!” Purple!”) as she draws, and I could point out examples of them in the artwork.

Drawing on the Floor (6)

For older kids, encourage them to try and copy what they see in the famous paintings. Or, simply let the artwork act as a catalyst, and see where it takes them. Travis didn’t exactly copy Starry Night, but he did make big swirls of color in imitation.

Drawing on the Floor (9)

You could even use the project as a jumping-off point for deeper exploration into a certain artist or particular piece of art, as many museums are offering free tours these days. 

Drawing on the Floor (2)

Even if it just turns into messy scribbling on the floor, your kids will have had fun.

Drawing on the Floor (10)

Puffy Paint Clouds

Puffy Paint Clouds (8)

With so much attention going to big brother Travis during the school week, it was nice just to pause with Veronika for some messy art today! Shaving cream paint has so many uses, and today we focused on clouds. Veronika has been using lots of weather words like “rain” and “cloud” lately, and I figured I would seize the moment.

To make the paint, mix up about 3/4 cup foamy shaving cream and 1/4 cup white glue. I was entirely inexact about this, just eyeballing it, but you really can’t get it wrong.

Puffy Paint Clouds (1)

We used blue construction paper as the background for a pretty azure sky. Ideally we would have been dipped cotton balls in our “paint”, but I was all out! In a pinch, we wadded up tissue paper to make the clouds “fluffy”.

Puffy Paint Clouds (3)

If your child likes things neat, you can “paint” the shaving cream mixture onto the paper with a paintbrush and then add crumpled tissues on top. If your child likes to be messy, roll the tissue wads right in the gluey mixture, and then press onto the paper.

Puffy Paint Clouds (4)

We sort of did this both ways!

Puffy Paint Clouds (6)

Veronika was fascinated by the glue mixture, dipping her fingers into it often.

Puffy Paint Clouds (2)

I also sang about clouds as we played to make it a little weather lesson. So the project ends up being equal parts art, sensory play, and science for toddlers.

Puffy Paint Clouds (7)

Artwork Display

Artwork Display (10)

There are many things about my kids that make me sentimental, but I confess their artwork is not one of them. First of all, there is so much of it! And second, it takes up so much space. And let’s be honest: at first you’re amazed by every crayon line, but after a while those crayon scribbles start to look the same.

So here’s a fun way to display your toddler’s art and make them proud, but keep things rotating out the door! Display one piece, but toss it to make room as soon as there is a new one to display.

Artwork Display (1)

The simplest idea is simply to have a plastic frame on the wall where you can insert one drawing, then swap out for the next. Even easier, I like to hang Veronika’s latest artwork on the fridge. To make it feel special, today I helped her design her own artwork holder!

Hot-glue a magnet or magnetic strip to the back of a 12-inch ruler.

Artwork Display (3)

Next, use hot glue to attach spring-type clothespins to either side.

Artwork Display (2)

Now have fun decorating the ruler before you mount it on the fridge. Veronika glued on dried pasta and added marker scribbles.

Artwork Display (4)

I added her name using glue and glitter.

Artwork Display (6)

I didn’t have to wait long before she had her very next masterpiece of marker scribbles. Now I had the perfect place to display it, and will swap it out immediately for the next one that comes along.

Artwork Display (8)

A final idea to manage all that toddler art is simply to keep a digital record. I always take a snap of the kids’ art – no matter how grand or small – before tossing it. Consider staging a picture of your toddler surrounded by a few “masterpieces”, and then you won’t feel so bad tossing the real thing.

Artwork Display (9)

As an alternative, turn scribbles on paper into cylinders and make them works of art on a mantel! How do you deal with all the toddler artwork? Please share in the comments.

Artwork Display (5)