Acorn Animal Craft Challenge

Acorn Animals (4).JPG

Travis’s craft challenge from Highlights this month was to make little animals using nothing more than acorns, wiggle eyes, and paint.

We collected a whole bunch of acorns (about 20) from oak trees nearby, which was no easy feat in 10 degree weather!

Acorn Challenge (1)

Inside, I asked him what colors he wanted to paint, thinking about what animals he might end up with. He opted for gray, so we mixed black and white together. Because he didn’t want to get his fingers messy on the small acorns, I held them while he painted.

Acorn Challenge (2)

For variety, we made a few pink acorns as well.

Once the paint dried, we glued together a few simple creatures. The stems on the acorn caps made us think of curly pig tails, so two pinkish acorns were glued together as pigs. Travis glued on the googly eyes, although the large size of the eyes made it hard for them to stick while the glue dried.

Acorn Animals (3)

The gray acorns made us think of little owls, who also received eyes.

Acorn Animals (5)

If Travis were older, I would have encouraged him to paint on little feathers, but I knew that sort of fine detail was too much for him. In sum, a cute project but not our favorite craft challenge to date.

Tic-Tac-Doughnut

Tic Tac Donut (10).JPG

Here’s a crafty spin on tic-tac-toe, with quite a few twists! The game was just the thing to keep us busy on a cold morning inside.

To make the playing board, cover the non-magnet side of magnetic paper (available at craft stores) with colored tape; cut the paper into strips, making 4 pieces total.

Tic Tac Donut (1)

To make the “doughnuts”, cut 10 circles from brown craft form and cut out the centers. Decorate with puffy paint as frosting!

Tic Tac Donut (2)

This was definitely Travis’s favorite part, getting into the idea that he was an icer at a bakery. We got creative and decorated all 10 differently, but for more accuracy, you might want to decorate 5 with one pattern and 5 with another. We just had to remember whose playing piece was whose!

Tic Tac Donut (5)

Let the puffy paint dry completely (this might take a while, if your kids were enthusiastic with their blobs of paint!). Attach a strip of the magnetic paper to the back of each doughnut.

To play the game, attach the colored magnet strips to a baking sheet as the board.

Tic Tac Donut (6)

Start tossing doughnuts onto the sheet.

Tic Tac Donut (7)

The first player with 3 in a row wins! Hmm, there might have been a little cheating and reorienting going on, but Travis loved the challenge.

Tic Tac Donut (8)

Prefer your tic-tac-toe a little more traditional? Check out a few versions we’ve made in the past!

Tic Tac Donut (9)

High Chair Painting

High Chair Painting (5).JPG

I’ve loved my first forays into making art with Veronika, and today I dared to give her real paint for the first time, meaning it wasn’t sealed up or homemade. The verdict? She did not eat any! In fact, there wasn’t much of a mess at all.

For this age, though, I do recommend strapping baby into a highchair before pulling out the paints, resulting in the safest, least messy location. You can cover the floor below with newspaper if desired, and tape down the paper to the high chair.

High Chair Painting (1)

I started this way, using a few blobs of store-bought finger paint. But this time I gave her paintbrushes, and showed her how to dab into the blobs and swish it around. She looked so proud to hold the brush!

High Chair Painting (2)

After a few strokes, though, she preferred to pick at the masking tape. Hmm…

Thinking quickly, I gave her a fresh sheet of paper with no tape, and just held onto it firmly.

High Chair Painting (3)

Now, Veronika loved it. The serious look on her face was her way of really processing how it worked to smoosh down the bristles and see new paint appear.

High Chair Painting (8)

She kept at it for quite some time.

High Chair Painting (4)

You’re an artist, Veronika!

High Chair Painting (7)

A proud first paintbrush painting!

High Chair Painting (9)

Aluminum Foil Art

Aluminum Foil Painting (7)
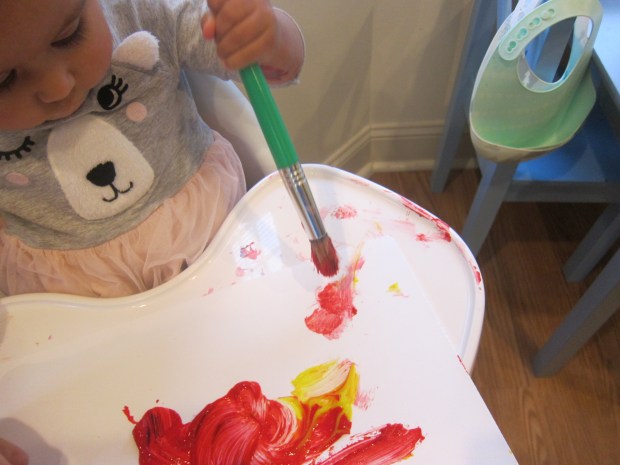
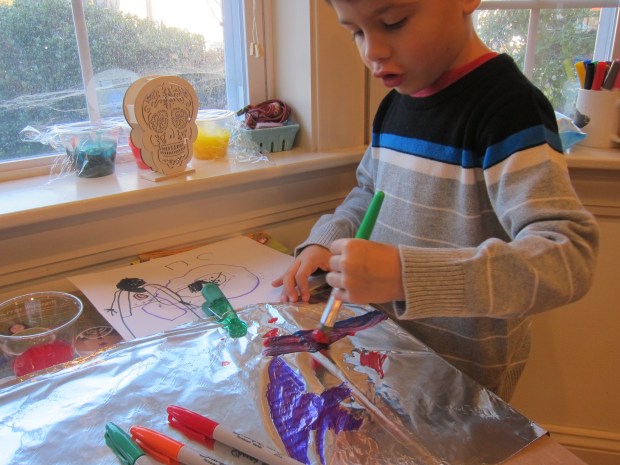
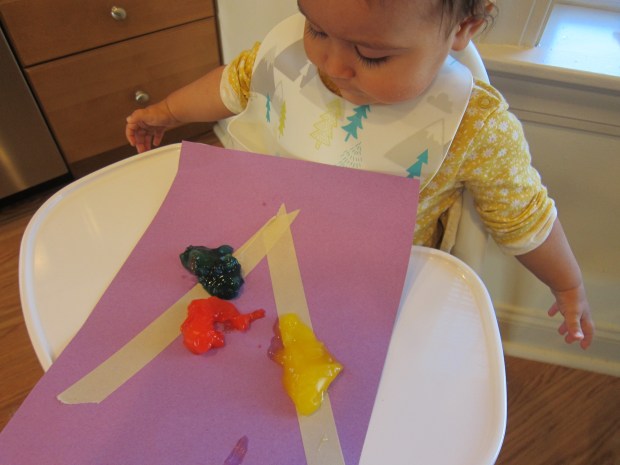
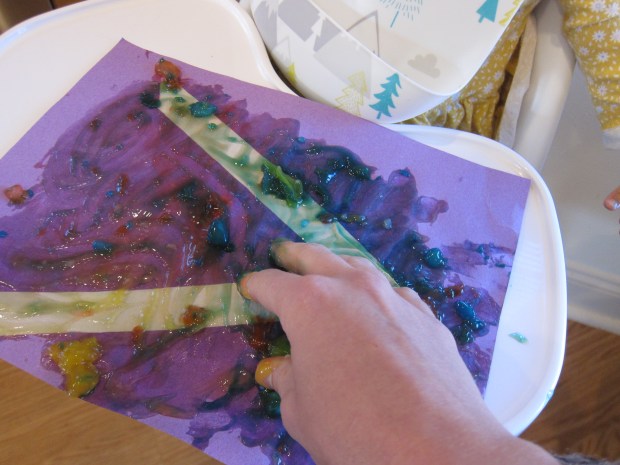
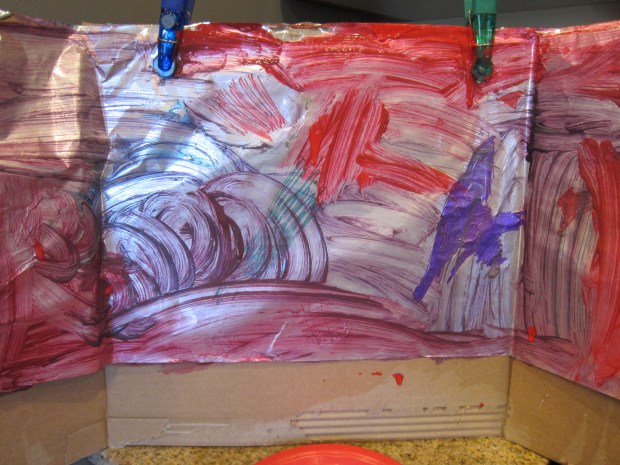
Something as simple as switching up the canvas can make an everyday activity like painting feel new again! Recent shiny mirror play prompted me to have Travis paint not on paper but on… foil!

I put the foil against a sturdy cardboard backing, and used snack bag clips to hold it securely.

Aluminum Foil Painting (1)

At first I thought he might want to use permanent markers on the foil. These made not only vibrant colors, but also fun texture where it indents the foil slightly.

Aluminum Foil Painting (2)

He was instantly designing a Star Wars ship (of course), but quickly decided to move on to paints.

I mixed tempera paint colors with a couple drops of dish soap in each (which supposedly helps it adhere to the foil better).

Aluminum Foil Painting (3)

Now he was off and running!

Aluminum Foil Painting (4)

He mixed colors, made fun designs, and wasn’t content until the whole surface of the foil was finished.

Aluminum Foil Painting (5)

What novel canvas has your child used for art? Please share in the comments!

Aluminum Foil Painting (6)

Tape Resist Letters with Homemade Edible Finger Paint

Finger Paint Tape Resist (6)

It was Daylight Savings today, and parents know what that means: an extra-long day where the kids wake up extra-early. Here’s just the right kind of messy project to help fill those extra hours… Daylight savings or any day the kids are up early!

I knew I wanted a messy art project for Veronika, but she’s still too little for paint since those little fingers go right to little mouth. This homemade finger paint recipe was perfect. After breakfast, I made the following:

Finger Paint Tape Resist (1)

Combine 2 and 3/4 cups water in a saucepan with 1/2 cup cornstarch. Bring to a boil.

Meanwhile, dissolve 1 packet of vegan jel dessert (such as Simply Delish) in 1/4 cup cold water. I used the orange flavor, meaning our paint would be nice and sweet, but unflavored is fine!

Once boiling, remove the saucepan from heat and stir in the jel mixture. Let cool completely.

Transfer to plastic cups and add food coloring if desired for other colors. Since the finger paint was naturally yellow, I added a few drops of red for some orange cups and a few drops of blue for some green ones.

Finger Paint Tape Resist (5)

Next, I added masking tape to a few pieces of construction paper for the tape resist portion of the project. A big V for Veronika seemed just right, and we made a T for Travis, too. Give the paper to your little one and add a few big blobs of paint.

Finger Paint Tape Resist (2)

Veronika was more hesitant than I would have thought to get her fingers in there at first! I showed her how to smear the paint all over the paper, mixing and mushing the colors.

Finger Paint Tape Resist (3)

I moved her down to the floor at one point, thinking she might want to get messier with lots of paint and paper spread out, but even then, she was a touch hesitant.

Tape Resist alt.JPG

No matter what, your paper will be very wet once completed, and will probably take all day to dry; I know ours did!

Finger Paint Tape Resist (4)

Once the “paint” dried, I peeled off the masking tape for the big reveal.

You could also do this activity with more complicated patterns or pictures, simply applying the masking tape in whatever design you like. Big kids might just want to get their hands in there too!

Monster Balloon Decorating

Halloween Balloon (8)

Blow up these “monsters” to decorate the house on the eve of Halloween! The LED lights should last about 48 hours.

Halloween Balloon (1)

Travis was thrilled with the little balloon lights (you can find these at party stores). Turn one on and slip into an uninflated balloon, then blow up.

Halloween Balloon (3)

I had pre-cut a few monster features for Travis on sticky-back black craft foam. As an alternative, you can make mouths, eyes, and noses on black cardstock and use a glue stick to attach to the balloons. But we found that the sticky backing made things very easy!

Halloween Balloon (4)

Our monsters were wiggly and wobbly as we decorated them; it was ultimately easier to hold them between my legs than to tape them onto a table, which we had tried first.

Halloween Balloon (7)

The darker it gets, the more your monsters glow!

Halloween Balloon (6)

Travis loved having these creatures around to set the mood for Halloween.

Halloween Balloon (9)

First Birthday Silhouette

Bday Silhouette (4)

Here is my gift to my baby girl on her first birthday, a silhouette that might not mean much now, but hopefully that she cherishes for years to come.

To start, cut a piece of patterned paper to fit a picture frame; I chose one that was 5×7 inches.

Bday Silhouette (1)

Have a photo printed that shows your baby in silhouette. You’ll probably need to orchestrate this carefully, and if needed, zoom in and enlarge so that the face fills nearly the entire photo print. Place underneath tracing paper and carefully trace the silhouette.

Bday Silhouette (2)

Cut out the tracing paper, transfer to black cardstock, and cut out the shape. Glue the cardstock onto the patterned paper and insert into the frame.

Bday Silhouette (3)

I doubted my ability to get this to come out right, but she looks adorable! What a moment in time to capture and frame.

Boo Mobile

Boo Mobile (5).JPG

The spooky decor continues! On the heels of eerie snack cups, Travis helped make a mobile to hang in the house this Halloween.

First, wrap 2 dowels in orange. Thick yarn would have made quicker work of this step but since I only had orange needlepoint thread, so I was proud of Travis sticking with it.

Boo Mobile (1)

Secure the thread with tape. Tie the two dowels crosswise to each other with more thread.

Boo Mobile (2)

For decorations, we cut simple ghost shapes from white craft foam. Travis loved adding their spooky faces, including one with “fangs”.

Boo Mobile (3)

I also cut the letters B-O-O from orange craft foam. Attach these decorations to more thread with tape, and tie each thread to one end of the dowels. Hang with a final piece of thread, whether in black or orange.

Boo Mobile (4)

Boo!

Boo Mobile (6)

Catnip Toys

Catnip Toys (6)

It’s our cat’s birthday today, 11 years old! Travis loved the idea of celebrating our little guy, so we put together these easy catnip toys for him.

Ranger Rick had a template to follow for Halloween-themed cat toys, since National Cat Day (October 29) falls just before the spooky holiday. I printed out the pumpkin and ghost templates and  traced them onto appropriately colored felt, along with shapes for facial features and a green pumpkin stem.

Catnip Toys (2)

Whoops, because I didn’t have much white felt, some of our ghost features were reversed white-on-black.

Catnip Toys

Use fabric glue or hot glue to attach both sides of each shape nearly all the way around, leaving an opening. Travis helped stuff these openings with cotton balls.

Catnip Toys (3)

And then of course we added catnip, a small spoonful to each. Travis thought the smell of it was wild, and loved the idea that it would drive the cat crazy.

Catnip Toys (4)

Seal up the remaining seam with more glue. I glued on the features, and then it was time to treat the cat!

Catnip Toys (5)

Travis loved tossing down the birthday present.

Catnip Toys (8)

And our cat was quite appreciative! How will you celebrate National Cat Day? Please share in the comments!

Catnip Toys (7)

Make Binoculars

Make Binocs (4)

These super-simple binoculars are a fun way to introduce the item to your baby. No complicated decorations or lenses here, just some quality “I Spy” play!

I taped together two empty toilet paper tubes with several layers of colored tape. Sometimes I prepare crafts while Veronika watches so she can play along, but I knew she would be an imp with the tape, so secretly put these together while she napped.

Make Binocs (2)

Once awake, I peered at her through the binoculars. Hello, Veronika!

Make Binocs (6)

I showed her how to hold the tubes up to her eyes and verbalized what I saw. “Look, there’s the cat! Look, it’s daddy! Look, a toy train!”

Make Binocs (3)

Next it was her turn; I handed the binoculars over, and she puzzled over how to peer through them. She loved holding them, and placed them up to her head in imitation, although needed my help to get them centered over her eyes.

Make Binocs (5)

Her favorite though was whenever I looked at her through them, rewarding me with a big smile each time. A great first pair of binocs!