Travis has been wanting to do this activity since we made other circuit crafts earlier this year, but it felt only right to wait on this one until Hanukkah.
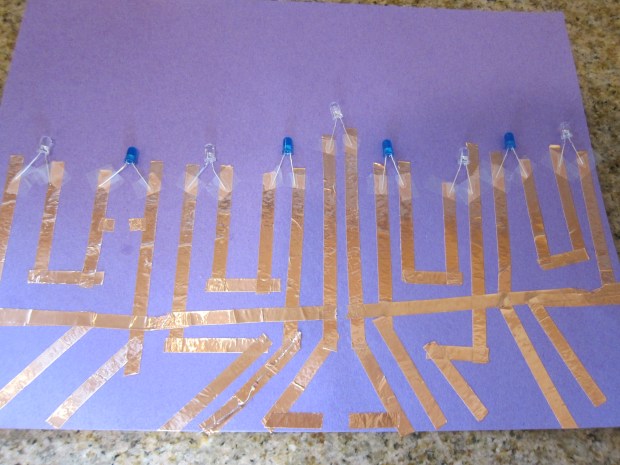
First, you’ll need to map out a menorah shape with copper tape. I simply copied from an online example freehand, so you’ll notice my spacing wasn’t always right.

If you’re going to be more exact, you’ll definitely want a ruler. You’ll also need to make sure that the gap between any two vertical tape lines isn’t wider than the width of a 9V battery. Meanwhile, Travis was fascinated with the thin copper tape, and couldn’t believe it was a metal!

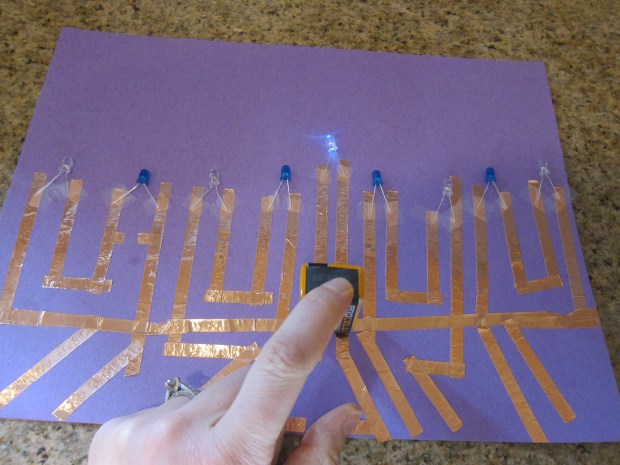
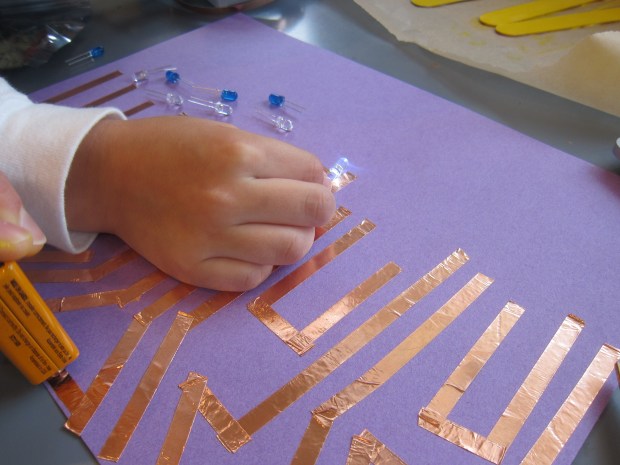
Once the tape was all laid out, I taped an LED light in the top center as the shamash candle. Hold a 9V battery over the two halves of the copper tape below this, and it will turn on!
Tape 8 additional LED lights over the other points of the menorah. We alternated white and blue, for an appropriately holiday-themed effect.

If you want to rig this up so that you can actually light a new LED each night, you’ll need five 9V batteries.
You’ll also need extra strips of copper tape to interrupt the circuit in 4 places, and then attach them on the second night of each interval. We didn’t make things that complicated, nor did we use the suggested ohm resisters, but Travis just loved marveling at how he could light each “candle”.
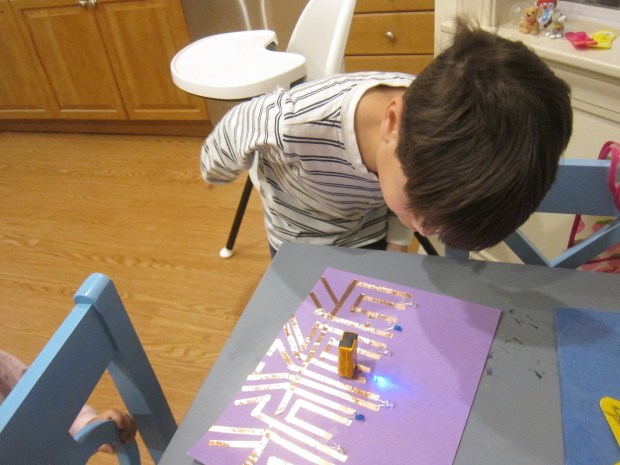
We moved the 9V battery around to light each LED in turn. He especially loved the blue ones!
