Christmas Tree Magnets

Christmas Tree Magnets (4)

Veronika loves to stand at the fridge and reorganize the alphabet magnets I keep there year-round, so I thought she would enjoy this Christmas spin on the activity! I saved up lots of baby food jar lids for this game, but frozen juice can lids would work, too.

I wanted to cover the majority of the lids in green felt to form the outline of a Christmas tree, but also added a few in shades of blue for ornaments and one brown (for the tree trunk).

Christmas Tree Magnets (1)

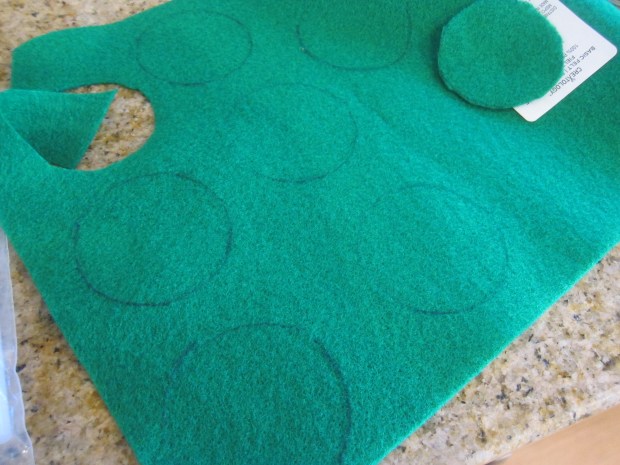
Trace the lid onto your various colors of felt and cut out, then attach to the underside of each lid with hot glue.

Christmas Tree Magnets (2)

Next, use hot glue to attach magnets onto the top of each lid. I cut these from a strip of magnet tape, which you can purchase online or in craft stores.

Christmas Tree Magnets (3)

They were now an instant mix-and-match puzzle for her on the fridge! I started with the lids in the shape of a Christmas tree so she could see the possibility, but of course she soon had her own agenda.

Christmas Tree Magnets (5)

She loved sorting the lids by color.

Christmas Tree Magnets (7)

Or just mixing and matching them.

Christmas Tree Magnets (6)

I love that she can return to these for the rest of the holiday season any time she trots by the fridge. Have fun seeing how many different kinds of tree you can design!

Christmas Tree Magnets (8)

Advertisement

Pencil Holder

Pencil Holder (6)

This toddler craft is so easy but the result is a pencil holder that really does look (almost!) like real leather. It’s a beautiful gift and your toddler can proudly claim to have made it themselves.

To start, clean and dry a 15-ounce can. I then showed Veronika how to cover it with strips of masking tape. She loved pressing these down by herself, and I only helped to make sure they overlapped and no metal was showing.

Pencil Holder (2)

Now it was time to make it look like leather. First she painted it with brown paint, very studiously applying it with her brush. I later added a second coat of paint for a polished look.

Pencil Holder (4)

Once dry, spray with shellac. (Note: This is a grown-up-only step, and be sure to do so in a well-vented area). I also wrote her name and the date on the bottom.

Pencil Holder (5)

Veronika is so proud, and this will make a perfect gift for daddy on Christmas morning!

Threading Pipe Cleaners for Christmas

Threading Christmas Pipe Cleaners (3)

I had intended this project as a fine motor activity with a holiday twist for Veronika, but big brother Travis immediately wanted in on the action, too, so it makes a great project for the whole family on a winter afternoon.

First up, I filled a tray with the following: sparkly red, silver, and green chenille stems; red and green beads; and an assortment of colored jingle bells.

Threading Christmas Pipe Cleaners (6)

I showed Veronika how to thread a bead onto one of the pipe cleaners.

Threading Christmas Pipe Cleaners (8)

She took a few tries, but then was much more interested in the jingle bells. She actually was quite skilled at inserting a pipe cleaner into the narrow loop on each bell!

Threading Christmas Pipe Cleaners (9)

I helped a little and she produced this little bracelet.

Threading Christmas Pipe Cleaners (12)

Travis jumped in on the action and wanted to make holiday gifts for friends, a unexpected bonus of the activity.

Threading Christmas Pipe Cleaners (2)

I was so proud that he even made patterns, counting out the same number and color of beads on each side of his jingle bells.

Threading Christmas Pipe Cleaners (4)

Meanwhile, Veronika was honing those fine motor skills or just busy digging through the materials as if this were a sensory tray. Between the sparkly chenille stems and the jingling bells, there was lots to love!

Threading Christmas Pipe Cleaners (11)

Sticker Christmas Tree Craft

Sticker Christmas Tree (9)

This activity will appeal to both kids and caregivers equally; toddlers will think they’re simply having fun with stickers, but you’ll secretly know that the craft hones fine motor skills and teaches direction-taking!

To start, I drew a Christmas tree shape on green construction paper, then cut out and glued down to a sheet of red paper.

Sticker Christmas Tree (1)

Next, draw zig-zag lines across the tree with pen, as if you’re drawing on strings of lights or garlands. I sat Veronika down with this tree and a bunch of happy face circle stickers. You can use Christmas-themed stickers instead, but I wanted her focus to be on the placement of the stickers, not the images.

Sticker Christmas Tree (2)

I asked her if she could put a sticker directly on the black line I had drawn. “Anywhere you see black!” I told her with a big smile. After one moment of hesitation, Veronika aced the task every time!

Sticker Christmas Tree (5)

In fact, when I worried she was running out of blank spaces to cover on the line, I suggested she could start to sticker anywhere. She looked at me like I was crazy and stuck to the line! She even fixed her own errors a few times.

Sticker Christmas Tree (6)

I had intended the activity as a test in listening to instructions only, and never would have guessed my 26-month-old would do so well. Look at this work!

Sticker Christmas Tree (7)

If you have preschoolers, this would make a great “busy bag” activity to work on solo, particularly if you need to, oh, wrap presents.

Sticker Christmas Tree (8)