Tipping Egg Toy

Tipping Egg Toy (9)

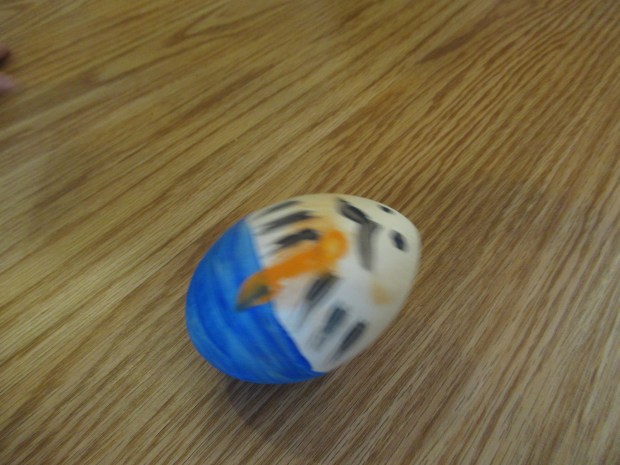
Here’s a silly DIY bobble toy, for which all you need is a leftover Easter egg, either plastic or wooden.

We used a wooden one because we wanted to paint it first. Little blue pants, an orange tie, and a thick black mustache made a dapper looking little fellow. Kids could also paint their egg more like traditional Easter eggs, with dots or stripes.

Tipping Egg Toy (1)

Travis giggled when he saw the little fellow!

Tipping Egg Toy (2)

Next, you’ll need to add a weight in the bottom half of the egg. Travis loved pressing clay down into the bottom of ours, and we added a marble for good measure. If you have no clay, you may need to secure your weight with hot glue.

Tipping Egg Toy (3)

Give it a push with a finger and watch your egg wobble up and down, thanks to the weight at the bottom!

Tipping Egg Toy (7)

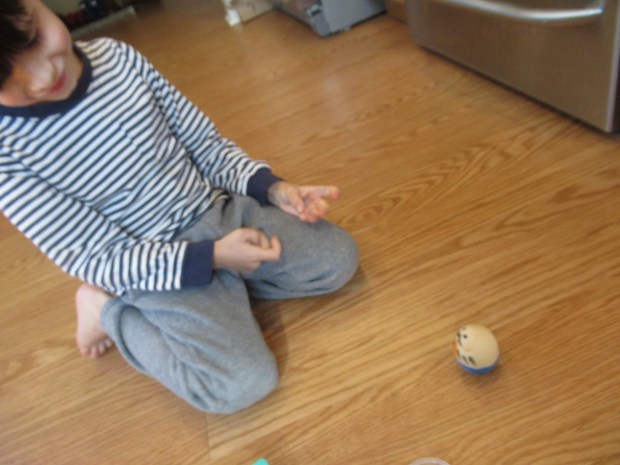
Here he is in mid-motion!

Tipping Egg Toy (6)

As a bonus, Travis loved playing with leftover clay for a while after, being artistic in a way I haven’t seen from him in quite a while!

Tipping Egg Toy (8)

Advertisement

Primary Color Rainbow Suncatcher

Rainbow Suncatcher Primary Color (8)

St. Patrick’s Day gets us thinking about all things rainbows and pots of gold. Here’s a neat way to show a toddler how to make a full rainbow… just from the three primary colors!

To start, I cut an arc from contact paper and taped it down to the floor. I then cut lots of tissue paper squares in red, yellow, and blue. I had these mixed in our craft tray which I soon worried was a mistake, instead of sorting them. But the big messy mix turned out to be half the fun!

Rainbow Suncatcher Primary Color (1)

To make the rainbow, you’ll need to work deliberately row by row. An outer row of red is followed by an overlapping yellow (to make orange), then plain yellow. Next overlap blue (to make green), then add a row of plain blue. Finally, overlap a little more red and you’ll get a bottom row of purple.

Rainbow Suncatcher Primary Color (3)

Veronika wasn’t old enough to understand that the colors needed to stay in their proper rows, but I soon realized the benefit of having mixed all the colors in the tray; she was the perfect helper to find me each right color. “Now let’s find only red squares!” I told her, and she happily dug through the tray.

Rainbow Suncatcher Primary Color (2)

Then she discovered how fun it was to make the tissue paper rain down as I finished up the rainbow.

Rainbow Suncatcher Primary Color (5)

The real engagement with the craft began for her once the suncatcher was taped to the window. Of course there’s the obvious element that now it sparkled and shone…

Rainbow Suncatcher Primary Color alt

…but now the full rainbow magically appeared as well. Where red and yellow overlapped, there was orange; yellow and blue made green, and blue and red made purple. We sang rainbow songs and Veronika loved following the arc of it with her fingers.

Rainbow Suncatcher Primary Color (7)

Next she pretended her favorite toy was sliding up and down it! We’re going to keep this beautiful rainbow suncatcher in the window to cheerfully greet the spring.

Rainbow Suncatcher Primary Color (9)

Sandpaper Shamrocks

Shamrock Threading (4)

I happened to have a sheet of green sandpaper, and realized it would be perfect for a few Irish shamrock crafts as we gear up for St. Patrick’s Day!

For the first project, I cut small shamrock shapes from the green sandpaper, and then used a hole punch to add a hole near the top of each. A piece of green lacing cord would be perfect for threading!

Shamrock Threading (1)

I encouraged Veronika to thread the lace through the hole of each clover. After a few tries, she seemed to tire of the task so I finished up her necklace.

Shamrock Threading (3)

She sure loved wearing this adornment, though! I realized it will make a great homemade alternative to the light-up shamrock bling the kids usually get at the St. Patrick’s Day parade (cancelled of course this year).

Shamrock Threading (5)

Note: If you don’t have green sandpaper, you can also cut the shamrocks for this necklace from green construction paper. A shoelace would work well for the thread!

For the second project, I cut several sizes of shamrock from green and orange sandpaper.

Shamrock Rubbings (1)

I placed these under regular white paper and showed Veronika how to rub over them with the side of a green crayon. The shamrocks are magically revealed!

Shamrock Rubbings (4)

She needed a little help for this step, especially rubbing the crayon with enough force, but she also proudly wanted to try it solo.

Shamrock Rubbings (5)

It was particularly neat to see how different textures of sandpaper came through; the rougher green sandpaper resulted in a darker and more pronounced rubbing than the fine-grained orange sandpaper.

Shamrock Rubbings (6)

“It’s a shamrock!” she said with delight each time. Both of these crafts are a great way to introduce toddlers to the symbolism and colors of St. Patrick’s Day.

Shamrock Rubbings (8)

Quesadillas with Tomato & Avocado

Quesadilla with Tomato and Avocado (2)

This recipes takes quesadillas to the next level with just a few simple tweaks.

Ingredients:

  • 1 avocado
  • 1 tomato
  • 4 whole wheat tortillas
  • 1/2 cup shredded vegan cheddar
  • 2 teaspoons canola oil
  1. Peel and pit the avocado and mash with a fork. Finely chop the tomatoes. Spread two of the tortillas evenly with the avocado and top with the tomato.
  2. Sprinkle evenly with the cheddar, then top with the remaining two tortillas.
  3. Heat the canola oil in a large skillet over medium-high heat. Working with 1 quesadilla at a time, cook for 2 to 3 minutes on each side, until golden brown. Repeat with the remaining canola oil and quesadilla, then cut into wedges to serve.

Quesadilla with Tomato and Avocado (1)