Tin Foil Easter Egg

Tin Foil Easter Egg (6)

Here’s a simple and lovely way for toddlers to make Easter egg art, with the extra thrill of getting to use permanent markers!

You’ll need a cardboard base as the backing for each “egg”, and I find that thin cereal box cardboard is much easier to work with than cutting through old boxes. Cover each egg shape with aluminum foil, making sure it is flat and smooth on the side you’ll be decorating.

Tin Foil Easter Egg (2)

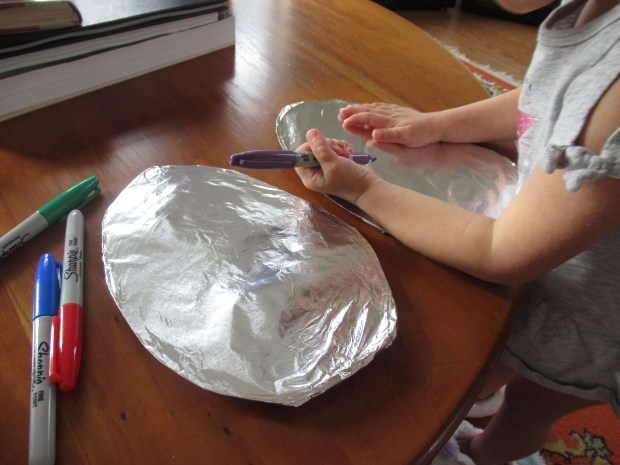
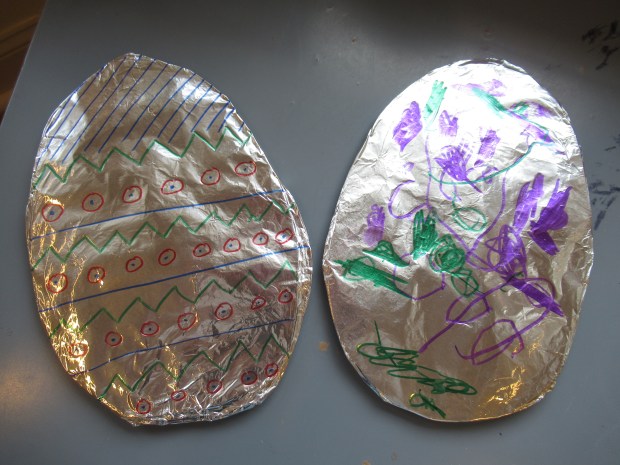
I set out sharpie markers, and Veronika and I each took an egg. She surprised me at first by making quite a few perfect circles! I hadn’t even known she could do that.

Tin Foil Easter Egg (3)

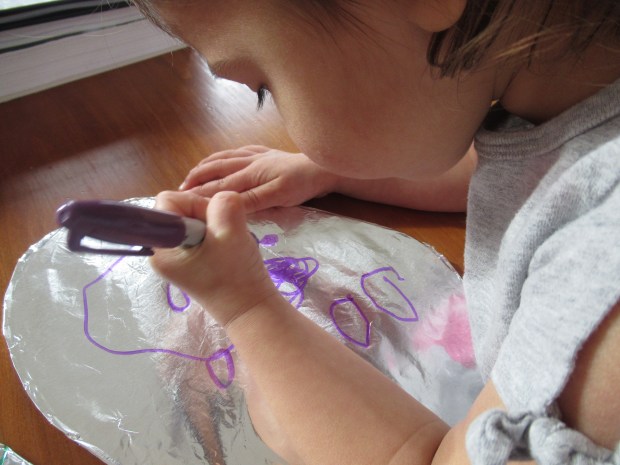
Then she began scribbling and drawing quite earnestly, telling me all about the colors she was using.

Tin Foil Easter Egg (5)

Meanwhile, I made designs on my foil egg with patterns in alternating colors, to show her how decorated Easter eggs can look. As with a recent “animal portrait” craft, I loved that one of these eggs was my grown-up example and one was purely her own toddler creation.

Tin Foil Easter Egg (8)

Advertisement

Motorized ArtBot Robot

Motor Art Bot (4)

This quirky little project results in a “robot” that can draw on paper, thanks to the use of a small hobby motor. I didn’t think we’d be able to make it… until I spotted a hobby motor in my junk drawer! If you don’t have one, check with your local electronics store.

To start, secure three or four colored pencils (or thin markers) around the sides of a sturdy plastic cup with masking tape. Add wiggle eyes to give your Bot some character, or even draw on a face with a Sharpie.

Motor Art Bot (2)

Next, you’ll need to attach the hobby motor to a battery pack, and then secure all that on top of the Bot. This part was tricky, since the wires from the battery pack came off the motor unless taped tightly. The whole thing was so heavy that when we turned on the power, it often either fell down or couldn’t move far. It actually worked best if I held the battery pack lightly, my hand following along in the robot’s wake.

Motor Art Bot (5)

We did get this quick clip!

Next time I would use a much sturdier cup, and find a way to tape both motor and battery pack on the top, to see if we got better artwork. But for some novel STEM play, this was a great project!

Motor Art Bot (3)

Dream Playground

Dream Playground (8)

When I was in elementary school, I came up with the idea for a “trash playground”, imagining a mini playground crafted from leftover trash. For a brief moment, I was sure this idea would a) save planet Earth and b) make me famous. Imagine my delight, then, when I spotted the same idea in a recent Parents magazine: have kids raid the craft bin or recycle bin and turn the odds and ends into a playground for toys!

This project was great because it engaged both of my kids, but for different parts. First, Travis helped me design the playground. He loved mapping out elements like a giant slide (an empty paper towel tube taped to stacked plastic cups), a seesaw (a wood scrap balanced atop craft sticks as the fulcrum), and more.

Dream Playground (1)

He decided that the slide should lead into a “ball pit” (made from pom poms and lollipop sticks).

Dream Playground (3)

Then we needed a trampoline, which was crafted from playdough lined with more lollipop sticks.

Dream Playground (4)

We left the glue to dry overnight and in the morning it was time for our expert toy tester (a.k.a. little sister Veronika) to test it out.

Dream Playground (6)

Her bunnies loved the slide!

Dream Playground (9)

Not to mention the seesaw and the tunnels to crawl through. She had fun in this miniature playground for ages!

Dream Playground (7)

What will your child put in a mini playground? A jungle gym? Monkey bars? Swings? We’d love to hear in the comments!