Hedgehog Pencil Holder

Hedgehog Pencil (5)

Travis has been so into coloring lately, and we need a spot for all his art supplies! This adorable hedgehog in his latest Highlights magazine came just in time, therefore. Now we can corral all those colored pencils.

Older kids will likely enjoy cutting felt and designing all the features for their hedgehog critter solo; however, for a kindergartner I did most of the work, since cutting felt is still tough for Travis. Instead, he helped me decide what the hedgehog needed – arms, a belly etc. – and what should go where. Don’t forget a whimsical red bow-tie!

Hedgehog Pencil (2)

Once you have the pieces cut out, hot-glue light brown felt to an empty toilet paper tube. Then hot glue on the additional features you’ve made, including a head, belly, nose, and arms.

I hot-glued a piece of darker brown felt to a piece of thin cardboard to be the spikes.

Hedgehog Pencil (1)

Similarly, hot-glue brown felt to thin cardboard for the feet; this will make the hedgehog sturdy enough to stand. Add these to the decorated tube.

Hedgehog Pencil (3)

For the finishing touch, Travis added eyes and a nose with paint markers. Puffy paint would also work for this step. Slip in colored pencils and your artist is ready to create!

Hedgehog Pencil (4)

Creamy Salsa Dip

Creamy Salsa Dip (2)

This easy dip has big flavor but appeals to little tastes buds! It’s incredibly easy to halve the recipe or make a bigger batch, which means you can always tailor it to your needs.

Ingredients:

  • 1/4 cup non-dairy cream cheese
  • 1/4 cup mild salsa
  • 2 teaspoons agave nectar
  1. Stir together all ingredients in a small bowl.

My kids like this with steamed carrot sticks for dipping.

Salsa Dip alt

It’s also great with tortilla chips!

Creamy Salsa Dip (3)

Textured Touch

Textured Touch (9)

This advanced texture game will delight toddlers because it also contains an element of surprise!

Cut two holes in the top of a flat box (such as a tie or scarf box).

Textured Touch (1)

Next, gather together a variety of fabrics and materials. We had burlap, felt, cotton, silk, wrapping paper, and sandpaper, for lots of nice contrast.

Textured Touch (2)

One at a time, I placed a piece of material under the lid and showed her how to poke a finger through to explore.

Textured Touch (3)

She looked so intrigued by the mystery of it!

Textured Touch (5)

I put my finger in the second hole so I could describe the texture to her. Burlap, for example, was bumpy and rough. Then we lifted the lid to see what we’d been feeling!

Textured Touch (4)

Wrapping paper was next, smooth and slippery. Soon, Veronika loved being the one to remove the lid and discover what was inside.

Textured Touch (6)

The lid definitely adds a fun element to the game, since toddlers will adore putting it on and off between each new material.

Textured Touch (8)

We played a second version of the game in a paper bag. Again, she loved the surprise of reaching in…

Textured Touch (10)

…and lifting out a new fabric with delight each time.

Textured Touch (11)

Talk about all the different textures as you play this version of the game, too. The more descriptive your words, the better!

Textured Touch (12)

Chances are, your little one will be busy putting the fabric in and out of the bag for a while. Boxes plus bags plus fabric, oh my! This game was a winner.

Textured Touch (13)

Listen with Me Panda Crate

Panda Listen var

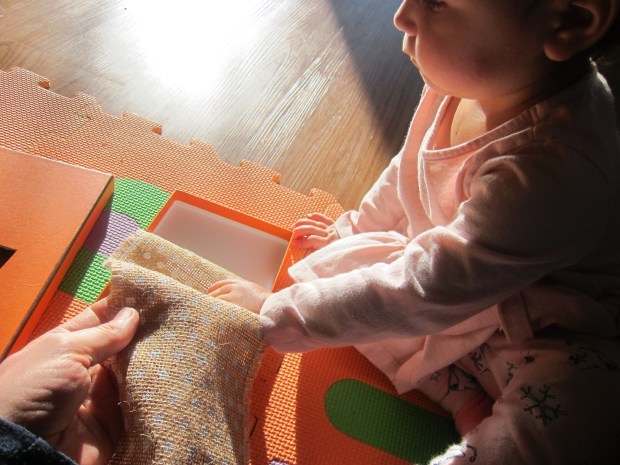
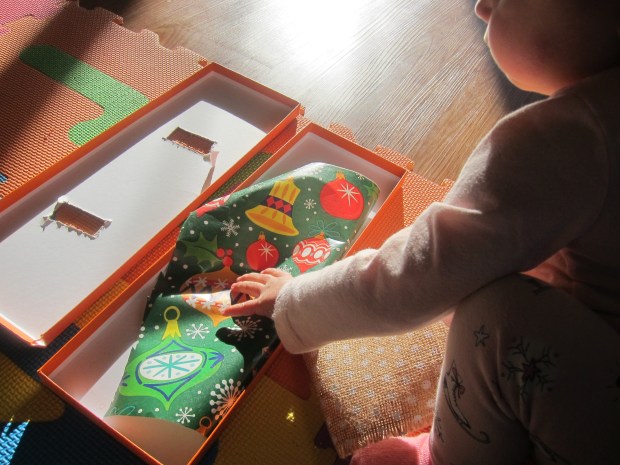
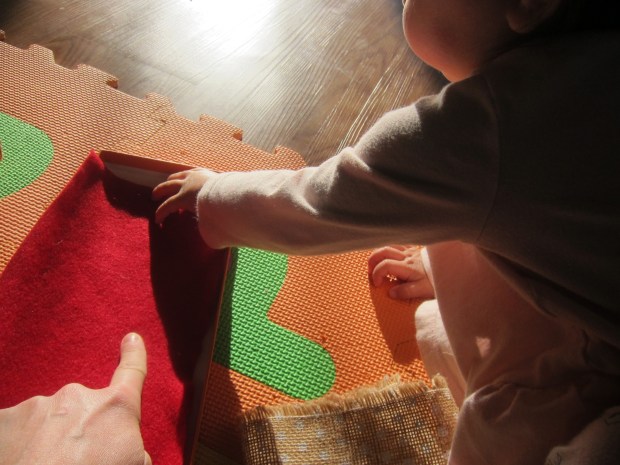
Veronika’s latest from Panda Crate was all about listening. Panda used music as a guiding theme to highlight the developmental milestones around this topic, in a crate that would suit babies 6 months and up. At 15 months, Veronika quite enjoyed the toys and activities in this bundle!

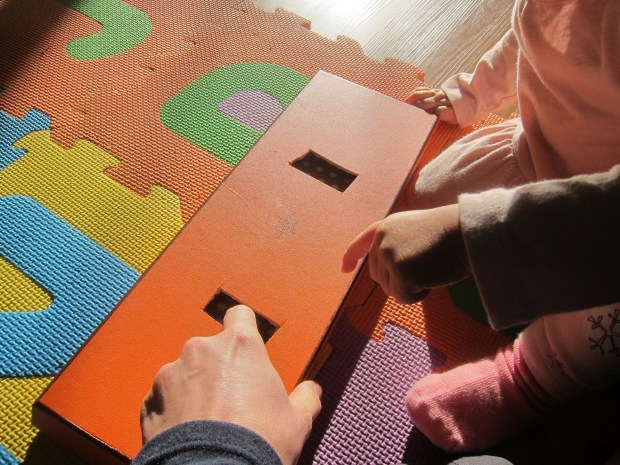
One: Loud and Soft Shakers

These streamlined shakers conceal what’s inside, but give a shake shake and your toddler will trot right over. One is billed as “soft” and one as “loud”, though as a small complaint I would have made the difference between them more pronounced. Still, shake them close to your toddler’s ear and talk about the dynamics.

Panda Listen (1)

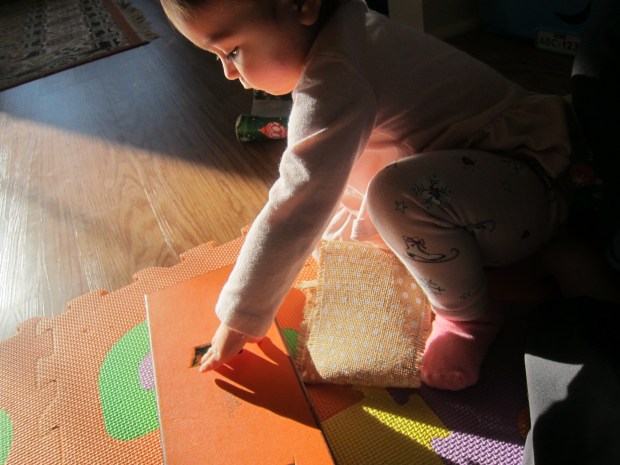
Hand them over to your little one and see how he or she plays. Veronika liked to shake them of course, but then also discovered she could roll them on the floor.

Panda Listen (21)

Or bang them on the floor and keep a beat!

Panda Listen (2)

Of course then we needed to put on some music and shake along to the rhythm. These will be a great addition to her bin of musical toys.

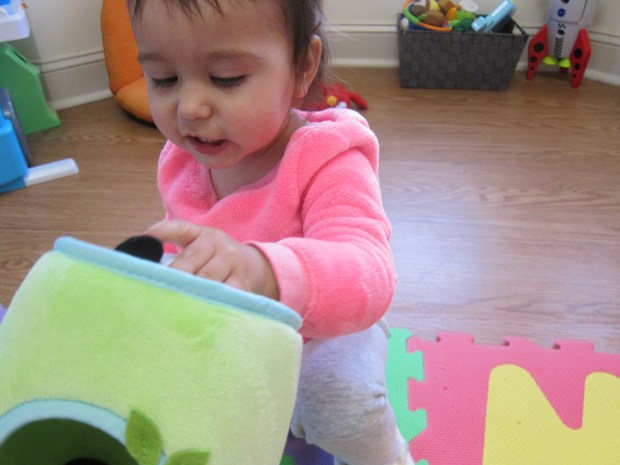
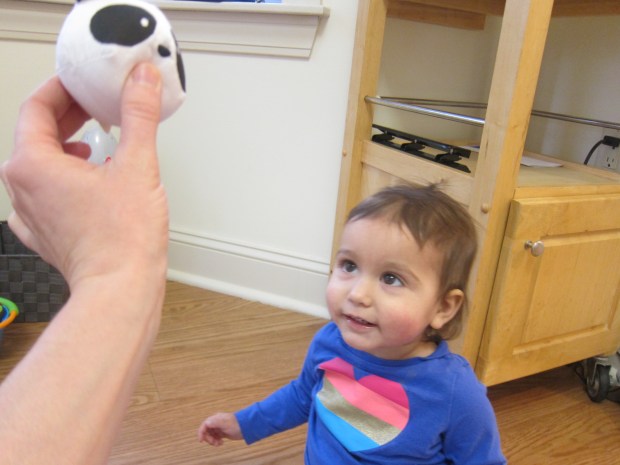
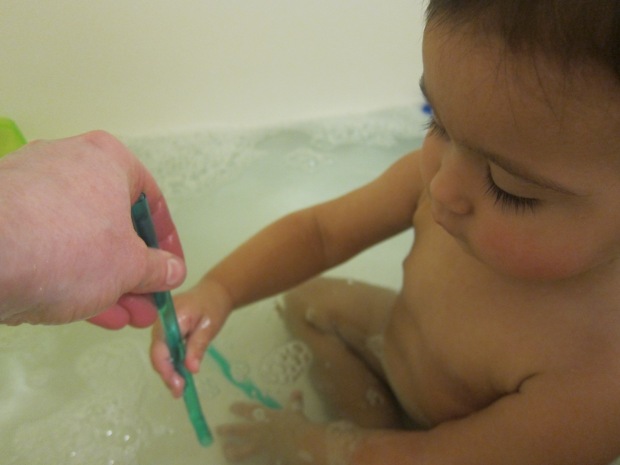
Two: Panda Squeakers

Squeak squeak, these two adorable panda heads that squeak when squeezed were a big hit.

Panda Listen (8)

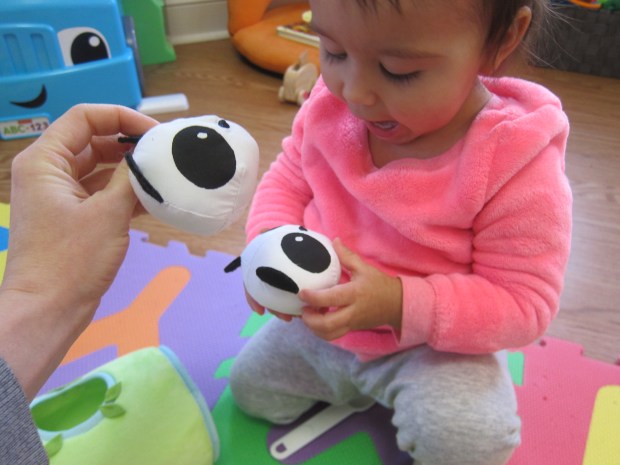
Veronika wasn’t able to make the sound herself yet, but loved trying!

Panda Listen (9)

For babies who are still learning about object permanence, the provided bamboo “tree” will help teach the notion. Slip a panda inside, give it a squeak, and see if baby can find panda.

Panda Listen (7)

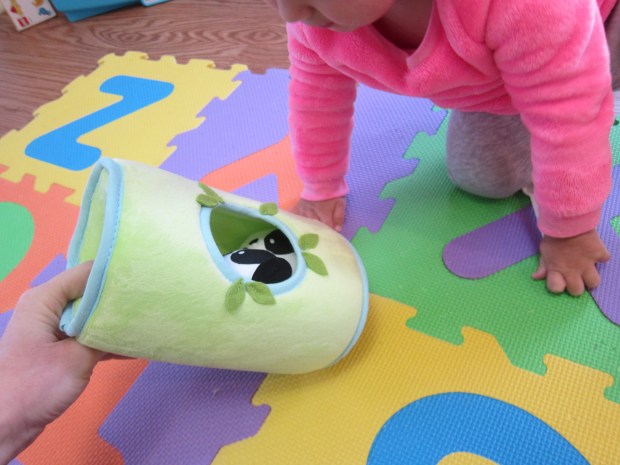
For Veronika, the trunk was more fun for putting the pandas in and out of their abode. Note: The side hole is smaller, so is a bit tricky and gives a toddler some problem-solving practice!

Panda Listen (11)

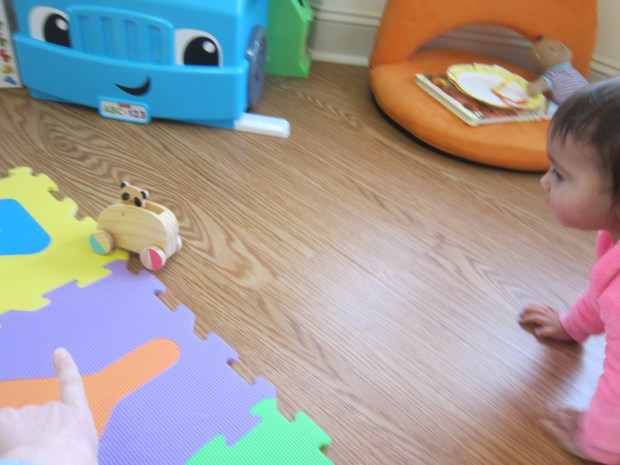
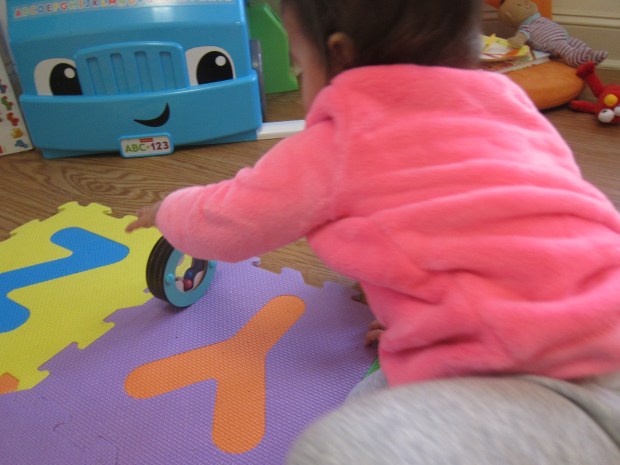
Three: Pull-Back Car

A definite favorite, this little wooden car has a wobbly panda who sits inside. Veronika was only disappointed she couldn’t pull it free!

Panda Listen (6)

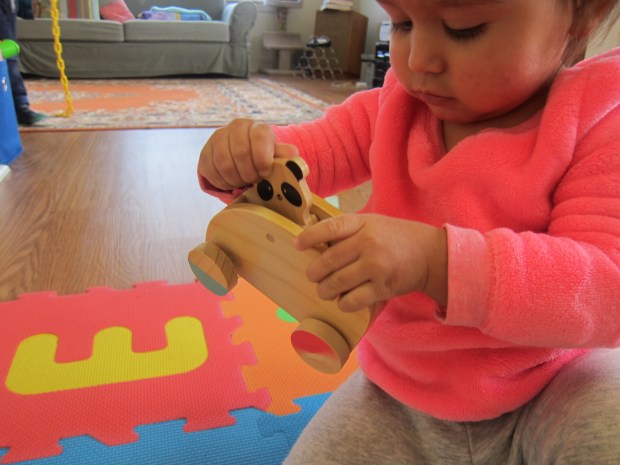
Show your baby how to pull the car back then release, at which point it zooms forwards. This perplexed Veronika the first few times she had to trot after it, but soon she was loving it!

Panda Listen (4)

For the auditory purposes of this crate, make sure to lift up the car and let the wheels  whir right up by your little one’s ears. We also had fun seeing if it moved differently on different surfaces, like her alphabet mat.

Panda Listen (5)

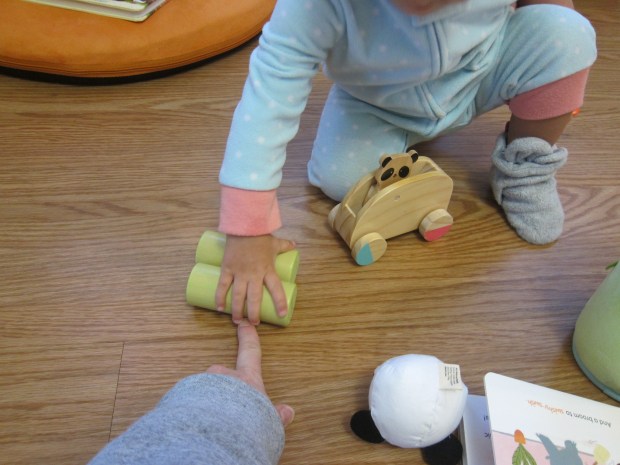
Four: See-Through Roller

The visual aspect of the beads made this rattler Veronika’s preference over the loud/soft shakers. She could shake it…

Panda Listen (12)

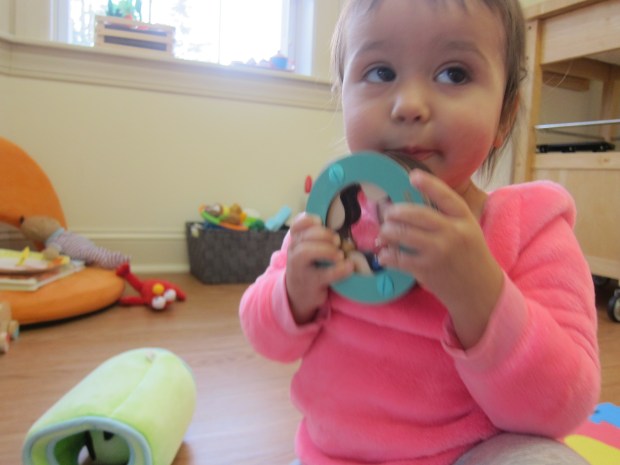
…or turn it into a drum by tapping with a baby spoon.

Panda Listen (14)

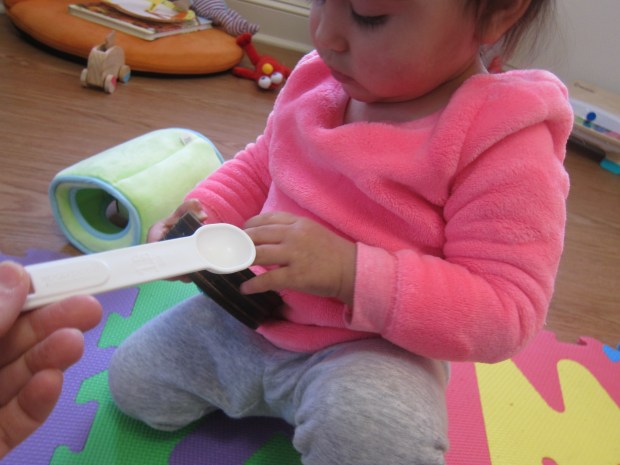
It’s also great for rolling back and forth to each other on the floor.

Panda Listen (15)

Five: Chunky Board Book

Finally, we read this month’s book, Panda’s Friendship Band. As we read the rhyming words, I tapped Veronika’s hand on the pages to the beat.

Panda Listen (17)

The story features tons of fun onomatopoeia, and she was copying along with silly lines like “oompah oompah” and “roo roo roo”.

Panda Listen (18)

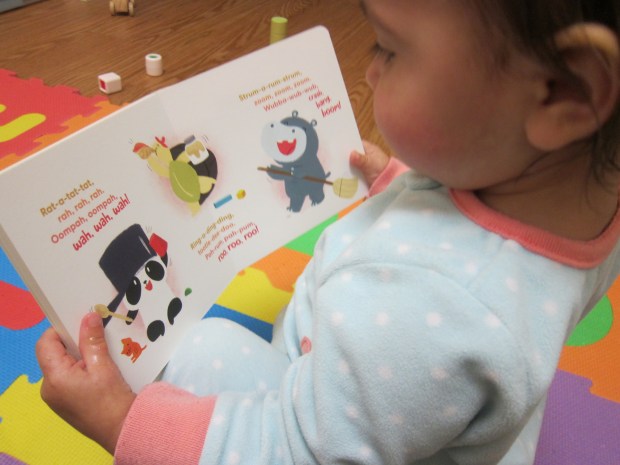
I always love a book that gets her to sit still and read!

Panda Listen (19)

Wonder magazine focused on listening milestones, which were a reminder of games we’ve played like special songs to go with different parts of the day, or walking around the house to name everyday sounds. Then we played a game of tempo dance, dancing along to a favorite song but mixing up the rhythm so it was slower or faster than she expected.

Panda Listen (23)

We also loved singing along to Panda Bear, Panda Bear, (to the tune of Teddy Bear, Teddy Bear, Turn Around) with Veronika mimicking the gestures!

Panda Listen alt

One of the Beyond the Crate suggestions happened to be a recent hit (pun intended!) around here: a Jam Session on pots and pans. If you haven’t done this recently, try it out, whether on pots or on oatmeal canisters. You can also drum a rhythm and see if your baby will copy.

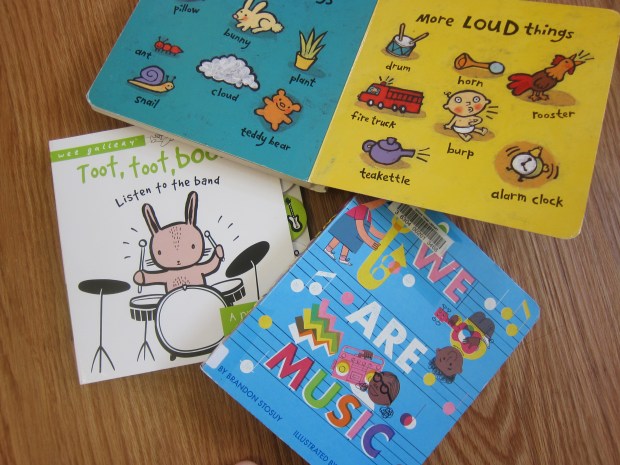
For some reading fun, we read the following three recommendations:

  • Quiet, Loud by Leslie Patricelli
  • Toot, Toot, Boom! Listen to the Band by Surya Sajnani
  • We Are Music by Brandon Stosuy

Panda listen alt

Watercolor for Toddlers

Watercolor (7)

It may seem like a recipe for disaster, but don’t be afraid to use a washable watercolor with even the youngest toddlers (just save the liquid watercolors for bigger kids!). Today it was Veronika’s turn to experiment with this medium.

In all honesty, she was an imp about the whole craft. Much more so than pressing the brush to paper, she liked to squeeze the brush…

Watercolor (6)

…paint on her hands…

Watercolor (3)

…dip in her fingers…

Watercolor (2)

…and even lift the bristles to her mouth with a cackle one time.

Watercolor (1)

To excite her about setting the brush to page, I drew a simple picture with crayon and then showed her how to paint over it. Kids will love the way the color runs off the wax instead of adhering, leaving pretty pockets of color.

Watercolor (4)

For extra fun, we moved the art to a bigger canvas. First, I laid Veronika down on a large sheet of craft paper and traced her. This got giggles!

Watercolor (9)

The idea is to let your little one fill in “self-portrait” features with the watercolor. Obviously at 15 months old, Veronika had only a rudimentary understanding of what we were doing, but I showed her how to paint on pants and a shirt, and a few cartoonish facial features.

Watercolor (12)

Really she just loved exploring the medium, dipping the brush in the water, watching how it could swirl the colors from dry to wet, and testing it with her fingers.

Watercolor (11)

In conclusion, Veronika was a bit too young for this first foray into watercolor, but I did enjoy introducing it; you have to start somewhere! I would definitely repeat this activity when she’s older, especially the self-portrait part, which older toddlers can tackle with greater care.

Watercolor (13)

Dip-Dye Caterpillar

Dip Dye Caterpillar (9)

Putting together this charming little caterpillar takes some time, but it’s worth it in the end!

Dip Dye Caterpillar (1)

To start, you’ll want to dye as many coffee filters as you have patience for (and/or room to dry!) in liquid watercolor. For each color, I squirted a few drops into an empty butter tub and then added a few tablespoons of water. Scrunch up a coffee filter (or a handful of them is fine) and dip in.

Dip Dye Caterpillar (2)

Travis loved watching the colors bleed up the filters! After a few single colors, he decided it was fun to re-dip some old ones, which resulted in a pretty mottled look on many of our filters.

Dip Dye Caterpillar (3)

A tutorial online suggested using as many as 250 filters for this project (!), but I would guess we dyed about 50. Lay these on paper towels and dry completely.

Dip Dye Caterpillar (4)

While the filters dried, we made the caterpillars head. Give your kids carte blanche to decorate an empty tissue box any way they like; it’s the perfect excuse to raid the craft bin for bits and bobs. Travis added buttons, pom poms, and wiggle eyes.

Dip Dye Caterpillar (5)

We twisted together sparkly pipe cleaners for the antennae.

Dip Dye Caterpillar (6)

Later in the day, it was time to poke holes in the coffee filters. Travis thought it was amusing to pierce each one with a kebab skewer. Kids will probably need grown-up help for this step, and to make the process move along more swiftly.

Dip Dye Caterpillar (7)

I then punched two holes in our caterpillar head, one in the top of the tissue box and one on the side. Using a large plastic needle, thread string through all of the filters and then up through the two holes in the head. Now suspend your caterpillar and watch it wiggle!

Dip Dye Caterpillar (10)

One of these would look so beautiful in a garden, but since we a) have no garden and b) it’s winter, we strung it up inside for a few days of play.

Dish Soap Tub Bubbles

Dish Soap Bubble Bath (4)

Blowing bubbles in dish soap is always fun, whether your kids are old enough to blow into the mixture themselves, or young enough that you do it for them. Tonight, I took dish soap bubbles to Veronika’s bath for some great soapy play!

To start, I tinted the tub blue with a little food coloring.

Dish Soap Bubble Bath (2)

(Side note: This was purely for extra entertainment, and not necessary at all. We always love a colored bath around here whether red, yellow, green, or something in between.

Colored Bath (2)

Just squirt in a few drops of all-natural food coloring and let your toddler swish the colors around!).

Colored Bath (3)

Once the water this blue, I filled a Tupperware container with a few squirts of dish soap and added a little water.

Dish Soap Bubble Bath (1)

Blow into the mixture with a straw and honeycomb bubbles will begin to rise to the surface. Definitely only let your child use the straw if you are confident he or she can blow out, not in.

Dish Soap Bubble Bath (3)

Veronika loved it the moment the bubbles spilled over the top of the container! After watching a few times, she was brave enough to put her hands in. These dish soap bubbles won’t pop, making for endless fun dipping hands in and out of what feels like endless bubbles.

Dish Soap Bubble Bath (5)

We hid a few fish toys in the big bubbles and she loved feeling around for them!

Dish Soap Bubble Bath (7)

After holding the container for a while, I set it down to float in the tub and she continued to enjoy putting eager hands into the bubbles.

Dish Soap Bubble Bath (9)

This made them spill over into the water, so then she loved stirring at them with one of the straws I’d used!

Dish Soap Bubble Bath (11)

I think she wanted to stay in this bath forever.

Dish Soap Bubble Bath (8)

DIY Sundial

DIY Sundial (7)Of the various ways Travis and I have made a sundial, this was by far easiest for him to keep up with – and the prettiest! Thanks to a vacation day off from school, we were consistent about popping out every hour, too. The secret? Play dough.

To start, we pushed a wooden dowel in a big blob of play dough. Press the play dough firmly onto an outdoor patio or similar surface. Stretch a line of string for accuracy along the shadow that the dowel casts, and set down a second blob of play dough.

DIY Sundial (2)

We started at 7 a.m., so marked this off as the first hour: Insert a toothpick, numbered with the time of day. (Note: you can make these “flags” much more elegant than ours, which were just taped-on strips of paper labeled with the hours from 7 to 4 p.m.).

DIY Sundial (3)

Being as accurate as we could, we dashed out around each hour over the course of this sunny day and set down a new blob of play dough and new toothpick flag. The colors looked great as they accumulated over the course of the day!

DIY Sundial (5)

We lost out winter sun after 4, so that was the final point of our clock.

DIY Sundial (8)

But Travis was wowed seeing this visual arc of how the sun had traveled. Definitely the best sundial he’s made yet.

DIY Sundial (6)

Spinach Tomato Scramble

Spinach Tomato Scramble a

Make this hearty tofu scramble for breakfast or dinner. Either way it’s a crowd-pleaser!

Ingredients:

  • 1 (1 pound) package firm tofu
  • 1/4 cup almond milk
  • 1/4 teaspoon curry powder
  • 1 teaspoon olive oil
  • 1/2 cup frozen spinach, thawed
  • 1/2 cup chopped tomato
  • 1/2 cup shredded Daiya mozzarella
  1. Combine the tofu, milk, and turmeric in a bowl and mash with a fork until the mixture looks like scrambled eggs.
  2. Heat the olive oil in a large skillet over medium heat. Add the tofu mixture and cook for about 3 to 5 minutes, until the liquid has mostly evaporated.
  3. Stir in the spinach, tomatoes, and cheese, and cook a final few minutes until heated through.

Spinach Tomato Scramble b

For variation, you can use 1/2 cup mild salsa in place of the fresh tomatoes. You can also substitute collard greens or kale for the spinach.

Spinach Scramble alt

Note: because of the watery salsa, I omitted the almond milk in this second version, and I think the kids liked it better!

Go to a Boat Show

Go to Boat Show (6)

It’s been quite a while since we did a “field trip” with Veronika, but today we had the opportunity to take her to her first boat show!

Don’t shy away from crowded places like these with a toddler in tow. My best advice: bring a small stroller, not the bulkier kind that goes with a travel system. This allows for storage of diaper bags and lunch bags and coats without making it tough to navigate the crowds. Then hit the show! Just the vantage point from above was exciting.

Go to Boat Show (3)

Once inside the show, there is so much about boats for little hands to love. Wheels to turn and buttons to press..

Go to Boat Show (8)

…soft seats to scamper over, and hidden berths below decks to explore.

Go to Boat Show(4)

Pontoon-style boats were a favorite; from a parent’s point of view, these are great because there are no tricky stairs or ladders to navigate.

Go to Boat Show (7)

Boat shows often feature hands-on activities for kids, too. Veronika loved watching the older children splashing in kids-only paddle boats!

Go to Boat Show (1)

Next she got to paint a wooden boat to take home.

Go to Boat Show (2)

In sum, the event was a splash!

Go to Boat Show (5)