Color Vision

color vision (1)

It’s never too early to introduce colors to your infant! Because your two-month-old’s eyes are now able to distinguish between shades, make sure to include a wide variety of colors in his or her toys. Today, I emphasized color each time she was on her playmat.

We have a set of shape toys that are in easy, bold colors, and they were perfect for this game (as opposed to multi-colored toys). I named each color in turn as I held it up to Veronika, and encouraged her to reach out.

color vision (2)

Some she wanted to grab onto.

color vision (3)

Purple and blue got big smiles – maybe those will be her favorite colors down the line!

color vision (4)

Then I set up all the colors in front of her for tummy time, so she could look at the rainbow.

color vision (5)

We played later in the day with musical instruments, and I showed her a few that were in bold, solid colors, like red rhythm sticks…

color vision (6)

… and purple maracas. What a great way to start introducing a rainbow-hued world.

color vision (7)

Faces & Emotions Cricket Crate

Cricket Faces (20).JPG

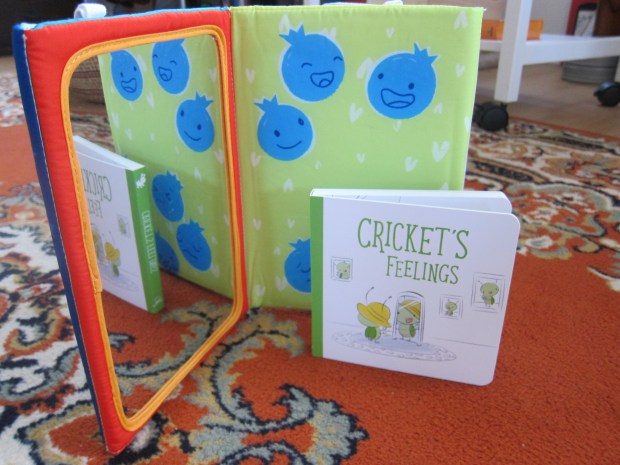
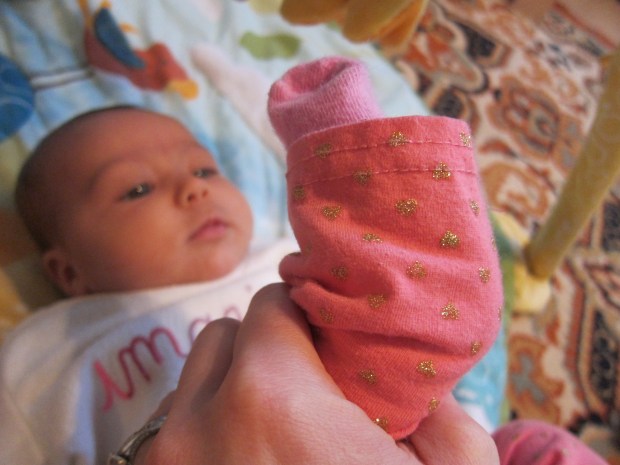
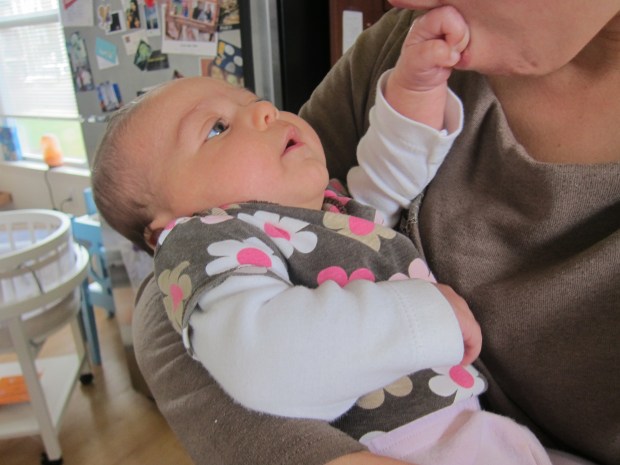
This week, Veronika and I cracked open the last of the newborn three-pack from Kiwi Co., originally termed Cricket Crate, and now having shifted to Tadpole Crate. The theme of this last box was faces and emotions, and the keepsake was just what we needed – a new tummy time prop!

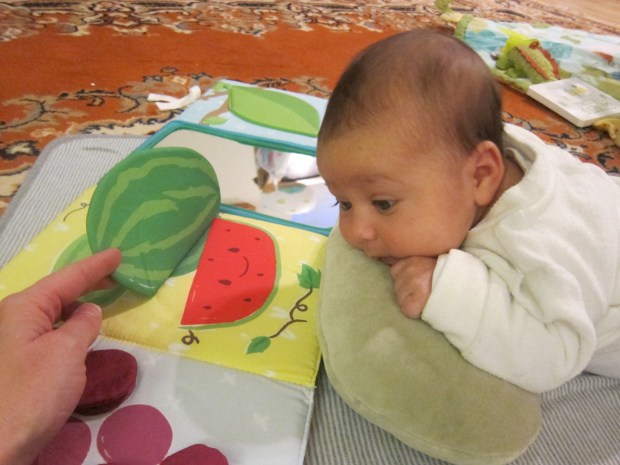
The tummy time mirror folds out in four panels on two sides, for eight visual panels total. You can lift the flaps and explore on each, where silly fruits wear different facial expressions.

cricket faces (2)

These are great for starting the conversation with your wee one about emotions – hey there, silly blueberry! Hello happy banana!

cricket faces (6)

Oh look, a sad cherry. I giggled and so did she!

cricket faces (5)

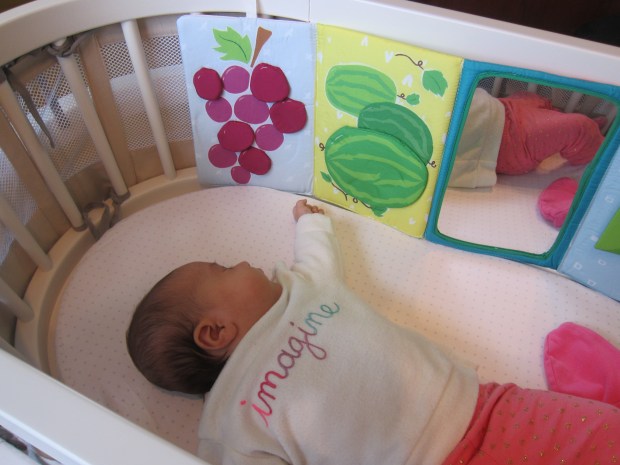
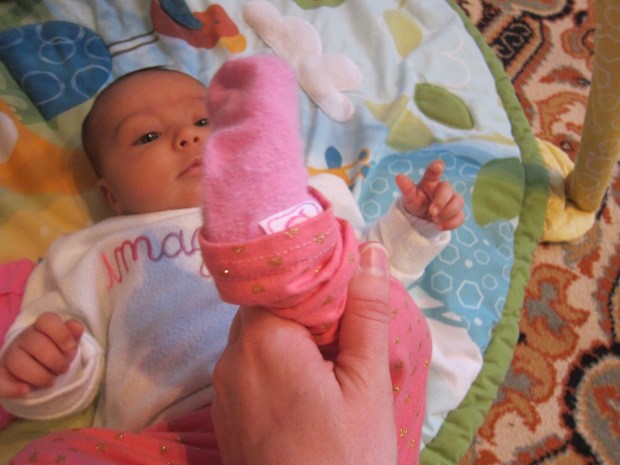
Next, we experimented with four different ways to position the mirror:

Hanging in her bassinet (Note: this is great when I need to entertain her as I cook dinner!);

cricket faces (11)

Upright for when she lies on her back;

cricket faces (3)

Folded into a triangle for tummy time;

cricket faces (9)

And lying on the floor for tummy time. This last she isn’t quite ready for yet, but it definitely encouraged head lifts.

cricket faces (12)

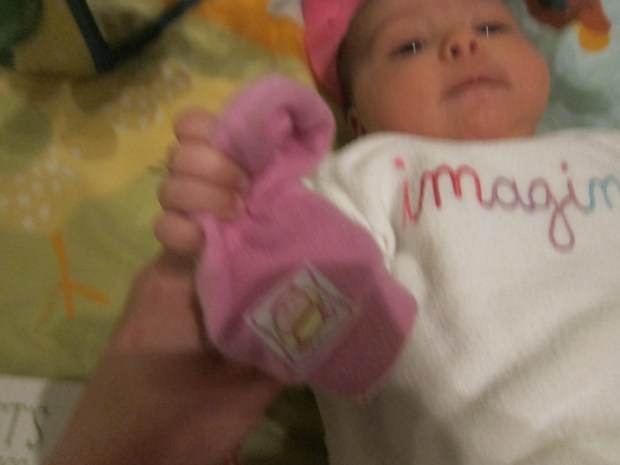
Don’t stop there! The Wonder magazine had lots of suggestions for games. First, we played ‘Look BothWays’; I used it as a way to encourage her to turn her head to the right, since she favors the left. By putting the panels on the other side, she turned her head and strengthened the muscles on that side.

cricket faces (4)

Next we played ‘Name That Facial Feature,’ similar to the game we play when she touches my face. This time, I touched the mirror, then the corresponding part on her face, naming each feature as I went.

cricket faces (7)

Lots of wonder in her eyes!

cricket faces (8)

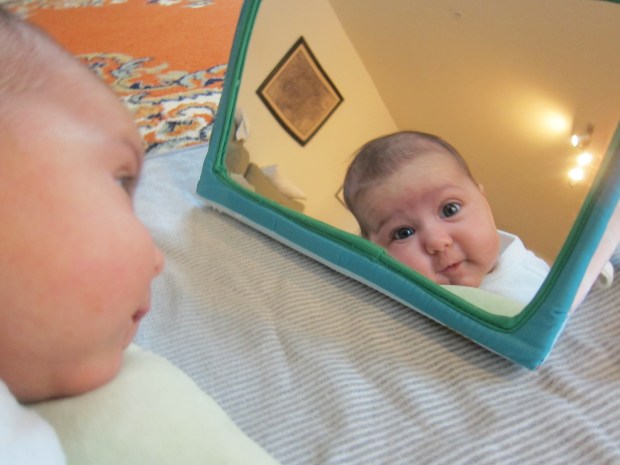
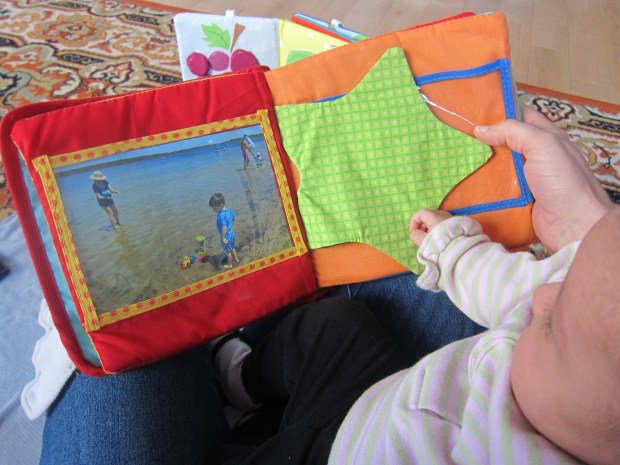
It’s also great for helping your child learn their own name. Your baby won’t realize that the reflection is them – not until much closer to one year old – but this was a chance to say ‘Veronika,’ and point first at the mirror, then to her body. I taped a photo of her to one of the mirror panels to reinforce the notion.

cricket faces (15)

Next we played ‘Emotional Me’; I made silly faces into the mirror, naming each emotion. To further this idea, I lay down next to her on the blanket (she looked so surprised finding us face-to-face!), and held up my phone in selfie mode. She was instantly captivated – who was that baby staring back? We went through emotions – happy, surprised, sad – and you could see her trying to copy each. Take some adorable pics while you’re at it!

Cricket Faces (17).JPG

Another great way to talk about faces and people is to go through photo albums with your child. Veronika loves the one I have with crinkly textures and soft pages, full of family pics.

cricket faces (16)

Or you can even look at strangers; babies will take any faces they can get. We flipped through a magazine together, and I pointed out what each person was feeling, or if they were old or young.

Finally, start to actually engage your little one in “conversation.” Ask a question or make a comment then… Wait! Give your baby time to respond, and they will start to pick up on the rhythm of how a real conversation goes. I was rewarded with lots of little “ah ooh” and “ah geh” responses, and she seemed to happy to be “talking” with me just like she sees big brother do!

cricket faces (18)

The book this month concentrated on emotions too, aptly titled Cricket’s Feelings. Don’t be afraid of getting overly dramatic as you read each page in this book – happy, scared, excited etc. You might feel silly, but Veronika was wide-eyed!

cricket faces (14)

We also read:

Baby Faces by Margaret Miller

Huggy Kissy by Leslie Patricelli

Happy Hipp, Angry Duck by Sandra Boynton

Little Gorilla by Ruth Bornstein

Gideon & Otto by Oliver Dunrea

and From Head to Toe, by Eric Carle

Cricket Faces alt.JPG

The website bonus this month was a downloadable Tummy Time tracker. This sheet was definitely a reminder for a mom like me who never makes enough time for it.

cricket faces (10)

Now it’s on my counter and jogs my memory every time I walk into the kitchen. As mentioned, this was our final Cricket Crate – eager to delve into Tadpole next, once the series is fully up and running!

Sock Play

sock play (1)

At about this age (10 weeks old or so), babies start to discover their… feet! One way to direct attention to those adorable little tootsies is to put on a pair of brightly-colored socks, and help your little one find his or her feet.

I bent Veronika’s legs up, and happily crowed, “Pink socks!” She instantly was fascinated.

sock play (2)

Babies love to reach for their toes, hence why they are so prone to pulling the socks right off and losing them! This time, I wanted her to do so. I loosened the sock slightly, and then it was just a matter of time before Veronika had a grip and… a bare foot!

sock play (3)

Who knew socks made such great toys?

sock play (4)

Fresh Water, Salt Water

fresh water (4)

This activity from Travis’s January issue of High Five magazine provided a nice dose of STEM learning, alongside the usual monthly craft. We’ve done a similar experiment before, but liked the set-up for this version!

Fill 2 large clear glasses with 1 and 1/2 cups warm water each.

fresh water (1)

Add 1/3 cup salt to one cup, and stir until dissolved.

fresh water (2)

The instructions said to tint the other cup blue with food coloring so you can tell them apart. Because the salty cup is cloudy, this step isn’t really necessary, but blue water is cool, so why not!

Now add the same object to each of the two cups, and observe any differences. We tried the magazine’s suggestions of aluminum foil balls, which floated to the top in both versions.

Next we tested plastic dinosaurs. Both sank. Hmm, no difference!

fresh water (5)

Finally, when we tried tomato slices, the tomato in the salt water seemed to pop above the surface with more buoyancy.

fresh water (6)

But why hadn’t the others been different? We added more salt to the salty cup, liberally pouring in and stirring. After two more tries, we had a crayon that floated!

fresh water (7)

The crayon in the opposite cup, down at the bottom, helped illustrate buoyancy best for Travis.

fresh water (8)

Overall, he loved the set-up and scientific nature of the project, plus adored pouring the salt. Great for budding scientists.

Touching Faces

touching sensation (2)

Veronika is reaching out to her toys all the time now, and I love watching every time she does so on her playmat. But even better is when she reaches out to me!

A few days ago, she reached up for the first time to touch my face, a look of wonder in her eyes. I was happy to let her hand explore. Now we take a few minutes each day for this beautiful exercise.

touching sensation (1)

As she touches each feature, I’ll then move her hand to the same feature on her own face. “Mommy’s cheek, Veronika’s cheek,” I’ll say. You can repeat this phrase for the chin, nose, forehead, etc. Eyebrows are fun because they’re furry!

touching sensation (3)

Now this is the very best kind of face time!

Flashlight Show

flashlight show (2)

Your two-month-old is still developing his or her eyesight, and still loves sharp contrast. A great way to play up this factor is to shine a flashlight after dark! This is a cozy game to play at bedtime, or as you wind down for the evening.

I sat with Veronika in her room, turned out the light, and started by shining a flashlight on different parts of her body. Those adorable feet…

flashlight show (1)

…and hands.

flashlight show (4)

Next I shined the light on various toys or objects around the room, naming them as I did so. This makes the game great not just for strengthening eyesight, but also for language development.

flashlight show (3)

Because big brother Travis loves to take the occasional bath-by-flashlight, we extended the game to bathtime. Lots of great vocab in here, including the shower curtain…

flashlight show (5)

…and the little whale who protects our spout.

flashlight show (6)

You can also play this game while your baby lies in the crib, and shine the flashlight through a toy or other object held up against the wall. You’ll get great shadows – what a show!

Jellyfish Lantern

jellyfish lantern (8)

It’s getting hard to impress Travis with crafts these days; let’s be honest, we’ve done a lot of them! It seemed like time for new materials – hence this awesome paper lantern jellyfish. It is by far the coolest jellyfish we’ve made together, and we’ve done a few in the past.

Travis remembered seeing paper lanterns from a summer festival back in August, and was so excited when I announced I had one for our craft. He needed to play with it first, of course!

jellyfish lantern (1)
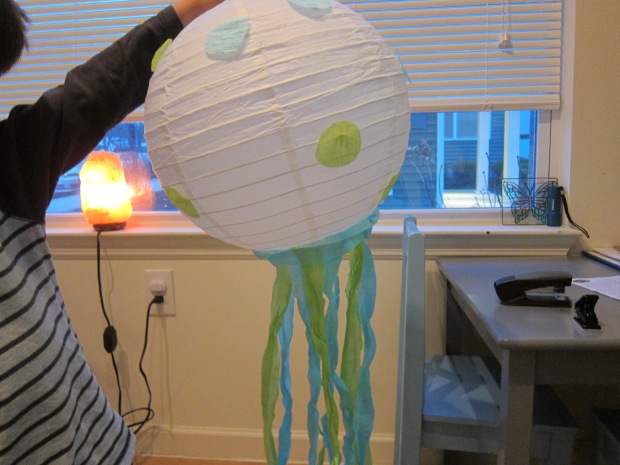
Next we needed crepe paper for the tentacles… It wasn’t long before we had crepe paper madness in the house, too!

jellyfish lantern (2)

I was happy to see him have so much fun, while I made sure to save enough pieces of equal length to be the tentacles.

Next I showed him how we could change the look of the crepe paper by wrapping around a finger. This gave the tentacles great texture!

jellyfish lantern (3)

Glue the tentacles around the bottom rim of the lantern. Add a final piece of crepe paper in a circle around the rim, to hide all the edges. Let dry.

jellyfish lantern (4)

We also cut a few circles from additional crepe paper to be spots on the jellyfish. So pretty!

jellyfish lantern (5)

Travis couldn’t wait for it to dry, after which the jellyfish was instantly a prop in his games.

jellyfish lantern (7)

Once he lets go, we’ll hang it from the ceiling for a beautiful ocean corner of his bedroom.

jellyfish lantern (6)

Fluffy-Paint Collage

Fluffy Paint (13).JPG

We tend to think of sensory art projects as toddler games, but sometimes, even four-year-olds just need to get messy! Queue this shaving cream paint project, a great suggestion from High Five magazine, that absolutely delighted Travis.

To make our fluffy paint mixture, we first mixed 1/2 cup white glue with 1/2 cup shaving cream (thanks Daddy!) in a bowl.

fluffy paint (2)

Stir until combined. Divide the glue into cups (as many different ones as you have colors). Add drops of food coloring, and stir until mixed.

fluffy paint (3)

Travis loves to play mixologist like this!

fluffy paint (4)

We smeared our puffy paint over two thick pieces of watercolor paper (card stock would work, too). Let dry completely.

fluffy paint (5)

Travis loved this step so much he requested extra cups of shaving cream to stir and tint with color. I was happy to oblige!

fluffy paint (6)

Later in the afternoon, it was time for some fine motor skills. First, we had to check out how the dried paint felt. Very puffy!

fluffy paint (9)

We cut the puffy pictures into pieces.

fluffy paint (10)
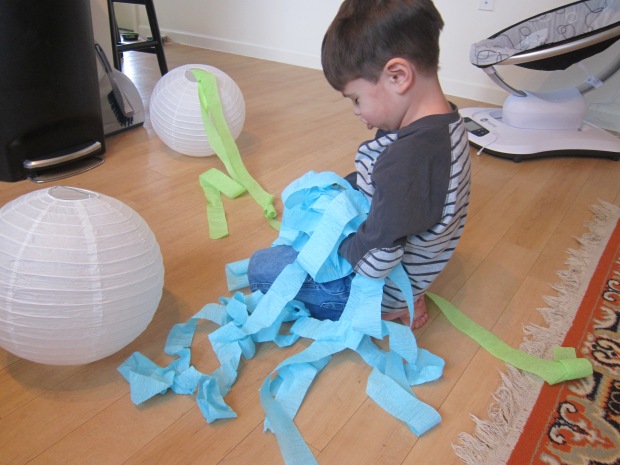
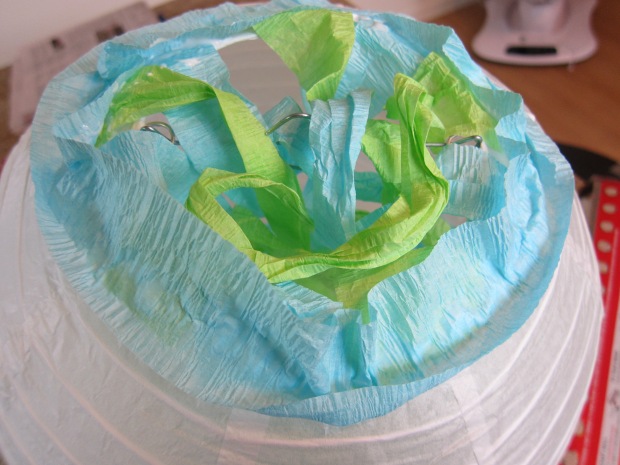
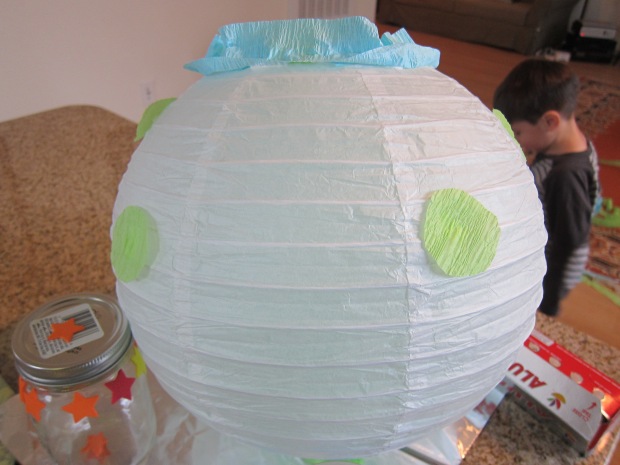
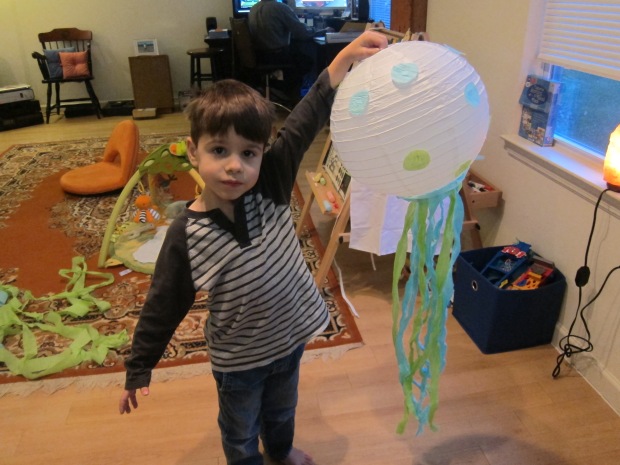
Travis was proud to cut his paper any which way, and I made a few more exact shapes – circles, squares, triangles etc.

fluffy paint (11)

Choose a piece of colored construction paper for a background, and glue down the pieces with clear glue for a creative collage. Older children may want to be very deliberate, and design flowers or other motifs. Travis just loved making piles of clear glue!

fluffy paint (12)

Once again, he loved this step so much that when we were done, he asked for extra paper to cut up and glue down. I loved seeing him so busy!


Up and Away

Up and Away (2).JPG

Today was Veronika’s first airplane ride!

Okay, maybe not really, but with stronger neck and head muscles, it was time to take her for a classic baby airplane ride.

Start sitting up, with your baby’s tummy on your shins. Gently lean back, holding baby securely, then lift your knees up in the air.

up and away (1)

Whee, we’re flying! As baby gets older, there are fun ways to vary this. I used to joke to Travis that his take-off had been delayed (we live near LaGuardia after all!), earning huge giggles. You can also do fun landings, sound effects, silly turbulence, and more.

Thanks to big brother Travis for the pics!

Painted Star Jar

painted star jar (4)

The quest to quell Travis’s fear of the dark continues, and today we put together this great nightlight. Agency over the project and final product hopefully will help a four-year-old (or a child of any age!) feel safe in their room at night.

painted star jar (1)

First, we covered a mason jar with star stickers. Foam star stickers worked great, and peeled off easily when the time came. I’m not sure how well other stickers would work.

painted star jar (2)

Travis enjoyed this step so much that he insisted on covering a second jar in stickers, even though that one wasn’t going to be a nightlight!

We then covered the jar in a coat of pretty blue paint. We used tempera paint; make yours acrylic if you hope it will last a long time.

painted star jar (3)

Let dry completely, then peel off the stickers to reveal beautiful star shapes left behind.

At bedtime, slip a battery-operated tea light into the jar for a beautiful glow. Here’s to a good night’s sleep!

painted star jar (5)