Centerpiece

Centerpiece (4)

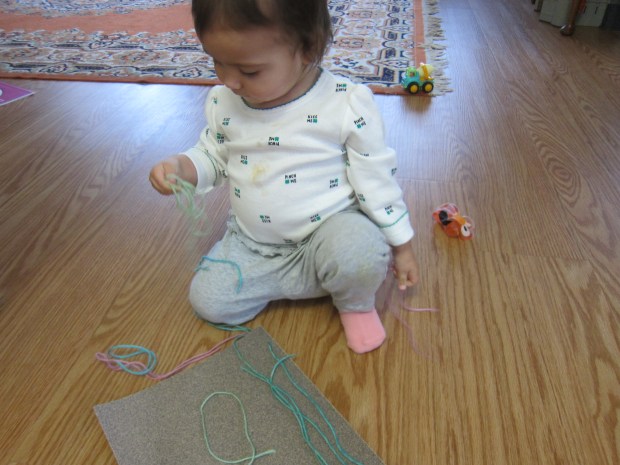
Veronika has only been walking for a couple of weeks, but she already has a few nature forays under her (tiny) belt. Today when we headed outside, I brought along a small bag so she could collect treasures along the way.

Centerpiece (6)

She loved dropping sticks and other finds into it!

Centerpiece (7)

Of course, she didn’t know that I had plans for these items once home. I set out the items she’d found, along with a bright red beach bucket to be a “vase”.

Centerpiece (2)

Note: You can use anything for the container, but I liked that the bucket wouldn’t break, unlike a glass or pottery vase. You could also try upcycling a milk carton for this project.

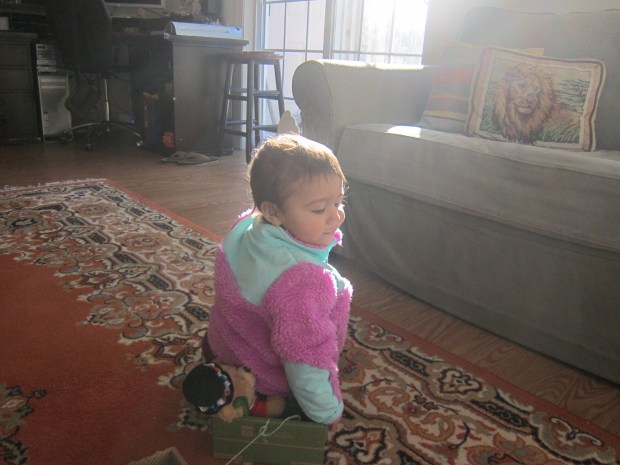
She’s at the helpful age where she likes to put things “in”, so one by one, she arranged the items.

Centerpiece (3)

I cheated a bit with a few tulips we already had at home, since these added a nice pop of color. But look at the centerpiece she was able to create!

Centerpiece (5)

I put this on the table as the family dined, and made sure she knew that it was her masterpiece. In sum, this was a really sweet way to engage a young toddler with nature.

Pipe Cleaner Sculpture

Pipe Cleaner Sculpture (6)

Pipe cleaners are a fantastic way to introduce your toddler to the idea of 3-D and sculptural art. Because the ends of pipe cleaners can be pointy, this is definitely an activity that you want to supervise the entire time, not something for a toddler busy box. I loved taking time today with Veronika to show her how to manipulate them.

To start, I dumped out a package of multi-colored pipe cleaners in front of her. So needless to say, the game was already a hit!

Pipe Cleaner Sculpture (1)

I started by making a few fun shapes. Using our imaginations, this one looked like a dog.

Pipe Cleaner Sculpture (4)

She got quite a kick out of mommy’s art skills as we made the pipe cleaner say “woof”!

Pipe Cleaner Sculpture (var)

Her next request was for a sheep, so I wound together white pipe cleaners into a semblance of a woolly lamb..

Pipe Cleaner Sculpture (3)

She then loved pulling off the curly “wool” pieces.

Pipe Cleaner Sculpture (5)

I tried to think of the safest way to make her a “sculpture” without resulting in any poking and pricking, and circles seemed ideal. Loop these together in a pattern or in rainbow order, or any other way that strikes your fancy!

Pipe Cleaner Sculpture (alt)

Veronika loved holding long chains of the loops, and also decided that individual circles made great bangles and anklets!

Pipe Cleaner Sculpture (8)

In sum, you’ll have a great time together discovering all the ways you can manipulate the pipe cleaners, whether tight curly-cues, or interesting shapes, or more.

Pipe Cleaner Sculpture (7)

Rainbow Craft Challenge

Rainbow Challenge (5)

Just in time for St. Patrick’s Day, Travis’s art challenge from Highlights magazine was to make a rainbow using tissue paper, glue, and… anything from the recycling bin!

So of course first we had to dump everything from the bin onto the floor. Travis loved going through the pile, including boxes and tubes and cans that we didn’t ultimately use for the project (some of which became props for his games all afternoon).

Rainbow Challenge (1)

A pizza box was the largest piece of cardboard available so that became our base. We glued down blue tissue paper for a quick background.

Rainbow Challenge (2)

I had bought tissue paper in every color of the rainbow, and assumed we would tear these into tiny pieces. But Travis had other ideas, and I loved watching him twist a sheet of each color into a rope, then glue these in rainbow order.

Rainbow Challenge (3)

A black bottle cap made a pot of gold and white tissue paper glued on to a container lid became a puffy cloud. Clever!

Rainbow Challenge (4)

Here’s hoping we have some extra luck whenSt. Patrick’s Day rolls around next week.

Peanutty Overnight Oats

Peanutty Oats (2)

These individual servings of overnight oats are perfect for hectic mornings since most of the prep happens the night before.

Ingredients:

  • 1/2 cup rolled oats
  • 1/4 cup chia seeds
  • 2 cups plain soy milk
  • 1 and 1/2 cups raspberries
  • 2 tablespoons sugar
  • 1/4 cup creamy peanut butter
  • 1/2 cup sliced banana
  • 4 teaspoons agave nectar
  1. Divide the oats and chia evenly among 4 small mason jars. Pour 1/2 cup milk over each serving and stir. Cover and refrigerate at least 3 hours, or overnight.
  2. Meanwhile, mash the raspberries and sugar together in a small bowl with a fork. Refrigerate until ready to serve.
  3. In the morning, spoon 2 tablespoons raspberry mixture over each jar of oatmeal, along with 1 tablespoon peanut butter, and 2 tablespoons banana slices. Drizzle with the agave nectar.

Peanutty Oats (3)


Chick’n Pot Pie Muffins

Chicken Muffins (2)

Croutons are the secret for the “crust” in these individual-sized pot pies. As a result, they make fantastic toddler finger food!

Ingredients:

  • 2 cups vegetable broth
  • 1/4 cup Earth Balance butter, melted
  • 4 cups croutons
  • 1 and 1/2 cups Gardein chick’n strips, cooked and chopped
  • 2 cups frozen mixed vegetables
  • 1 tablespoon wheat germ
  • 1/4 cup vegan ranch dressing
  • 1 tablespoon ground flaxseed
  • 3 tablespoons water
  • 3/4 cup shredded vegan cheddar cheese
  1. In a saucepan, whisk together the broth and melted butter. Heat over medium heat until warm. Set aside.
  2. Meanwhile, combine the croutons, chick’n, mixed vegetables, wheat germ, and ranch dressing in a large bowl. Mix well.
  3. In a small bowl, whisk together the flaxseed and water. Pour over the crouton mixture, along with the broth mixture.
  4. Divide evenly among 12 muffin cups and top each serving with 1 tablespoon shredded cheddar.
  5. Bake at 375 degrees F for 20 minutes.

Note: These may fall apart slightly for serving, but you’ll still have a tot-sized portion ready to go, even if they aren’t perfect “muffins”.

Chicken Muffins (3)

Sandpaper Line Designs

Sandpaper Lines (3)

This classic toddler activity can be a lifesaver whether you need to keep little hands busy at home or if you’re on the go. To make it portable, simply cut the sandpaper square smaller and tuck the strands of yarn into a zip-top bag.

For an at-home version, I just sat Veronika down in front of a few squares of rough sandpaper and added strands of yarn in various colors and lengths.

Sandpaper Lines (1)

I showed her how to make a few depictions of real things, like a little “fish” swimming in water. Older toddlers can have lots of fun trying to fashion real pictures!

Sandpaper Lines (5)

But the enjoyment here for a young toddler like Veronika was the way the yarn sticks to the sandpaper. I demonstrated by holding it up for her so she could marvel at how the yarn seems to “stick”.

Sandpaper Lines (2)

She also loved scratching her fingers against the rough surface.

Sandpaper Lines (4)

Or just picking up handfuls of yarn and dropping them down again.

Sandpaper Lines (6)

Truth be told, her favorite version seemed to be draping strands of yarn around herself like a scarf!

Sandpaper Lines (7)

One way or another, this is a great activity when you need to entertain your toddler in a pinch.


Magic Carpet Ride

Magic Carpet (5)

Veronika is at the age where imaginative play starts to take off, so today I took her on a magic carpet ride!

Clearly your child will have no context for such a game, so you may want to take a quick peek at the magic carpet scene of a movie like ‘Aladdin’. Veronika was entranced by the soaring carpet!

Magic Carpet (1)

Then I sat her down on a big beach towel (with a rather magic carpet-esque print). A few doll friends came along for the ride.

Magic Carpet (3)

Humming and singing songs, we went for a magic carpet ride around the apartment, waving to the things we passed.

Magic Carpet (4)

I then transferred her dolls to a smaller towel to see if she wanted to be the one to give a ride, but this was met with confusion.

Magic Carpet (6)

So it was back to her big carpet for another ride! Does your child prefer to pull toys on the magic carpet, or sit for a ride? Please share in the comments!

Peppermint Sugar Crystal Sticks

Peppermint Crystals (4)

If your kids love rock candy, they’ll be intrigued by this method to make it at home. Unfortunately, our spate of bad luck with crystallization projects continues, but here’s a step-by-step guide. I’d love to hear if your kids are successful with this one!

First, bring 1 cup water to a boil in a saucepan. Stir in 2 cups sugar and continue to cook at a boil until the sugar dissolves.

Peppermint Crystals (1)

Carefully pour the mixture into two small mason jars. Add a few drops of peppermint extract to each. Travis loved the way this smelled! Next he added a couple drops of red food coloring to one and green to the other.

Peppermint Crystals (2)

Ideally, use lollipop sticks to grow your crystal candy. We had to improvise and used toothpicks instead, which may explain our poor results. Dip these in the peppermint sugar solution, then roll in regular sugar. Use a clothespin to suspend them in the red and green liquid, making sure they don’t touch the sides or bottoms of the jars.

Peppermint Crystals (3)

Now wait!

Peppermint Crystals (6)

We did see a little bit of crystallized liquid form near the surface of the jars after about three days, which we could skim up with a spoon, but nothing crystallized on the toothpicks.

Peppermint Crystals (5)

Well, that didn’t deter Travis from spooning up some sugary liquid for a quick snack!

Shoe Box Train

Shoe Box Train (8)

We had a few leftover boxes around the house, so it felt like the perfect day to make Veronika a cardboard train. Okay, technically none of these were shoe boxes, but I use the term in the title because they were all about that size. Use any similarly-sized packages for this terrific tot train.

To put it together, simply puncture holes in the sides of each box, and attach them together with yarn or string.

Shoe Box Train (1)

To make even this part fun, I made lots of drilling and clanging construction sounds as I worked.

Shoe Box Train (3)

Veronika wanted to hold a pair of safety scissors to get in on the action! Once our train was complete, it was time to load up passengers. Some stuffed animal friends happily climbed aboard at the station.

Shoe Box Train (5)

I showed Veronika how to hold the yarn so she could pull the train along with her as she walked forwards. I realized this was the first time she’s used a toy that pulls, rather than pushes, so it was great for her motor development.

Shoe Box Train (6)

After a while, she did prefer to push the train cars along, which was just fine too.

Shoe Box Train (7)

Station change! Next it was all aboard the dinosaur train.

Shoe Box Train (9)

There were so many elements to this game that I loved, whether watching her busily load the passengers in and out, the way she said “roar!” to the dinosaurs, or how determined she was to make the train move. She even decided to test out a seat for herself!

Shoe Box Train (10)

Motor skills, imaginative play, and so much more, all thanks to a few upcycled boxes.

How To… Throw a Boomerang

Boomerang (4)

The latest “how to” from Highlights magazine was more of a feature article about a professional boomerang thrower. Travis was so inspired that we picked up a cheap one online and headed outside to try our hand at it!

Carefully, we read the tips. Hold the boomerang vertically with the decorated side facing you, then pinch it between thumb and index finger.

Boomerang (2)

We even took a moment to check that the wind was on our right cheek, not left, since we both throw lefty. Now throw overhand!

Boomerang (3)

Well, it turns out that it’s very hard to throw a boomerang and have it return to you. But we sure had a lot of laughs together, got some mother-son exercise which felt novel and playful (baby sister was painting on the patio, FYI), and had a blast. He loved chasing after it and was so proud when he could catch it, even when we did so more Frisbee-style.

Boomerang (5)

Finish off the fun with some videos from the pros!