Entertain With Dances

Entertain Baby (2).JPG

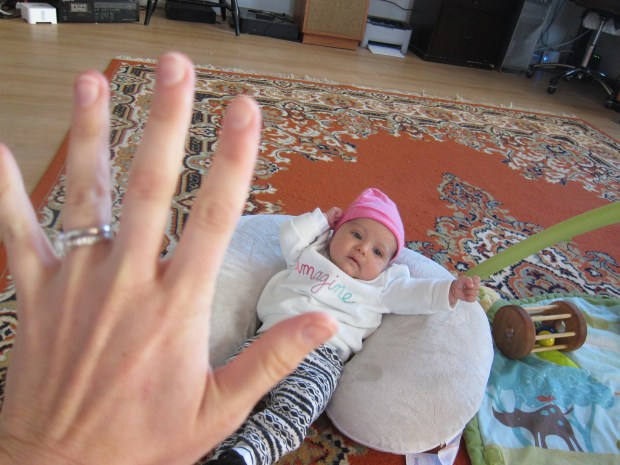
Today, I got silly for Veronika!

Moms and Dads, set aside your inhibitions, prop your little one up, and get dancing. I promise you that your baby won’t judge; he or she will just love the show.

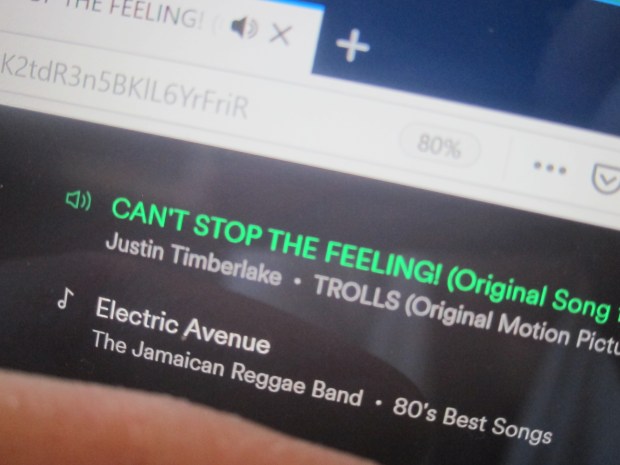
To make things fun for Veronika, I picked kid-friendly dance music, pulling from Travis’s music mix (think: the type of songs you hear at a Gymboree over and over and over).

entertain baby (4)

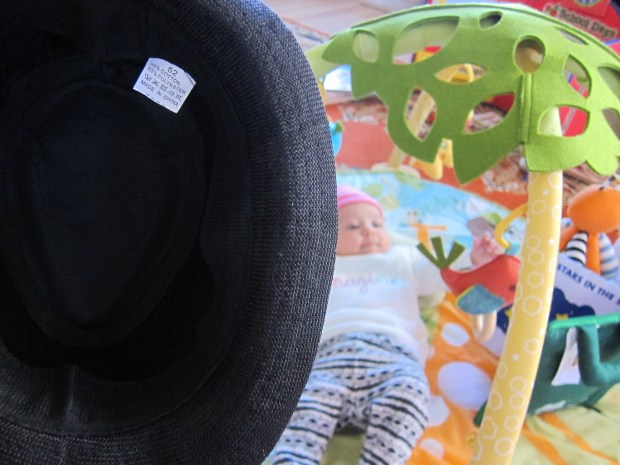
For added effect, I even put on a “costume” – a top hat and feather boa.

entertain baby (1)

Now it was time to pull out dance moves from back in my high school theater days – jazz hands and chorus line feet were in heavy rotation. The hat made a perfect peek-a-boo prop mid-dance!

entertain baby (5)

She seemed so into it, if perhaps mildly startled at mommy’s antics at times!

I also tapped her little feet along to the rhythm, so she could feel it in her body.

entertain baby (3)

Bottom line: don’t feel silly – get silly! Your baby will love the entertainment.

Book Swap

book swap (2)

Reading is now a nightly part of Veronika’s routine; here at two months old, she finally has a real “bedtime”! But the same few baby books can become old hat rather quickly, even after only a few weeks. We’ve had a heavy rotation of black & white-themed books for Veronika for a while, so it was time to swap in some new ones.

No need to head to the store and spend all your money for this activity. Make your library your best friend, and check out some of the classics. Some old favorites from when Travis was little include: Little Blue Truck; Peek-a-Who; the That’s Not My… series from Usborne Books, and Eric Carle’s My Very First Book of Colors.

book swap (3)

What’s good for your baby in their developmental stage right now? Bold colors, bright contrasts, and simple story lines.

book swap (1)

Many libraries also have suggested reading lists for babies. These can be a great way to search among the board books, if you don’t know where to start.

book swap (4)

Veronika seemed to feel special when I sat her down in my lap for storytime with the new books.

book swap (5)

And big siblings can be big helpers reading books, especially ones with flaps to open or lift.

book swap (6)

What’s on your infant’s reading list? Please share in the comments, and happy reading!

Plastic Egg Fireflies

plastic firefly (5)

Travis is into making things glow lately, and beyond glow-in-the-dark paint, we brainstormed other ways to play with light. I pulled out an old tea light and a few plastic eggs leftover from Easter, and we were able to cobble together this little firefly. It made us nostalgic for summer nights!

To make our bug, first we selected patterned paper for the wings. Travis had fun flipping through a booklet of paper and picking the one he liked best. Alternatively, you could have your child scribble on white paper and cut out wing shapes.

plastic firefly (1)

Next I snipped a pipe cleaner into small sections – 6 for the legs, and two slightly longer for the antennae.

plastic firefly (2)
Grown-up step: Use a piercing tool to poke holes for the legs and antennae. The oblong part of the egg will be the back of the firefly’s body, and the more rounded part will be its head.

plastic firefly (3)

Slip in the pipe cleaners, bending slightly so they stay put. Curl the tops of the antennae over.

Next we glued on the wings and eyes. Whoops, because of where I’d pierced the antennae holes, our eyes were above them instead of below them. Oh well!

plastic firefly (4)

Once the glue dried, we could make our little creature glow. Travis was absolutely delighted, and had so much fun taking the tea light out and putting back in again.

plastic firefly (6)

Pretty soon the bug was flying all over the house. A nice reminder of summer evenings to come, here in the middle of winter!

Noisy Toys

noisy toys (3)

Veronika has been reaching for her toys for a few weeks now, and is starting to get a good grip on those that I hold within reach – so it was time to teach her a little bit about cause and effect!

Toys that make noise are great for this purpose. The more your baby holds a toy, moves it, and then hears a noise, the better he or she will start to realize that they were able to create the noise through their actions.

So I put together a big pile of toys from our baby bin that made various sounds. Classic rattles are great for this of course, but I also added some with bells, crinkly sounds, and various other auditory fun.

noisy toys (1)

One by one, I held them out for Veronika, and let her take hold. She loved crinkling this one!

noisy toys (8)

When I rolled the beads inside this rattle, she began kicking her feet at it, almost like she was peddling a little stationary bike. She was clearly delighted at her actions and the effect!

noisy toys (6)

Noisy toys are also great on the go, as with this rattle book on a trip to the library.

Noisy Toys (9).jpg

While she was on her play mat today, I left the noisy toys scattered within reach, so that when her hand came down on one, she could grasp it and give it a try.

noisy toys (7)

Overall, a super fun way to introduce her to new toys and new concepts.

noisy toys (4)

The result of all that fun and mental stimulation in the morning? Napping soundly all afternoon!

noisy toys (5)

Classic Slow-Cooker Pot Roast

Pot Roast.JPG

This recipe is officially my new go-to stew for cold winter nights. I can set it cooking around lunchtime, and by dinner it’s perfect – plus it makes the entire house smell amazingly cozy.

Ingredients:

  • 2 tablespoons olive oil
  • 1 package Gardein beefless tips
  • 1/2 cup chopped onion
  • 2 cups vegetable broth
  • 2 tablespoons tomato sauce
  • 1/2 teaspoon salt
  • 2 cups roughly chopped carrots
  • 3 roughly chopped celery sticks
  • 2 small red potatoes, quartered
  1. Heat 1 tablespoon olive oil in a skillet over medium heat; add the beefless tips and cook for about 8 minutes, until browned.
  2. Heat the remaining tablespoon oil in a slow cooker over high heat. Add the beefless tips, along with all the remaining ingredients. Cover and cook on high for 6 to 7 hours.

We love this served with a warm baguette!

Glow in the Dark Moon and Stars Painting

Glow Moon (6).JPG

Travis loves the craters on the moon, and is always asking how they’re made. So we’ve done a few fun projects where he gets to make craters, everything from poking holes into clay to making explosions outside. This little project was also another way to add a comforting glow to his bedroom at night. We just needed glow-in-the-dark paint, and a fun tool – q-tips! – and we were ready to start.

glow moon (1)

First, I marked off a section of dark construction paper with masking tape. The area within the tape would be the moon, and the rest of the paper was for the stars.

glow moon (2)

We filled in the moon with glow-in-the-dark paint, then used a q-tip to form lots of craters.

glow moon (3)

The only glow paint we had is actually meant to be squeezed from a tube, not brushed on, so to make stars we squeezed out dots of paint and then smooshed them with a q-tip.

glow moon (4)

Travis loved this step!

glow moon (5)

Now we just had to wait until dark. We let the painting dry under bright lights, and transferred to his room at bedtime.

Glow Moon alt.JPG

A beautiful glowing (crater-filled!) moon.

Play with Finger Puppets

finger puppets (3)

Today, I got crafty for Veronika! Travis and I wanted to make her a set of animal finger puppets, which I copied from a template. Technically, the felt pieces are meant to be sewn together. But I will be honest: I cannot sew to save my life. What I can do is hot glue, and that worked in a pinch!

First, draw a template for the bodies of the animals on white paper. Pin the paper to a piece of felt, and cut out. You’ll need two for each animal, front and back. I used white felt for a zebra, green for a crocodile, yellow for a lion, and light blue for a hippo.

finger puppets (1)

Hot glue (or sew) the two pieces together.

Next I added tiny bits of felt for each animal’s features. The zebra got black triangles for stripes, a black nose, and pink ears.

finger puppets (2)

The hippo had a piece going horizontally across for his nose in the same light blue, as well as pink ears and eyes. The lion got a brown mane, and a yellow circle glued over that for the face. The crocodile got big white eyes and itsy-bitsy white triangles for teeth.

finger puppets (4)

Add any final features with a pen or sharpie.

These came out so cute! You can hold them up for your little one to see. Veronika might have been slightly alarmed at first.

finger puppets (6)

I named each animal for her, and made their sounds, and had them act out silly hand plays.

finger puppets (8)

Big sibs will definitely want to take a turn with the puppets on!

finger puppets (7)

Finally, we used the animals at story time. If you have books featuring any of the animals you’ve made, trot out the puppet to help bring the story alive. Or choose which animal to make based on what books you have at home!

finger puppets (10)

We’ll be playing with these for a long time to come, I can already tell.

Avocado Fries

avocado fries (1)

Whoa – one bite of these “fries” and you may never eat a potato french fry ever again. My son loved avocado as a toddler, then sadly dismissed it in nursery school. Now he gobbles it up again thanks to this recipe!

Ingredients:

  • 2 ripe avocados
  • 1/4 cup flour
  • 2 Ener-G eggs
  • 1 cup crushed tortilla chips
  • 1/2 cup plain non-dairy yogurt
  • 2 tablespoons agave nectar
  1. Peel the avocados, and remove the pits. Spoon the flesh from the skin, and cut into wedges.
  2. Place the flour in one bowl, the Ener-G eggs in a second, and the tortilla crumbs in a third. (Note: To crush the tortilla chips, use a rolling pin over them in a sealed zip-top bag).
  3. Dip the avocado wedges in each bowl, starting with the flour, then the eggs, then the crumbs. Transfer to a baking sheet lined with foil.
  4. Bake at 425 degrees F for 10 minutes.
  5. For a quick dipping sauce, whisk together the yogurt and agave.

avocado fries (2)

Starry Night Constellations


starry night (4)

Our star-themed fun continues, here in the dark days of winter. January is a great time of year to talk with little ones about stars, because the sky gets dark so early; in the summer, it’s still light when Travis goes to bed, and he hardly ever gets a chance to star gaze!

Tonight, we had flashlight fun with some of our now-familiar constellation forms. Ahead of time, I used permanent marker to make a dot for each star on construction paper, making the shapes of favorites like Orion, Canis Major, the Big Dipper, and the Southern Cross.

starry night (1)

Now it was up to Travis to punch out the holes, using a pen (or a sharp pencil would work).

starry night (2)

I was quite impressed with how exact he managed to be, puncturing the paper only where I’d made dots. He loved the challenge!

starry night (3)

Now stand in a dark room, and shine a flashlight through the holes onto the wall. Voila, you’ll see the starry sky suspended before you! Travis loved being the one to hold the flashlight, and line up the beam so a particular constellation appeared.

starry night (5)

Indeed, he loved it so much he had to punch holes all over a second sheet of paper. Now it looked like the Milky Way was flooding our wall with stars!

starry night (8)


No-Cook Overnight Oatmeal

no-cook oats (5)

Let’s face it – mornings are crazy, amiright? High Five magazine must know it, because Travis’s January issue featured a great recipe that kids can help make the night before. Shake up these no-cook oats, and they’re ready to go for breakfast!

Ingredients:

  • 1/4 cup rolled oats
  • 1/4 cup plain non-dairy yogurt
  • 1/4 cup non-dairy milk (we used coconut)
  • 1 teaspoon agave nectar
  • 1/4 teaspoon ground cinnamon
  • Handful of dried apricots or raisins
  1. Combine all of the ingredients in a jar with a tightly-fitting lid.no-cook oats (2)
  2. Seal the jar and shake – kids will love this step!no-cook oats (3)
  3. Refrigerate for at least 8 hours, or overnight.

no-cook oats (4)

In the morning, simply uncap the jar and voila – breakfast is served. You can serve cold like muesli, or warm it briefly in the microwave.