Learn to Blow

Learn to Blow (5).JPG

Blowing is such a gentle and fun sensation for babies, both to feel it from you and to learn! Today, Veronika and I had some fun with this idea in a few ways.

First, I simply took a deep breath in and then blew gently on her cheeks and forehead (you’ll probably want to avoid the eyes). Veronika giggled and thought this was a delight.

You can see she tried to imitate me with her tongue out, so making more of a raspberry sound. But I love that she instantly tried to copy me!

Learn to Blow (1)

Try blowing on palms or fingers, too.

Learn to Blow (2)

Then I pulled out our pinwheel for more demonstration. She loved watching it go around in the “wind”.

Learn to Blow (6)

I hoped she would try blowing on it, too, but her hands proved too tempting to make it spin.

Learn to Blow (7)

Then of course we needed the perfect story for learning to blow: we huffed and puffed to the Three Little Pigs!

I set up a Three Little Pigs toyset that’s been around since big brother Travis was a baby, and hung up tissue paper over the houses.

Learn to Blow (3)

As I narrated the story, I huffed and puffed on the tissue each time we came to that part of the tale. She loved watching the tissue paper sway back and forth!

Learn to Blow (4)

Do you have a fairy tale that you like to narrate in a hands-on way? Please share in the comments!

Travel with Me Panda Crate

Panda Travel (1)

Veronika received her second crate from Panda Crate today. As I reminder, she’s receiving crates meant for babies a few months younger than her actual age, since I wanted to be sure we didn’t miss a single thing. Read my full explanation here.

So, adapting “Travel with Me” slightly, we still had fun with the following crate items at 11 months old!

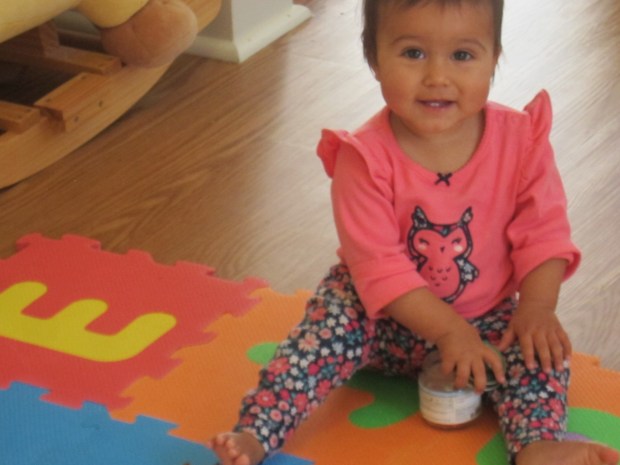
One: Travel Play Mat

This item is truly meant for those still doing tummy time, with tactile elements galore. The handy roll-up-and-velcro feature means you can take it anywhere in those early days when you don’t want your newborn on the floor (germs!).

Panda Travel (4)

The reverse is a nice fluffy fabric, which makes it a cozy blanket for chilly fall days even now that Veronika is bigger. The one element she loved as an eleven-month-old was the pocket; hide toys in here for your bigger baby to find and you’ll get great smiles of delight.

Panda Travel (5)

Two: Star Grasping Toy

Speaking of hidden toys, this is the one I secreted away in the pocket. The crinkly elements will be catnip for little babies’ hands. Because so many baby toys are round or square, the shape was also fun to talk about with Veronika.

Panda Travel (10)

I touched each of the 5 points of the star, counting them out as we went.

Panda Travel (2)

Three: Hanging Rattles

These two rattles attach to the loops of the blanket for any babies doing tummy time.

Panda Travel (3)

I appreciated that they work great as travel toys even for older babies, since they fasten easily onto the handle of a car seat. My big girl didn’t let them dangle for long; she loved snatching them down!

Panda Travel (8)

You can also of course use them to talk about the weather (cloudy, sunny). Best of all was using them more like maracas together, shaking along to songs in the car.
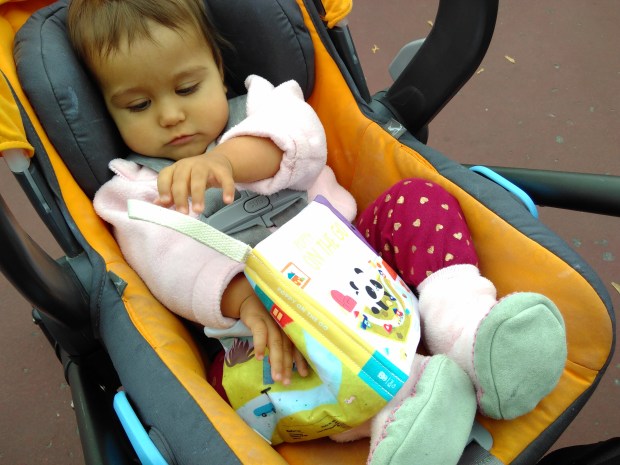
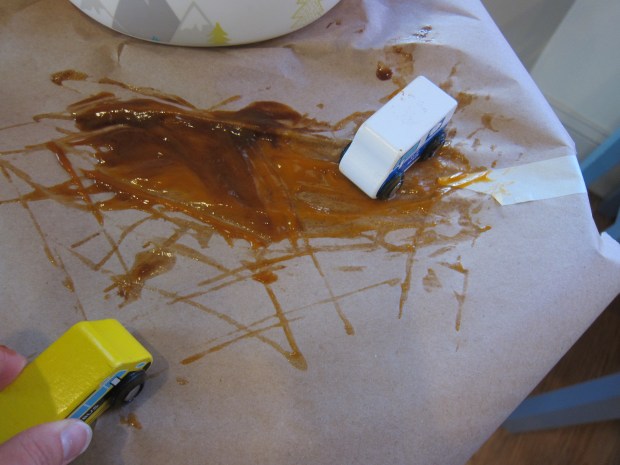
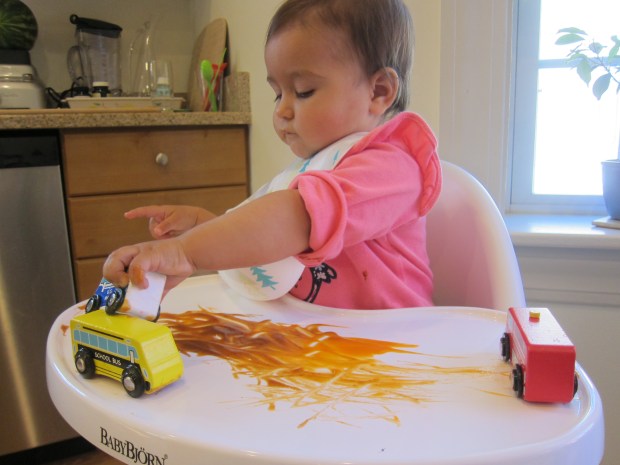
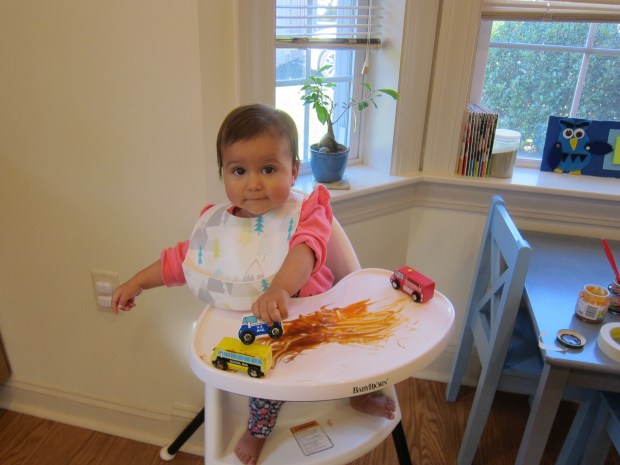
Four: Fabric Book

Last month, Veronika received a bath book about Panda, now it was time for a crinkly book. It’s super lightweight, making it perfect to pack as a travel toy. This one was fun because we could name vehicles and Veronika is old enough to imitate the sounds each makes (the vroom vroom of a car, the choo-choo of a train). The book has very few words, which encouraged me as a parent to narrate what we saw on each page, talking about all the details.

Panda Travel (9)

Once again, I perused Wonder magazine, including a Grow section on muscle and movement development. The Learn section was a trip down memory lane: we hit all the suggested activities back in the day, whether tummy time skin to skin as a newborn, reading board books during tummy time at 4 months old, placing toys just out of reach at 5 months old, and encouraging rolling at 6 months old.

The Play section was also a nice reminder of ways I enriched Veronika’s experience as a younger baby: outings like going to a coffee shop, arranging a mommy play date, picnicking in the park, strolling outdoors, or going to the aquarium. If you receive the crate when your baby really is four-months-old (or thereabouts), you’ll love the suggested “Beyond the Crate” activity of Ribbon Play.

For travel-themed musical fun, I sang Veronika Wonder‘s version of “Wheels on the Bus” with cute new verses:

The baby on the bus goes on a trip,

On a trip, on a trip.

The baby on the bus goes on a trip,

All through the town.


The baby on the bus looks all around,

Up and down, what’s that sound?

The baby on the bus looks all around,

All through the town.

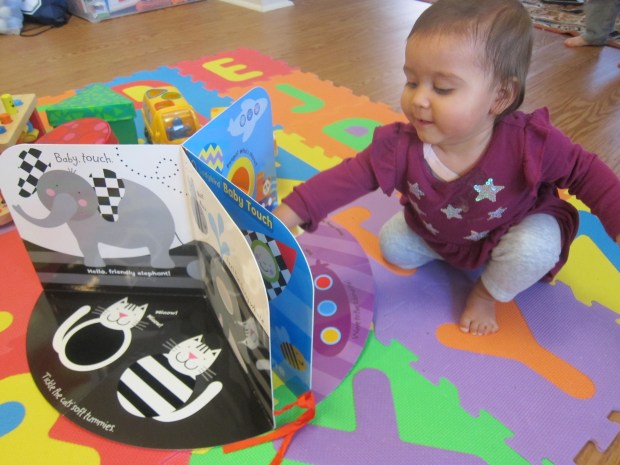
Finally, we checked out these three books at the local library:

  • Baby Touch: Tummy Time by Ladybird
  • Go! Go! Go! by Nicola Bird
  • Red Wagon by Renata Liwska

The Ladybird book in particular is fantastic, actually an accordion that folds open and can keep Veronika entertained for hours.

Panda Senses alt

We’re looking forward to more Panda crates, especially as the toys become more appropriate for Veronika’s true age.

Head, Shoulders, Knees, and Toes

Head Shoulders (1)In the past, I’ve sung songs like ‘Head, Shoulders, Knees and Toes‘ to Veronika mostly for fun. But now that she’s saying her first words (like “cat“!), songs like these are great to learn vocabulary. Because babies love to mimic, see if your little one will follow along and pat parts of his or her body as you sing.

Head Shoulders (6)

We have a fun interactive learning desk with pictures of the body; it was great to sing the song at the desk and point to the corresponding pictures.

Head Shoulders (2)

I also pointed out each word on her corresponding body part. Knees and toes!

Head Shoulders (4)

I like to use my own face when pointing out eyes, ears, mouth, and nose. Hopefully she will reach out and start touching features back, soon.

Head Shoulders (3)

Finish the song with a big round of applause!


Catnip Toys

Catnip Toys (6)

It’s our cat’s birthday today, 11 years old! Travis loved the idea of celebrating our little guy, so we put together these easy catnip toys for him.

Ranger Rick had a template to follow for Halloween-themed cat toys, since National Cat Day (October 29) falls just before the spooky holiday. I printed out the pumpkin and ghost templates and  traced them onto appropriately colored felt, along with shapes for facial features and a green pumpkin stem.

Catnip Toys (2)

Whoops, because I didn’t have much white felt, some of our ghost features were reversed white-on-black.

Catnip Toys

Use fabric glue or hot glue to attach both sides of each shape nearly all the way around, leaving an opening. Travis helped stuff these openings with cotton balls.

Catnip Toys (3)

And then of course we added catnip, a small spoonful to each. Travis thought the smell of it was wild, and loved the idea that it would drive the cat crazy.

Catnip Toys (4)

Seal up the remaining seam with more glue. I glued on the features, and then it was time to treat the cat!

Catnip Toys (5)

Travis loved tossing down the birthday present.

Catnip Toys (8)

And our cat was quite appreciative! How will you celebrate National Cat Day? Please share in the comments!

Catnip Toys (7)

Make Binoculars

Make Binocs (4)

These super-simple binoculars are a fun way to introduce the item to your baby. No complicated decorations or lenses here, just some quality “I Spy” play!

I taped together two empty toilet paper tubes with several layers of colored tape. Sometimes I prepare crafts while Veronika watches so she can play along, but I knew she would be an imp with the tape, so secretly put these together while she napped.

Make Binocs (2)

Once awake, I peered at her through the binoculars. Hello, Veronika!

Make Binocs (6)

I showed her how to hold the tubes up to her eyes and verbalized what I saw. “Look, there’s the cat! Look, it’s daddy! Look, a toy train!”

Make Binocs (3)

Next it was her turn; I handed the binoculars over, and she puzzled over how to peer through them. She loved holding them, and placed them up to her head in imitation, although needed my help to get them centered over her eyes.

Make Binocs (5)

Her favorite though was whenever I looked at her through them, rewarding me with a big smile each time. A great first pair of binocs!

The Kitchen Bowl

Kitchen Bowl (11)

Forget the World Series or the Super Bowl, today Travis and I competed in the… Kitchen Bowl!

This was an adorable idea from Raddish Kids to round out their Game Day crate. If you have a large family, or are hosting a family gathering, or just want to invite friends over, then you can play these games with proper teams. Travis and I had more of a “tennis match”, going one-on-one to see who could win. For a few of the activities, I challenged him solo.

First, of course, we had to name our teams. Travis declared himself the Speedy Lemons (after his favorite food) and made the Melty Ice Creams. We decorated posters with our names and mascots, and Trravis was proud of his very inventive blue lemon.

Kitchen Bowl (6)

The first event was the Ultimate Taste Test. Could he identify items blindfolded? I knew Travis wouldn’t be “game” for anything liquid, so stuck to yummy snacks like mini bagels, graham crackers, and cashews. He aced them all (pun intended!).

Kitchen Bowl (9)

Next we played a round of Basket-foil. Wad up aluminum foil into balls (about 6 per team) and place a mixing bowl across the room.

Kitchen Bowl (1)

See who gets the most baskets in 60 seconds! We tied with 2 each.

Kitchen Bowl (2)

Tong Training got lots of laughs: Each team has two cups, one filled with 1/4 cup beans. See how long it takes to transfer the beans from one cup to the other. The Speedy Lemons had an impressive 45 seconds.

Kitchen Bowl (3)

You’ll need to work those fine motor skills if one drops.

Kitchen Bowl (4)

Uh oh, the Melty Ice Creams upended the cup.

Kitchen Bowl (5)

Then I challenged him to Memory Madness. I placed 5 utensils in a brown bag (use up to 10 items for bigger kids) and had Travis look at them for 30 seconds. Could he remember all 5?

Kitchen Bowl (7)

With some coaching from the sidelines, he proudly recalled all the items.

Kitchen Bowl (8)

Finally, Speed Whipping! I set out two bowls and two whisks. We had vegan Coco Whip which won’t really whisk up into stiff peaks, so this was just a matter of being silly and seeing who could whip fastest. The Melty Ice Creams came out on top!

Kitchen Bowl (10)

Did I mention this was all before the school bus came? What a way to start the morning!

Kitchen Bowl alt.JPG

Baby Food Jar Play

Baby Food Jars (6)

Veronika hasn’t eaten baby food out of jars in ages (this little miss prefers finger foods), but I like to keep a few empty jars on hand for games and activities. Today she kept so busy with 4 jars and 4 lids and this simple activity.

I set the jars in front of her on a soft surface (be sure your floor is well padded if using glass jars).

Baby Food Jars (1)

To start, I simply showed her how to remove a lid, and then place it back on. Babies will instantly want in on this action. Veronika snatched off the lids (I had them very loose) and tried to put them back on.

Baby Food Jars (3)

It was so interesting to watch the brain at work on this one. At first she put the lids on upside down, or on the bottom of the jars.

Baby Food Jars (2)

But after a few tries, she was putting them on right side up, even making them a little tight.

Baby Food Jars (7)

She looked so pleased with herself and had to do it over and over!

Baby Food Jars (4)

For extra fun, I put small toys inside a few of the jars. I thought she would be interested in digging for the rewards once the lids were off, but truly the lids and jars themselves were what fascinated her.

Baby Food Jars (5)

I loved watching this sequence: She gets the lid on.

Baby Food Jars (9)

Then off again.

Baby Food Jars (8)

Then peeks inside for a toy!

Baby Food Jars (10)

She was one very pleased little girl.

Baby Food Jars (11)


Car Tracks in Baby Food

Car Tracks (2)

Veronika loves to vroom cars around on the floor (she even says “vvvv” as she does so!) and so I thought: Why not turn it into an art project?

I taped craft paper down to her highchair tray, and spooned on a little bit of jarred baby food. I added a few trucks (firetrucks and school buses are favorites) and let her go wild.

Car Tracks (1)

She immediately began vrooming the wheels through the blobs of food, and was rewarded with car tracks. I showed her how we could stretch these out to the edge of the paper, or make tracks that zig-zagged back and forth.

Car Tracks (3)

The paper seemed more hindrance than helper, so I stripped it off and repeated the game right on her high chair tray; luckily it’s an easy one to clean! She liked this version better.

Car Tracks (4)

And took a few tastes of her artwork, too!

Car Tracks (5)

A thoroughly enjoyable little activity, with a snack built right in.

Cauliflower & Potato Mash

Cauliflower Potato Mash

This twist on mashed potatoes is a great way to sneak in new veggies for babies and toddlers!

Ingredients:

  • 2 yellow potatoes
  • 1 head cauliflower
  • 1 cup soy milk
  • 1 tablespoon Earth Balance butter
  1. Peel and chop the potatoes. Place in a saucepan and cover with water; bring to a boil, then continue to cook for 10 minutes, until tender.
  2. Meanwhile, cut the cauliflower into florets. Steam for about 7 minutes, until tender.
  3. Combine the cauliflower and potatoes in a large bowl, along with the soy milk and butter. Mash with a potato masher until smooth.

We also like stirring in a few thawed green peas, which add nice texture!

Cauli Mash

Cranberry Chemistry

Cranberry Chem (6)

The cranberry harvest has hit the shelves, making it the perfect time of year to experiment with this under-appreciated berry. Okay, so this quick science trick uses cranberry juice, not whole fresh cranberries, but it’s still a fun seasonal project for kids!

I set up a few test tubes about 1/3 of the way full with cranberry juice and laid out baking soda and lemon juice.

Cranberry Chem (1)

First, Travis added 1 teaspoon baking soda to one test tube. It fizzed instantly, always the most exciting part.

Cranberry Chem (2)

When the bubbles settled, the cranberry juice was noticeably more yellow.

Cranberry Chem (3)N

ow add 1 teaspoon lemon juice (or citric acid) to the same test tube. It will return (almost) to the original color. The color became sort of striated in ours, so the return to normal was clearest near the bottom of the tube.

Cranberry Chem (5)

The science at work here is base (baking soda) first neutralizing the anthocyanins in the juice, and then the acid returning it to normal. Travis had fun simply experimenting from there! He thought we might make it extra yellow by adding 2 teaspoons baking soda (that one was really fizzy!).

Cranberry Chem (4)

Next time, we’ll think of other solutions we can add, like soda or baking powder.