Squishy Bag

Squishy Bag (6)

Sometimes you just need a good old-fashioned way to entertain a toddler, and today this squishy bag was it. There is nothing fancy here, just good squishy fun.

The mixture inside is similar to a finger paint recipe I’ve made. Bring 3 cups water to a boil. Meanwhile, whisk together 4 tablespoons cornstarch and about 3 tablespoons water to form a paste. Add the cornstarch mixture to the boiling water and continue to cook for 1 to 2 minutes; the mixture will look like Vaseline.

Remove from heat and stir in food coloring. I divided my batch in half so Veronika could have red and green.

Squishy Bag (1)

Let cool slightly before transferring to zip-top plastic bags. Seal (I recommend duct tape along the top for added security) and then it’s time to play!

Squishy Bag (2)

I gave the bags to Veronika while the mixture inside was still warm, but not hot. Be sure to check the temperature with your own hand, first. This added a tiny temperature lesson to the activity.

Squishy Bag (3)

She really loved the way this one felt!

Squishy Bag (8)

She also was delighted when I showed her how to make shapes, which will linger for a few moments in the goo. A “V” for Veronika was easy.

Squishy Bag (5)

A star (her favorite shape) was a bit harder to make clearly, but she loved that we tried!

Squishy Bag (9)

Then I showed her how to hold the bags tightly at one corner and squeeze, which was a delight.

Squishy Bag (11)

Squeeze!

Squishy Bag (12)

Eventually the mixture inside was completely cold, but she still enjoyed squishing about for a while. Next time I would do this particular sensory bag in snack-size zip-top baggies, as I think it would be easier for her hands.

Squishy Bag (7)

Porcupine Playdough

Porcupine Playdough (8)

Play dough is a great way to keep little hands busy no matter what, but if you want to add an extra element of fun, make it spiky… by designing little “porcupines”!

I cut paper straws into small pieces for this activity. You could also use craft sticks but I liked that I could vary the length of the straws. Some pieces were short and stubby and some were longer.

Porcupine Playdough (1)

Of course Veronika has no actual idea of what a porcupine is, but she sure does know that pushing straws into blobs of play dough was good fun!

Porcupine Playdough (2)

I demonstrated first, and she took right to it.

Porcupine Playdough (3)

Pulling them out was its own challenge, since the straws will stick a little. A good way to work those little muscles!

Porcupine Playdough (4)

She grew momentarily confused at one point when there was no where else to stick a straw in this play dough blob.

Porcupine Playdough (6)

Phew! I presented her with a new ball of play dough just in time!

Porcupine Playdough (5)

The game can easily continue with no more variation than this, but chances are it will turn into more free-form play dough play. Perfect for when big siblings are busy doing school work online!

Porcupine Playdough (9)

Highchair Fun

Highchair Fun (9)

Babies and toddlers love to play “dropsie” off a high chair tray, and this game lets them do that to their heart’s content!

Highchair Fun (1)

Choose a light-weight, favorite toy (around here that’s Daniel Tiger figures!) and tie a piece of yarn securely to one end of the toy. Tape the other end of the yarn to the high chair tray. I used lots of tape, knowing Veronika might be tempted to rip it up, or throw the toys so strongly the tape came loose.

Highchair Fun (2)

Then it was just a matter of sitting her down and demonstrating!

Highchair Fun (3)

She giggled when the toys dropped, and eagerly looked over her tray: where did they go?

Highchair Fun (7)

You can make the dropping silly and not scary by adding sing-song words like, “Uh oh trouble!” or “Dropsie!”

Highchair Fun (5)

I then showed her how she could pull on the yarn to retrieve a toy back all by herself. This took a few tries, but she started to get the hang of it.

Highchair Fun (6)

Now it was her turn to impishly dangle the toys off.

Highchair Fun (8)

As you can probably guess, this is a great way to occupy a toddler when dinner is almost ready.

Highchair Fun (10)

Where’s Teddy?

Where's Teddy (4)

This cute version of hide-and-seek will have your toddler busily chasing strings on the way to find a favorite toy!

For set-up, tie a string around a teddy bear’s leg (or another stuffed animal), and hide the animal somewhere in the house. Be sure to leave the yarn or string dangling where your toddler can easily spot it.

Where's Teddy (1)

The favorite bear around here is little British teddy that Veronika calls “Paddington”. “Where’s Paddington?” I asked her, signing “where” in baby sign language.

Where's Teddy (6)

She immediately started towards the stairs, since normally “Paddie” is up in her crib. I redirected her by tugging on the string.

Where's Teddy (3)

It was a little hard for her to wrap her head around the game on the first round. We followed the string together until we found “Paddie” behind a pillow.

Where's Teddy (5)

Next I hid him in a drawer, and this time she understood a bit better about how to follow the string.

Where's Teddy (7)

As with any game that involves string, be sure to supervise closely during play.

Little Passports: Egypt

LP Egypt (17)

Once again Little Passports saved the day here during Covid-19 home school. At a moment when Travis balked against assigned lessons this week, the latest package from “Sam and Sofia” proved far more interesting.

LP Egypt (7)

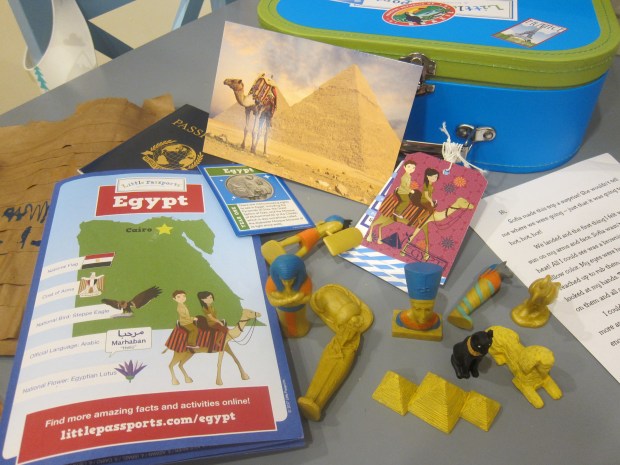
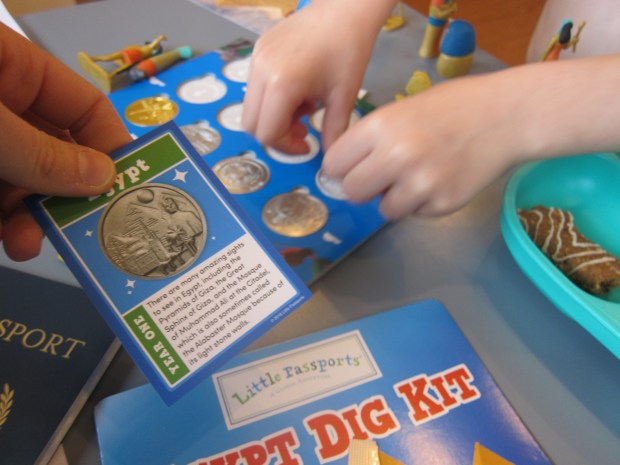
As always, he started off by putting the latest country coin in with his collection, and we added Egypt’s flag to his passport.

LP Egypt (2)

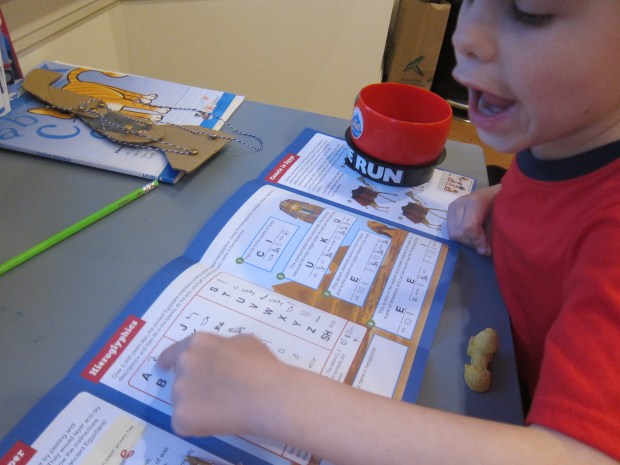
The booklet this month was fantastic for a kindergartner; I was so proud of (and amazed at!) his speed with a hieroglyph decoding activity. There was also a spot-the-difference page about camels, a geographic word scramble, and neat information on ancient headdresses. I would rate this booklet much more approachable for a five-year-old than the one from France.

LP Egypt (6)

Souvenir:

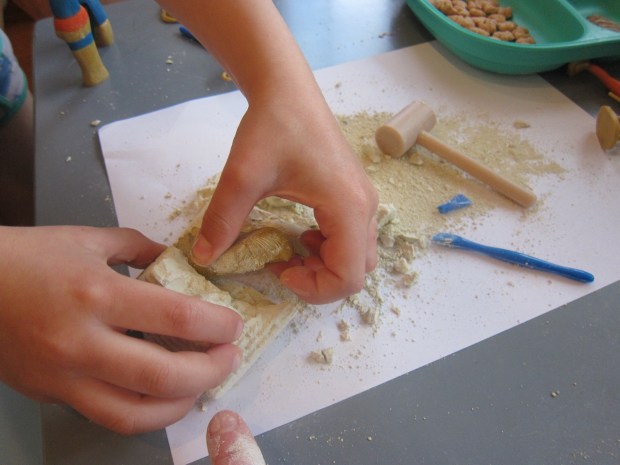
This month’s gift was an Excavation Kit and Travis needed to start digging the moment he saw it.

LP Egypt (3)

We chipped and chiseled and cleared the dust until he’d uncovered a little mummy figure. Travis was ecstatic and played with it all afternoon.

LP Egypt (4)

Further Activities:

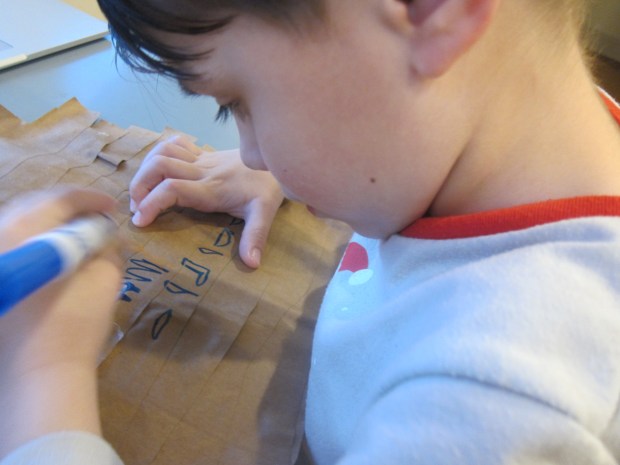
After checking out extras online like photos, Arabic phrases, and silly jokes, we started in on a few additional activities. First up was making “papyrus paper”, much as the Egyptians used to overlap stalks of papyrus plant. This one was a little messy so lay down one or two sheets of wax paper to cover your surface. In a cup, mix together equal parts white glue and water (about 1/4 cup each) and stir with a craft stick.

LP Egypt (12)

Cut a brown paper shopping bag into strips that are about 8 inches long. Begin laying these down on the wax paper, brushing over each with the glue. (Alternatively, you can dip each strip in the glue mixture and then smooth it down, but this sounded too messy to Travis). Let dry completely.

LP Egypt (15)

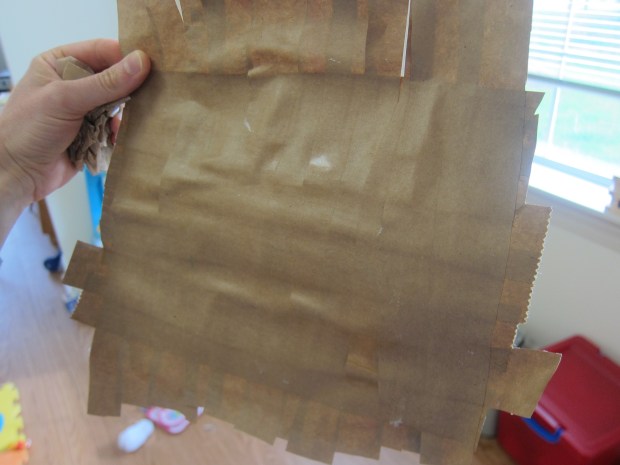
It will lift off the wax paper once dry, and does indeed have a neat feel and texture. Travis practiced writing his hieroglyphs!

LP Egypt (16)

Next up, we mummified an apple! This will definitely appeal to kids interested in the mummy aspect of Egyptian history. Pour 1 and 1/2 cups baking soda and 3/4 cup salt into a large zip-top bag. Peel an apple and carve into a desired mummy face. We tried to make the lines of King Tut’s headpiece along the sides, although admittedly with limited art skills.

LP Egypt (10)

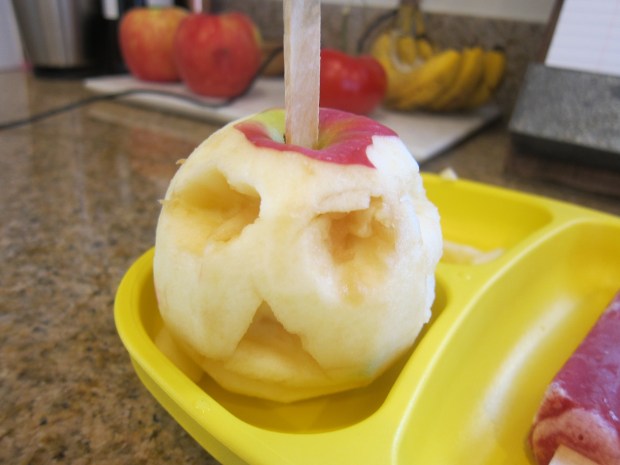
Insert a Popsicle stick into the apple and submerge in the baking soda mixture. Now let it stand for one week – or even two! I’ll update this post once our mummification is complete.

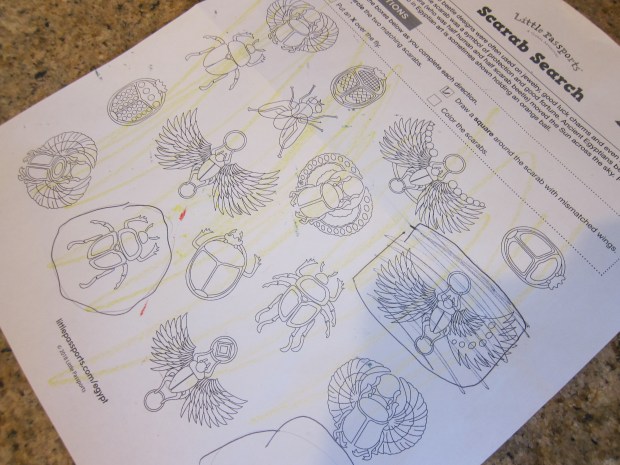
There were a few other suggestions online, although Travis was only mildly interested in a scarab beetle coloring page and coloring in the Egyptian flag.

LP Egypt (14)

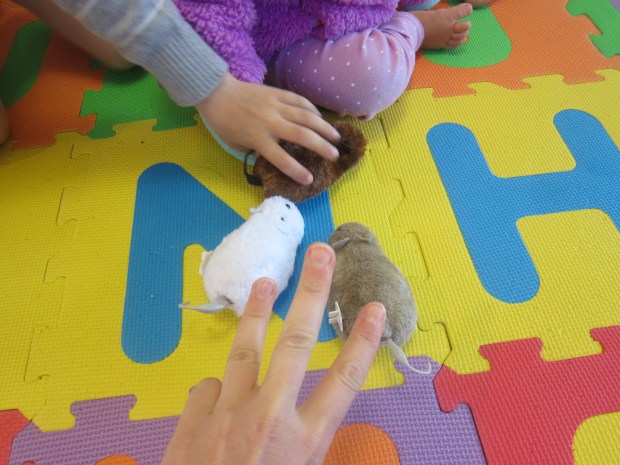
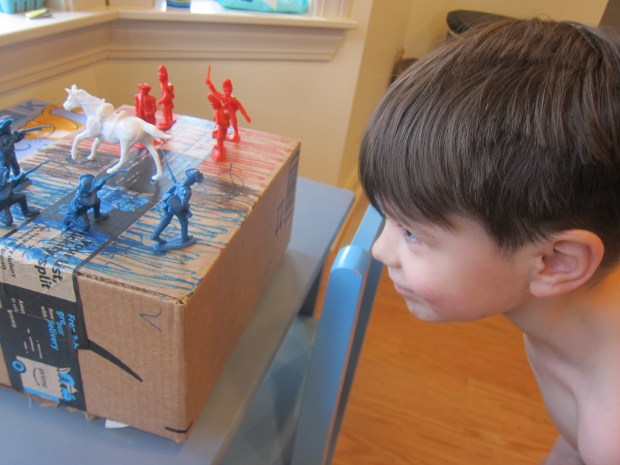
I did, however, purchase the optional add-on of Egyptian mini-figures and these were a huge hit! The tube included fun toys of King Tut, Nefertiti, the Sphinx, and more.

Recipe:

We finished the voyage with a recipe for the popular Egyptian flatbread called aish baladi, similar to pita bread. The recipe was too complicated for Travis; he helped with the initial few steps, but then I was left to finish the project. Tastewise, it was a huge hit! Travis enjoyed it plain, but you can dip it in hummus, too, or stuff it with a filling. King Tut watched us bake, of course:

Aish Baladi (2)

Ingredients:

  • 1 and 1/2 teaspoons instant yeast
  • 1 and 1/4 cups warm water
  • 2 and 1/2 cups flour
  • 1/2 teaspoons salt
  • 1 tablespoon canola oil
  • 1/4 cup wheat germ
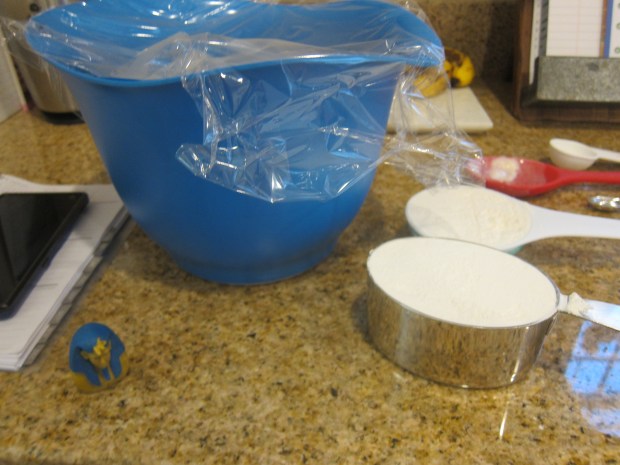
  1. Combine the yeast and warm water in a large bowl, whisking until the yeast is dissolved. Add 1 cup flour to the mixture. Cover the bowl with plastic wrap and let rest for 20 minutes or so.
  2. Uncover the dough and mix in the salt, oil, and remaining flour. Transfer to a lightly floured surface and knead the dough, then place in a bowl and let rise for 1 hour.
  3. Divide the dough into 8 portions, and roll each into about a 5-inch circle. Place on a baking sheet and sprinkle with some of the wheat germ. Repeat with the remaining dough portions. Cover and let rise for about 30 minutes, while the oven preheats.Aish Baladi (3)
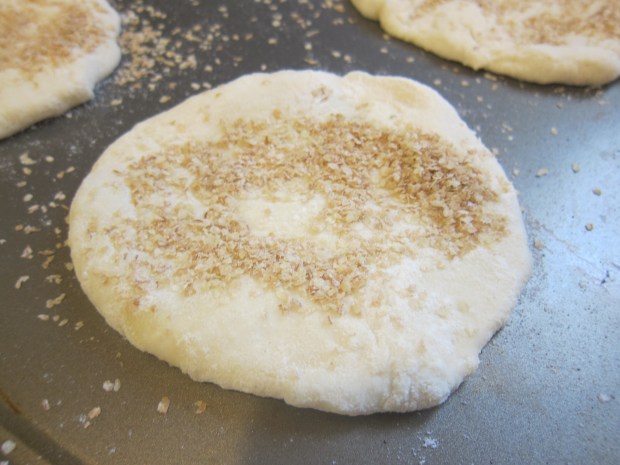
  4. Bake at 500 degrees F for 7 minutes.

Aish Baladi (4)

Update: The apple mummy came out so neat! One week later it had shriveled and shrunk, but felt smooth and soft like a dried apple. There was no rotten smell or aspect to it, which was quite cool.

Apple Mummy

What a neat way to see a “mummy”!

Living Room Maze

Living Room Maze (5)

This activity is a great way to entertain a toddler on a rainy morning, not to mention it makes use of leftover boxes! You’ll need large enough boxes that your child can crawl upright through them.

In the past, we’ve decorated boxes to be more like a house or even a castle. The purpose this time wasn’t so artistic, but more about letting Veronika explore spatially. I attached two boxes together to make a big tunnel, and cut two windows so she could poke her head out.

Living Room Maze (2)

There was also a third box branching off to the side to make it a “maze”.

Living Room Maze (7)

Well of course she was eager to explore! The windows were great fun for peekaboo.

Living Room Maze (8)

She crawled back and forth, and in and out, and through and around. I used all of these spatial words as she played.

Living Room Maze (9)

She also delighted in bringing toys inside with her.

Living Room Maze (6)

Eventually big brother wanted in on the action, and he was just the right height for popping through the sun roof!

Living Room Maze (10)

I loved watching the kids turn it into a cozy nook for reading. In sum, this kept us busy all morning!

Living Room Maze (11)


Five Little Mice

Five Little Mice (2)

Subtraction games during Travis’s home schooling reminded me how important counting rhymes are for toddlers, too, an early intro to addition and subtraction long before they fully grasp the concepts. Here are the words to a fun one to try:

Five little mice went out to play,

Gathering crumbs along the way.

Out came pussy cat, sleek and fat.

Four little mice went scampering back.

Repeat until there is one mouse left, then add this twist at the end:

Out came pussy cat, sleek and very fat.

The mouse ran away, what do you think about that! 

Five Little Mice (4)

We have a few mouse toys in the house, so today I acted the story out for her in addition to speaking the words. You can add a kitty cat stuffed animal, too! If you don’t have props on hand, walk your fingers out for the scampering mice, using the appropriate number of fingers in each verse.

Five Little Mice (1)

Then make big whisker shapes with your fingers when pretending to be the fat cat.

With or without props, this is a fun finger play!

Five Little Mice (5)

Kindergarten Home School Week 5: Friday

Home School 25 f

I’m happy to report that Travis finished this fifth week of Covid-19 home schooling on a high note. Here’s a quick run-down as we head into the weekend. You’ll notice we didn’t take a break in the morning, which helped ward off temper tantrums of transitioning from play to “class”.

9-9.30: ELA. Travis worked on rhyming today. We looked at flashcards and took turns quizzing each other. Star and can? Thumbs down! Star and jar? Thumbs up!

Home School 25 a

This thumbs up made it feel silly for Travis. We then put together a booklet of the pairs we’d found, stapling them in since he didn’t want to use glue. He rounded out ELA by writing sight words in rainbow colors and did about 15 minutes on Lexia.

Home School 25 b

9.30-10: Math. Today’s big topic was subtraction, including an intro video from his teacher. He watched a read-through of Pete the Cat and His Four Groovy Buttons, and we followed up with a snack subtraction game. Travis enjoyed watching our snack lines of cereal puffs dwindle down. We talked about who had more, less, or equal to as the game went on. “School is fun!” he declared.

Home School 25 d

10-10.30: Social Studies. Although there won’t be a real Patriot’s Day parade this year, Travis watched a video about the holiday and then made his own parade float. Little sister wanted to help decorate, too!

Home School 25 e

Of course Travis wanted to play with his minutemen and red coat soldiers, after!

Home School 25 g

10.30-12.30: Long lunch/free play. This coincided well with baby sister’s nap.

12.30-1: Art. First we watched a video of sea otters, and then checked out animals on the Monterey Bay Aquarium’s website. His assignment was to draw his favorite animal in its habitat. Here’s a shark in the ocean!

Home School 25 h

That rounded out the day. The afternoon included a toddler music class for little sister, and a chance to get some fresh air despite cold weather. When he needed direction for his play, tangrams and online yoga helped fill the time.

Kindergarten Home School Week 5: Thursday

Home School 24 c

It was another day of hits and misses, here in our Covid-19 home school. I’d be very curious to hear from readers what you’ve found that works and what doesn’t. Spreading out lessons all day? Having “school” in larger chunks of time? Please share in the comments!

9-10: ELA. Travis’s lesson today was going through a magazine for sight words. He seemed to particularly enjoy finding familiar words in adult reading.

Home School 24 a

It was also a nice lesson on how some words are more common than others. For example, he realized how many times he’d spotted “the” as we glued the words down after (to cardboard! I’m running low on construction paper). He also happily did 20 minutes on Lexia, which left me free to make beanbag fishfor lil sis.

Home School 24 b

10-10.30: Math. We played a game called Roll and Record, which teaches kids to add the pips from two dice and record the result. Fill in the result on a graph numbered 1 through 12 until a number “wins”! Any adult who has taken a probability course can guess how our chart looked. I was thrilled that it worked out as perfectly one could hope, with 7 the clear winner. He even understood why as we discussed it after, how more combinations on the dice add up to 7 than any other possibility.

Home School 24 d

10.30-11: Recess/snack. Travis wanted to play Legos instead of heading outside, which turned out to be a mistake. It was impossible to rope him back in for just about anything after.

11-12: Specials: We tried to do Music; he had a tantrum.

Home School 24 e

We tried to do Spanish (a silly video teaching likes and dislikes). Nope. We tried to do an emotional wellness handout from his school counselor. Nope.

Home School 24 f

At a certain point, I realized I was hindering his emotional wellness for the day, so we just played Uno.

Home School 24 g

12-1: Lunch/cooking. Travis helped make a salsa recipe, which helped reset his mood.

1-2: Yoga! On a whim, I started up a Star Wars-themed yoga from Cosmic Kids. Wouldn’t you know, it kept Travis entranced and active for a full hour. This counted as his teacher’s suggestion to act out a story too! We ended on that high note, which left time to socialize with friends online and enjoy free play.

Home School 24 h


Fishy Beanbag

Fishy Beanbag (4)

This little craft is great fun for a toddler to play with, and simple to make with items you likely have at home.

Fishy Beanbag (1)

Start with an old sock and fill it about three-quarters of the way with dried beans. Twist the end to make a tail, and secure with yarn or string.

Fishy Beanbag (2)

I drew on eyes, fins, and scales with a fabric marker; if you want to get a little craftier, cut out pieces of felt for these details. To make the fish mouth, poke the fabric in slightly where a mouth would be and use hot glue to secure.

Fishy Beanbag (3)

I wriggled the fish up to Veronika, and she was delighted! She loved how heavy it was, and began “swimming” it around the room. I actually wouldn’t make it quite so heavy next time, or we could have played catch with it and worked on her catching skills!

Fishy Beanbag (5)

I next showed her how to toss the fish into the laundry basket “ocean”. This was good fun but we quickly realized we needed more fish.

Fishy Beanbag (8)

Since I didn’t want to use up all the extra socks in the house, I simply balled one inside the other and knotted string at the end for a quick version, minus the decorations.

Fishy Beanbag (10)

Now she had a school of fish to play with!

Fishy Beanbag (13)