Salty Cave Crystals

Salty Cave Crystals (3)

Travis has seen stalactites and stalagmites in cartoons and real life, so he was intrigued when we set out to make our own. You’ll need about a week for this project from start to finish, so it’s also a good lesson in patience!

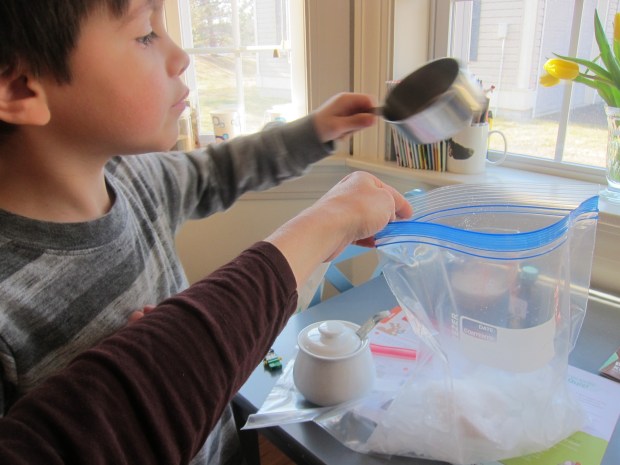
For set up, add 1/4 cup Epsom salts to each of two paper or plastic cups. Fill with water and stir for 1 minute. There should still be some Epsom salts undissolved in the bottom, making this a supersaturated solution.

Salty Cave Crystals (1)

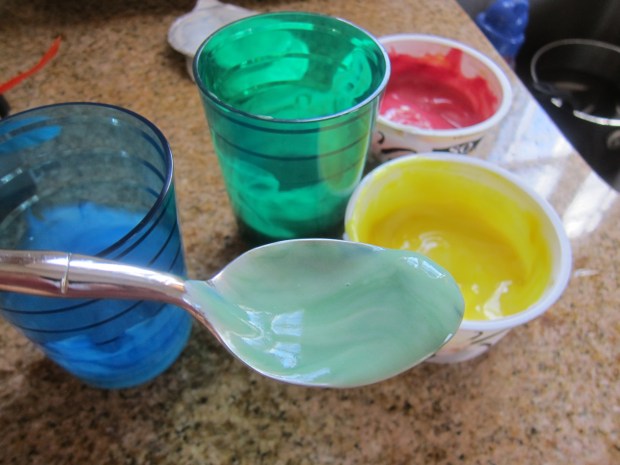
Add food coloring in your child’s colors of choice. Travis stirred in blue and green.

Salty Cave Crystals (2)

Tie a piece of yarn around two paper clips (or safety pins), and dangle the ends in the cups. Now set the whole contraption some place where it can sit undisturbed with the yarn dangling over an old jar lid between the two cups.

Alas, we didn’t have great results with this. Either something is wrong with Epsom salts in our apartment these days, or we’re making a mistake! But we could see crystals growing lightly along the string.

Salty Cave Crystals (6)

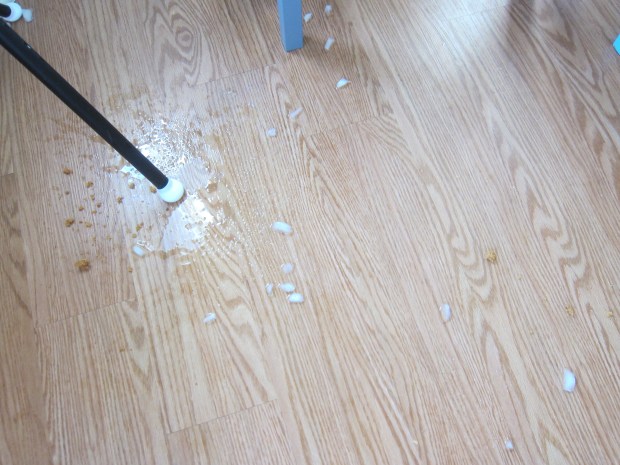
Interestingly, there was a leak in one cup and the best crystals formed around the base. So Travis declared these our stalagmites.

Salty Cave Crystals (8)

As a side note, we could also see the blue food coloring creeping up the yarn: capillary action in action!

Salty Cave Crystals (7)

What’s That Smell?

What's That Smell (2)

For some olfactory fun today, I presented Veronika with smells from around the house and we had fun naming each item as we smelled it. Unlike when she was little, now she can parrot these words back to me, hold the items herself, make yummy noises of delight, and more.

I wanted to clearly differentiate between edible and non-edible items in the game, so we started with the latter. I laid out a flower, tea bags, spice jars, and three different scents of soap.

What's That Smell (1)

One by one, I held them to my nose, then showed her how to do the same. For breakable items, like the spice jars, I waved the item under her nose. But she got the hang of it solo with the soap!

What's That Smell (4)

The tea bags were a big hit, so much so that I got out a bag of coffee and let her inhale that one deeply, too.

What's That Smell (5)

She looked so pleased when she smelled the cinnamon sticks, but she pulled back quickly from curry and a few other spices.

What's That Smell (3)

Next we moved on to items she could smell and eat. I set out a few pungent foods, like cooked vegan sausage and yogurt. Berries would be good, too. Or berry yogurt!

What's That Smell (6)

Veronika then found other fun ways to play with the items, and I was more than happy to watch her toddler brain explore. The cinnamon sticks were fun to take in and out of the jar, and the yogurt was fun to spoon through.

What's That Smell (7)

Finally, I made her a chart with a smiley face for the scents she had liked and a sad frown for ones she did not. Older toddlers will get a kick out of this part of the lesson, and may want to add to it on occasion.

What's That Smell (8)

Have fun continuing this kind of play no matter what room of the house you’re in, whether the bathroom or even outside.

Edible Finger Paint Activity on Foil

Baby Foil Painting (6)

Between an edible yogurt-based paint, pretty colors, an outdoor setting, and a shiny piece of foil as the canvas, what’s not to love about this project? The edible paint means it’s safe to play with toddlers or even younger babies.

It was warm enough that we took the activity outside to the patio, where a big beach towel could contain any mess. If it’s summer, you might consider stripping baby down to a bathing suit or diaper, in fact!

To make the paint, spoon non-dairy vanilla yogurt into containers or cups and add a few drops of food coloring to each. The pretty pastel colors felt just right for spring.

Baby Foil Painting (1)

For her “canvas”, I lightly crumpled up a piece of aluminum foil, then opened it back up again. This added lots of fun texture and shine to capture her attention. Note: I did also set down a brown paper bag in case she wanted to paint on that, too, but the foil was the definite favorite.

Baby Foil Painting (3)

She was eager to paint right away, and especially intrigued with using a brush instead of her fingers. Then she started painting her pants! Luckily it was warm enough to take them off and continue the activity.

Baby Foil Painting (5)

Next she loved pouring the paint cups right onto the canvas. After that we swished the yogurt around to even out the big blobs.

Baby Foil Painting (7)

Here is her final masterpiece:

Baby Foil Painting (8)

This activity was good yummy colorful fun.


Erupting Chocolate Ooblek

Chocolate Ooblek (3)

Today I made Veronika a new version of ooblek. Wanting to make this one stand out from the crowd, not only did this version feature chocolate, but it could explode! And yes this activity is toddler safe.

As a reminder ooblek is about 2 parts cornstarch to 1 part water. From there, there are so many ways to fancy it up. Unfortunately I messed up the texture of our ooblek from the get-go because I thought I had a full box of cornstarch in the pantry. It turned out I only had less than 1 cup left, and I’d already poured in over 1 cup of water to a plastic tub. So our mixture was on the watery side, not true ooblek.

But that’s okay, because there was more for Veronika to play with here! First, we sprinkled on cocoa powder in addition to the cornstarch. This was purely for the heavenly smell. Yum!

Chocolate Ooblek (1)

We also added 2 tablespoons baking soda because we wanted our ooblek to erupt. (Note: Be careful, because the baking soda will offset the now-solid-now-liquid property of ooblek, as it will dissolve in the water).

To make the explosions, add white vinegar to squeeze bottles and squirt in a bit at a time. This is great for exercising those little fingers.

Chocolate Ooblek (4)

Veronika almost couldn’t believe it when the first bubbles appeared. I had to help out with lots of the squeezing, but she was transfixed watching the eruptions every time the vinegar hit the baking soda.

Chocolate Ooblek (6)

The resulting bubbles are really neat ones, too, almost like honeycomb, but with a quasi-solid texture. They won’t pop until you pop them!

Chocolate Ooblek (7)

This made for lots of fun poking and prodding. Veronika was a little hesitant to get her hands messy, but adding a spoon helped her get in there.

Chocolate Ooblek (9)

There also was also an added auditory component to the fun, thanks to the hissing sound whenever baking soda mixed with the vinegar.

Chocolate Ooblek (11)

In sum, this project made for one happy girl!

Chocolate Ooblek (10)


Corn Muffins

Corn Muffins (1)

These not-too-sweet muffins make a great breakfast with a pat of vegan butter, or can be served alongside a bowl of soup for dinner.

Ingredients:

  • 1 cup yellow cornmeal
  • 1 cup flour
  • 1 teaspoon baking soda
  • 2 teaspoons + 1/4 teaspoon baking powder, divided
  • 1/2 cup applesauce
  • 1/4 cup agave nectar
  • 1 cup unsweetened soy milk
  • 3 tablespoons canola oil
  1. In a bowl, combine the cornmeal, flour, baking soda, and 2 teaspoons baking powder. Set aside.
  2. In a large bowl, whisk together the remaining 1/4 teaspoon baking powder and the applesauce. Add the agave, soy milk, and canola oil.
  3. Add the dry ingredients to the wet ingredients, stirring just until combined.
  4. Bake at 400 degrees F for 25 minutes.

We particularly like these next to a bowl of lentil soup!

Corn Muffin alt

Note: The muffins turned out quite browned on the outside, following these baking instructions. You may want to reduce the cook time by a few minutes, or reduce the oven temperature to 375 degrees F for a lighter cornbread.

Corn Muffins (2)

Ice-Cream Snowballs

Ice Cream Snowballs (7)

The weather hit an unseasonable 75 degrees F today, so we celebrated with homemade ice cream!

This project was a fantastic (edible!) addendum to Travis’s recent exploration of crystallization. To start, fill a large zip-top plastic bag about halfway with ice. Add 6 tablespoons coarse salt.

Ice Cream Snowballs (1)

In a sandwich-sized zip-top bag, combine 1/2 cup plain non-dairy creamer, 1 tablespoon sugar, and 1/2 teaspoon vanilla extract. Seal tightly.

Ice Cream Snowballs (2)

Place the creamer mixture in the larger bag, making sure it’s covered by the ice cubes. Now shake!

Ice Cream Snowballs (3)

Travis and I took turns, as the recommended shake time was 7 minutes.

Ice Cream Snowballs (4)

Whoops, a spill at about the 4 minute mark! But we were undaunted and kept going.

Ice Cream Snowballs (5)

At 5 minutes, we declared our ice cream done (and our arms exhausted).

Ice Cream Snowballs (6)

The ice cream turned out amazing! It looked crumbly at first, but after a few minutes it softened up just enough and was just like store-bought ice cream. Rainbow sprinkles were a must of course.

Ice Cream Snowballs (8)

Wow, ice cream on the back patio in March!

Ice Cream Snowballs (9)

What a treat this was for the kids.

Ice Cream Snowballs (10)

Noodle Knowledge

Noodle Knowledge (2)

Travis’s latest Raddish Kids included this cute lesson, a chance to learn more about noodles and pasta – and the difference between them!

To start things off, I set out a station where he could explore a wide variety of pasta shapes and sizes.  Our array included: rotini, cavatappi, spaghetti, elbow macaroni, small shells, and penne.

Noodle Knowledge (3)

I challenged him to talk about the differences and similarities that he noticed. Some were long (spaghetti), some were short (cavatappi). Some were straight (penne), some were curly (rigatoni), etc.

Noodle Knowledge (8)

This is a fun chance to introduce your kids to the idea of a Venn diagram, showing how categories can overlap. Older kids, especially, might enjoy drawing detailed diagrams, although we kept ours simple.

Noodle Knowledge (7)

Once the exploration was done, we set up a game! Travis’s goal was to match up each pasta shape with its name, using yarn to connect them. This was also great for sight-reading!

Noodle Knowledge (6)

He was so into it that he wanted to snack on cooked spaghetti. This made for the perfect nosh while we watched a few suggested videos that delved deeper into the history of pasta.

Noodle Knowledge (5)

Make sure to check out a world map for a visual of key countries, like China and Italy.

Noodle Knowledge (4)

We had to finish with fun stories, of course. Raddish suggested The Great Pasta Escape by Miranda Paul and Noodle Magic by Roseanne Greenfield Thong, among others.

Noodle Knowledge (1)

I was surprised to see no mention of Strega Nona, the most classic spaghetti story I can think of, so we added that in. Afterwards, both kids wanted to play “Strega Nona” with a magic pot and leftover dry spaghetti, which was perhaps the best part of the whole lesson.

Noodle Knowledge (9)

Rainbow Jello Sensory Play

Rainbow Jello (5)

I originally intended this as a sensory project for Veronika, but it turned out that my kindergartner loved it just as much; it was a nice reminder that even though he’s into battling Star Wars Lego figures, he’s still a little boy at heart.

First you’ll need to make jel dessert in all colors of the rainbow. Regular jell-o is available in every color, but not the vegan brands. I can find vegan jel dessert in red, orange, and yellow, but for the other colors, I use clear jel dessert and add food coloring.

Rainbow Jello (1)

Prepare all the colors, then set in the fridge until firm. (Note: the green never did firm up, which may have been because I used too much food coloring and made it too watery. As a result, our sensory play had a variety of textures).

Rainbow Jello (2)

Spoon the jel desserts onto a tray in rainbow order. It won’t stay this way for long…

Rainbow Jello (4)

I placed the tray over a few towels and stripped Veronika down to a diaper – no worry about sticky clothes here – then let her loose with spoons and spatulas. She immediately got started!

Rainbow Jello (8)

As mentioned, big brother Travis wanted an equal share of this project. He couldn’t wait for a jello snack.

Rainbow Jello (7)

And just to play!

Rainbow Jello (6)

Soon the kids were scooping and stirring and mushing. They layered rainbow “cakes” and stirred up rainbow “soup”. “Soup!” Veronika proudly repeated back when Travis used the word.  There were lots of fun vocab words to use, like soupy and lumpy and blobby and wobbly.

Rainbow Jello (9)

Plus: “Yummy!” she said, whenever she got a little taste. A perfect way to fill over 30 minutes of play.

Rainbow Jello (10)

Frozen Candy Cups

Peanut Butter Cups (8)

My family thinks these homemade peanut butter cups are better than the store-bought kind, and I’m pretty sure your family will agree!

Ingredients:

  • 3/4 cup non-dairy chocolate chips
  • 2 tablespoons + 2 teaspoons coconut oil, divided
  • 1 cup creamy peanut butter
  • 4 teaspoons strawberry jam
  1. Combine the chocolate chips and 2 teaspoons coconut oil in a small microwave-safe bowl. Microwave for 1 minute; stir, then return to the microwave for 30 seconds, or until melted. Spoon about 1 tablespoon chocolate mixture into the bottom of 8 muffin liners. Place in the freezer for 10 minutes.
  2. Combine the peanut butter and remaining 2 tablespoons coconut oil in a separate bowl. Spoon over the frozen chocolate, about 2 tablespoons per muffin liner.
  3. Dollop 1/2 teaspoon jam on each serving, and swirl with a toothpick. Freeze at least an additional 30 minutes before serving.Peanut Butter Cups (7)
  4. Serve frozen or the peanut butter will lose its shape.

Peanut Butter Cups (6)

Restaurant Games


Restaurant Games (var)

Dining out with a toddler is a lot harder than dining out with baby. While babies might be content to coo from a stroller and watch the world go by, not so your toddler! Here are a few favorite games I’ve found to keep Veronika occupied.

Drawing Games: Restaurants often provide paper and crayons… but good luck with that paper staying on the table. Now, I carry a roll of masking tape in my purse. Tape the paper down, and your toddler won’t be able to rip up his or her masterpiece!

Restaurant Games (bis)

Hide a Hand: Hide a small item in one hand. Let your toddler see it, but then close both fists. Today, for example, Veronika loved finding a piece of chalk over and over, grinning with delight no matter how many times I switched it back and forth between my hands.


Restaurant Games (3)

Hide-and-Seek: This is a classic of course. Hide a small object (a quarter works well) in an easy to spot location, and let your toddler be the seeker.

Restaurant Games (6)

Ta da! She found it under the menu.

Count Together: Finally, don’t forget about counting. Veronika already chimes along to “One, two, three…” and although she might not grasp what those words convey, kids can learn to parrot up to ten easily.  So count out sugar packets, crayons, single-serve creamers, or whatever else is on the table!

Restaurant Games (alt)

Today Veronika loved counting pieces of chalk into an empty plastic cup.

Restaurant Games (5)

And of course, it doesn’t hurt if you happen to be at an establishment so cool that the table itself is a chalkboard and there is a basket full of dinosaurs to play with!

Restaurant Games (7)

Do you have a favorite restaurant game with your toddler? Please share in the comments!