Christmas Doorknob Decoration

Christmas Doorknob (6)

Here’s a sweet Christmas decoration that toddlers will feel so proud to have made when they see it hanging around the house!

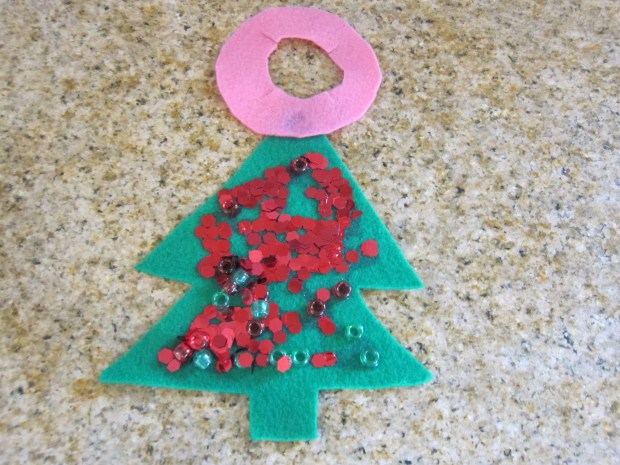
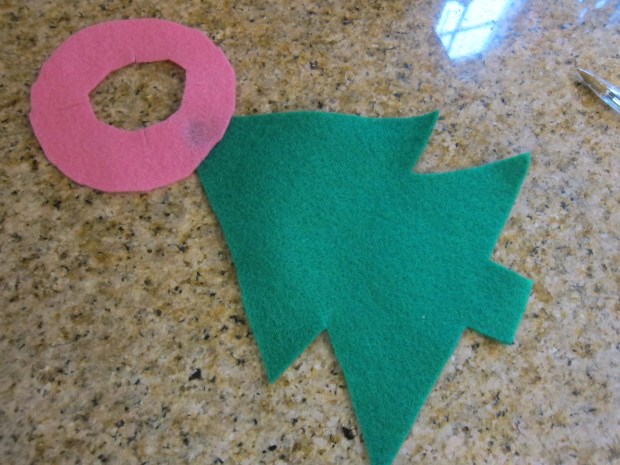
To start, I cut two shapes from felt. On pink felt (or red would work, too), I traced a 4-inch circle, then cut a smaller circle in the center, as well as four slits that would allow it to slip over a traditional round doorknob.

I then cut a Christmas tree shape (about 7 inches tall) on green felt. Use hot glue to attach the two together.

Christmas Doorknob (1)

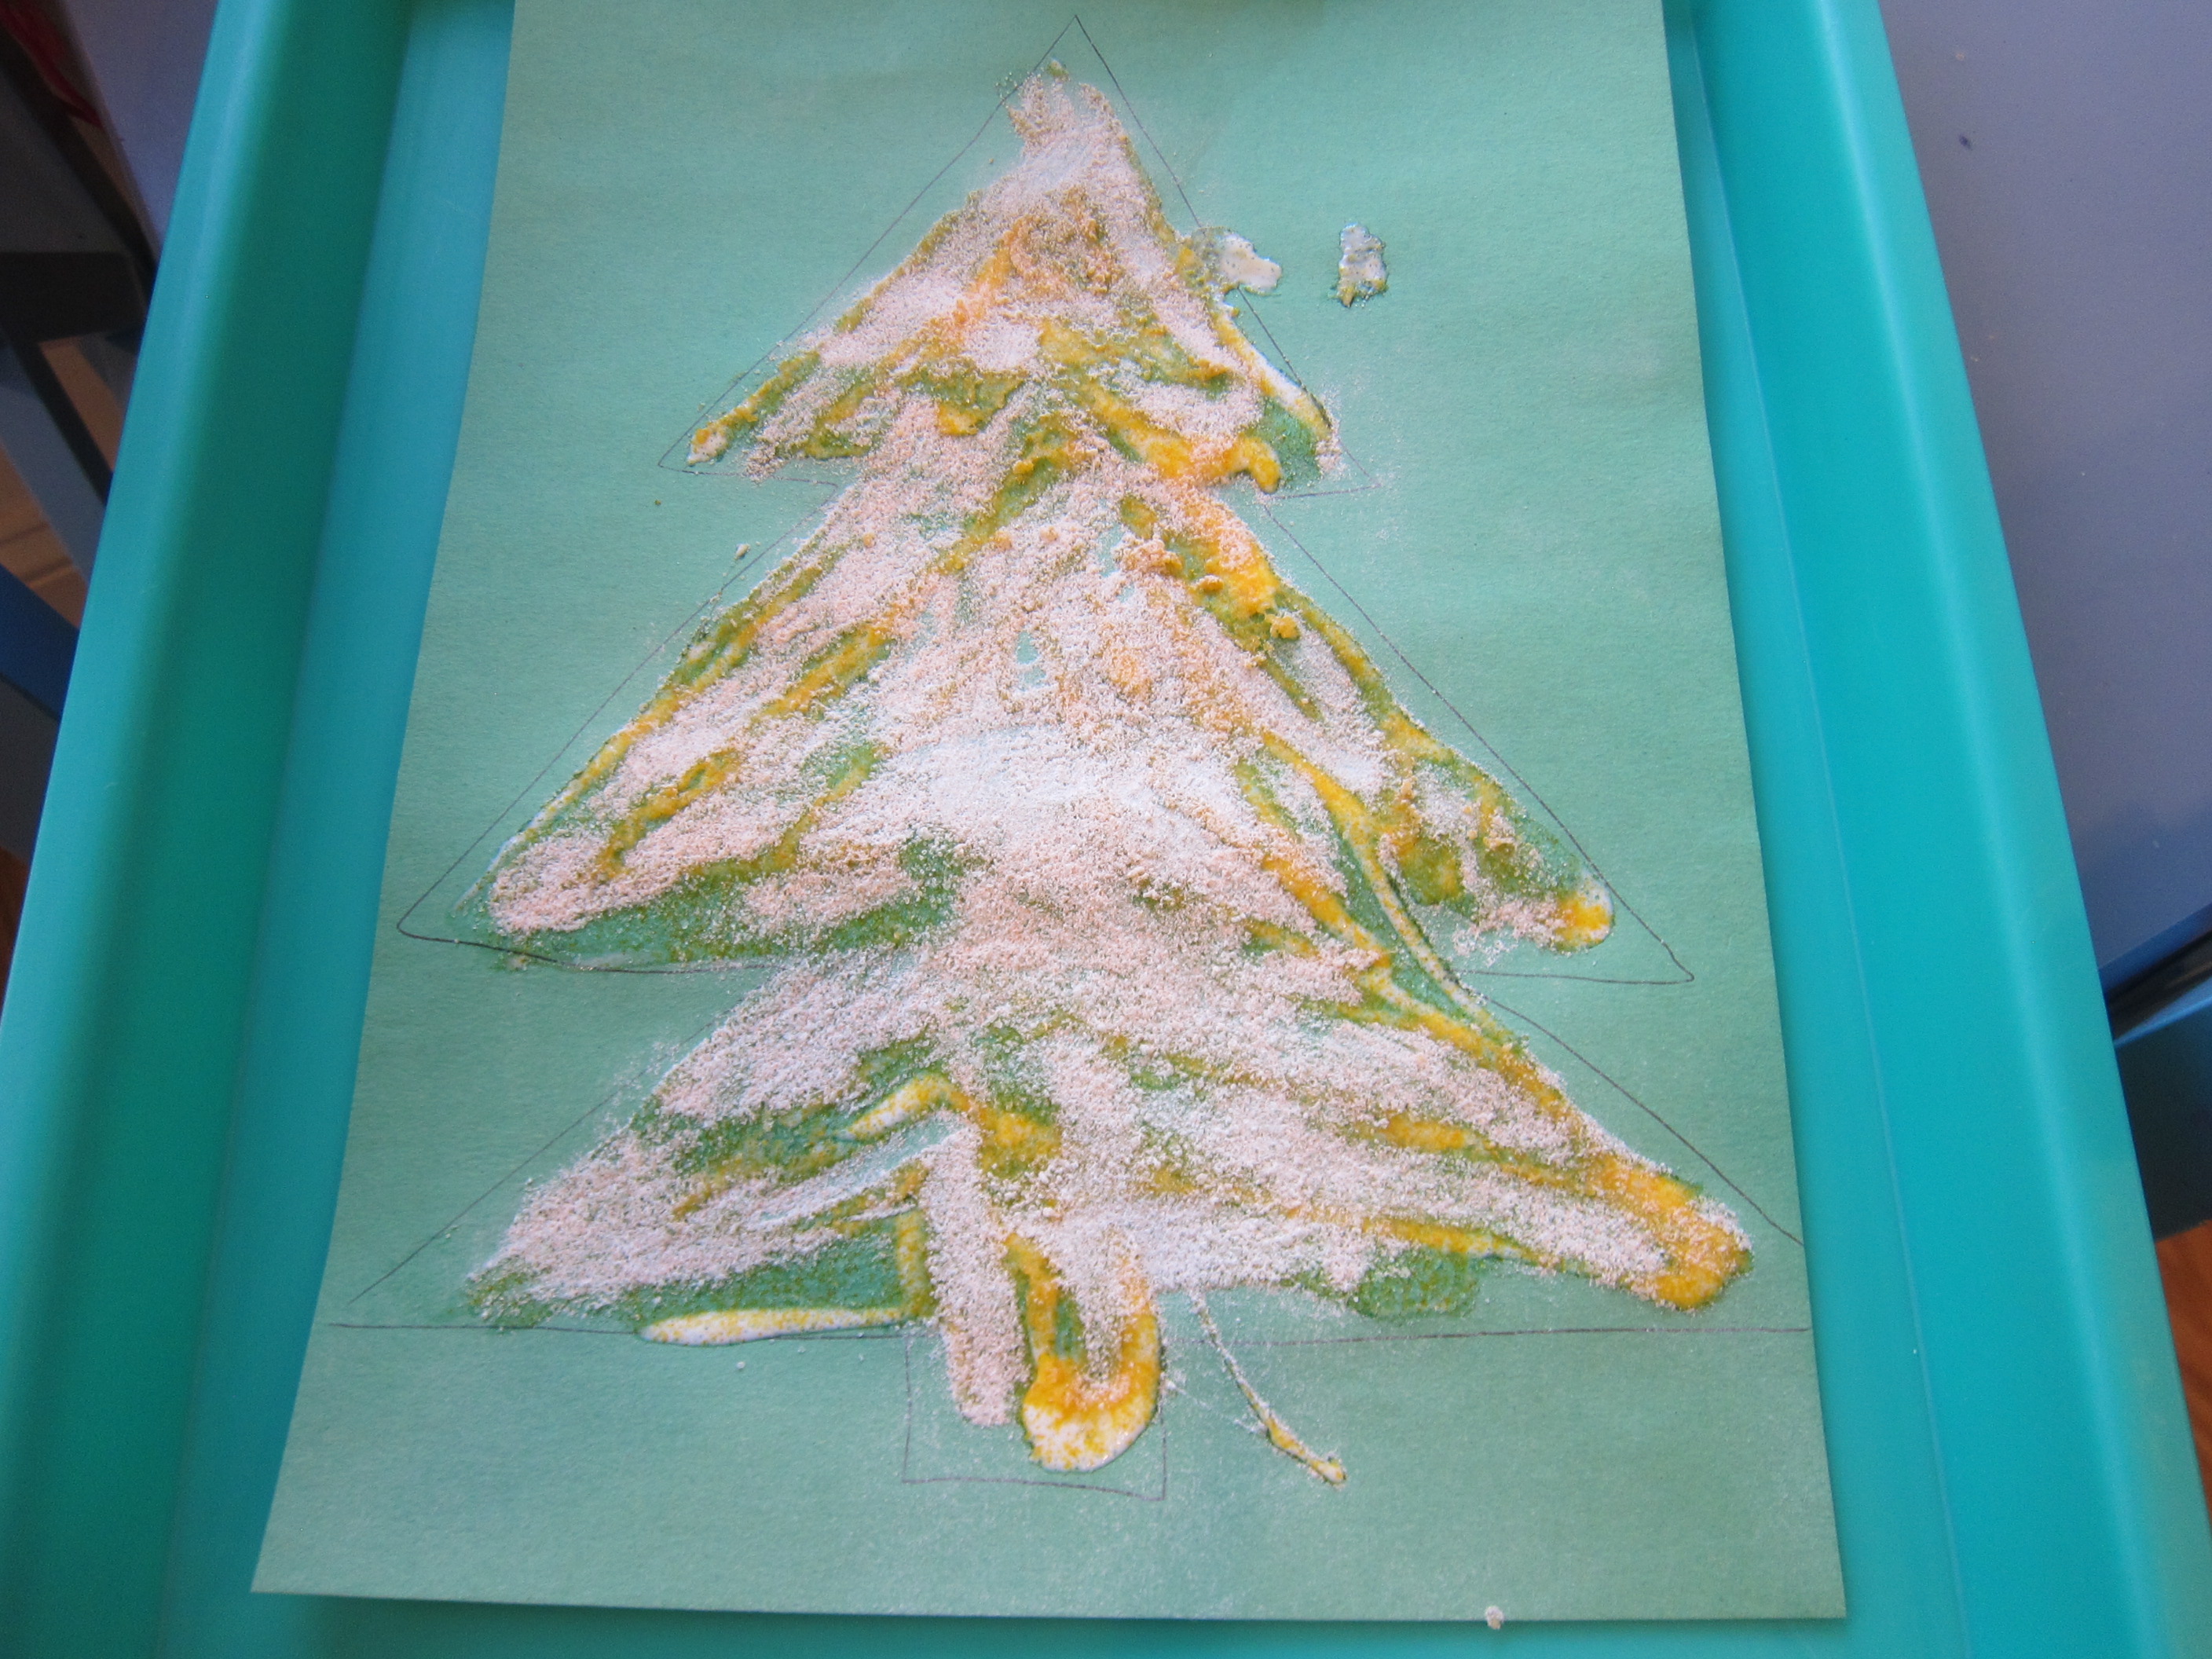
Now it was up to Veronika to decide how to decorate! I helped her squeeze tacky glue all over the tree, and then she liberally dumped on red sequins and red and green beads.

Christmas Doorknob (2)

“Look at all the sparkles!” she said, as she let them trickle down.

Christmas Doorknob (3)

I only helped now and then by adding extra glue or pressing on a bead in a few places, otherwise it was all up to her.

Christmas Doorknob (4)

Once the glue dried, it looked beautiful hanging on a hallway door.

Christmas Doorknob (5)

Upcycling with Holiday Cards

Christmas Card Ball (7)

We had a few blank and leftover holiday cards, so today we turned them into crafts in two ways: one for Hanukkah and one for Christmas!

For the first, we had a few Hanukkah cards with bumpy 3-D elements, and I thought these would be great for holiday rubbings, similar to fall leaf rubbings. I removed the paper wrapper from a blue crayon and showed Veronika how to place the cards under a sheet of blank paper, then rub sideways with the crayon to reveal the images underneath.

Hanukkah Rubbings (1)

Neat images of dreidels and the Star of David seemed to magically appear before her eyes. If you don’t have cards with these bumpy elements, you can also cut shapes from poster board, place under the paper, and rub over them. It was hard for Veronika to get the mechanics down of rubbing with the crayon sideways…

Hanukkah Rubbings (2)

…but big brother Travis could do it!

Hanukkah Rubbings (3)

Meanwhile, Veronika really enjoyed simply scribbling with blue on the leftover cards and envelopes, or pretending to “mail them”.

Hanukkah Rubbings (5)

We also had a few Christmas cards to upcycle, and these made perfect Christmas Card Ball ornaments.

Christmas Card Ball (1)

Cut an old Christmas card into strips, then punch a hole in the top and bottom of each.

Christmas Card Ball (2)

Arrange the strips in order, then insert a brad in the top holes.

Christmas Card Ball (4)

Fan all the pieces out, then begin adding them to a second brad through the bottom hole, bending each so you form an orb shape as you work.

Christmas Card Ball (3)

Finally, loop a string around the top brad, securing with a knot, then tie into a loop that can hang from a Christmas tree. Veronika loved playing with all the materials as I worked on these, particularly mimicking me with safety scissors and extra brads.

Christmas Card Ball (5)

This was a fun activity to do side-by-side with a toddler, and so pretty hanging from the tree.

Christmas Card Ball (8)

Star of David

Star of David (6)

Travis has been learning about different winter festivals at school, so today we made two versions of the iconic Star of David to celebrate the start of Hanukkah. These crafts turned out quite pretty, and are easy enough even for younger siblings to join in.

For the first version, we twisted two yellow pipe cleaners into triangles and then glued them one atop the other. Drizzle with extra glue and sprinkle with glitter!

Star of David (1)

For the second version, we painted 6 craft sticks yellow and then glued them into 2 triangles. Glue one triangle on top of the other, drizzle with extra glue and add more glitter. The glitter was definitely Veronika’s favorite part!

Star of David (2)

Note: Next time I would use blue glitter for a better final result. The gold glitter we tried didn’t look as nice as we hoped against the yellow background. They were still pretty, though!

Star of David (4)

Holiday Cookie Magic

Holiday Sugar Cookies (8)

There’s a lot to be said for beautiful and complicated holiday cookies (and we’ve baked some of those this holiday season!), but there’s also a lot to be said for slice-and-bake cookies. To wit, Travis and I had fun baking some today (thanks to the vegan sugar cookie dough from Sweet Loren’s). We then talked about the symbolism behind some of December’s holiday cookies before adding the following decorations.

Holiday Sugar Cookies (1)

Christmas:

Chewy Chunks: Who knew? Dried fruits and nuts (traditionally numbering up to 13 ingredients) originally represented Jesus and the Apostles, hence the ubiquitous holiday fruit cake. We didn’t use quite that many different dried fruits, but we did chop up raisins, prunes, dried apricots, and dried cranberries, then pressed into the top of the dough before baking.

Holiday Sugar Cookies (3)

Festive Fruit Strips: Fruit leather cut into strips makes candy cane stripes on a round cookie. Here was another “who knew” moment: the shape of a traditional candy cane is meant to represent a shepherd’s crook!

Holiday Sugar Cookies (4)

Hanukkah:

Jelly Doughnuts: Fried treats like jelly doughnuts represent the oil that lasted for 8 days during the miracle of Hanukkah. To turn them into cookie form, we pressed our thumbs into the center, filled each with about 1/4 teaspoon jelly, and sprinkled with powdered sugar.

Holiday Sugar Cookies (7)

Latke Cookies: Likewise representing the oil, here was a way to turn potato latkes into cookie form! Travis helped smash potato chips with mallet, then we dipped the top of the sugar cookie dough into the crushed cookies before baking.

Holiday Sugar Cookies (6)

These were all so easy and yet so delicious!

Handprint Menorah

Handprint Menorrah (6)

We don’t celebrate Hanukkah, but we have family and friends who do and wanted to mark the occasion with a few crafts. This keepsake handprint menorah is perfect to send to relatives!

To start, I needed to paint Veronika’s hands with three colors of washable paint, which I worried would be a wriggly and messy affair. But she held absolutely still, fascinated. White went on her palm, yellow on her fingers, and orange at the tips to be the candle flames.

Handprint Menorrah (3)

Cross your child’s hands so the left is on the right side of the paper and the right on the left. The pinkies should overlap, or you’ll have one candle too many!

Handprint Menorrah (2)

Her print was complete and I let it dry before covering with contact paper. It makes a lovely, durable card this way!

Handprint Menorrah (8)

Meanwhile, she loved having her hand painted so much that she wanted to do it herself a few times. I left her quite happy with extra paint and a spare piece of paper.

Handprint Menorrah (4)

Happy Hanukkah to those who celebrate!

Handprint Menorrah (7)

Paper Circuit Menorah

Paper Circuit Menorrah (7)

Travis has been wanting to do this activity since we made other circuit crafts earlier this year, but it felt only right to wait on this one until Hanukkah.

First, you’ll need to map out a menorah shape with copper tape. I simply copied from an online example freehand, so you’ll notice my spacing wasn’t always right.

Paper Circuit Menorrah (2)

If you’re going to be more exact, you’ll definitely want a ruler. You’ll also need to make sure that the gap between any two vertical tape lines isn’t wider than the width of a 9V battery. Meanwhile, Travis was fascinated with the thin copper tape, and couldn’t believe it was a metal!

Paper Circuit Menorrah (1)

Once the tape was all laid out, I taped an LED light in the top center as the shamash candle. Hold a 9V battery over the two halves of the copper tape below this, and it will turn on!

Paper Circuit Menorrah (6)

Tape 8 additional LED lights over the other points of the menorah. We alternated white and blue, for an appropriately holiday-themed effect.

Paper CIrcuit Menorrah (8)

If you want to rig this up so that you can actually light a new LED each night, you’ll need five 9V batteries.

Paper Circuit Menorrah (3)

You’ll also need extra strips of copper tape to interrupt the circuit in 4 places, and then attach them on the second night of each interval. We didn’t make things that complicated, nor did we use the suggested ohm resisters, but Travis just loved marveling at how he could light each “candle”.

Paper CIrcuit Menorrah (10)

We moved the 9V battery around to light each LED in turn. He especially loved the blue ones!

Smelly Christmas Tree

Smelly Christmas Tree (7)

This is a holiday craft I’ve wanted to do for a while, but never followed through because I couldn’t find a vegan jel dessert that was green. This year, I decided not to let that stop us, though it did require a little improvising!

If your family eats regular Jell-O, all you need is white construction paper and green Jell-O powder. For our version, I drew a Christmas tree shape on green construction paper and hoped that the yellow (peach) vegan jel powder would look nice against this background.

Smelly Christmas Tree (1)

All those logistics aside, Veronika loved brushing glue over the tree shape.

Smelly Christmas Tree (2)

The next step was even better: sprinkling on the jel powder! She tried applying it with a paintbrush first, but this was sticky and difficult. Instead, she loved scooping it on with a plastic spoon. This was great for her fine motor skills, too!

Smelly Christmas Tree (3)

The big payoff is that as soon as the powder hits the wet glue, it smells delicious. Veronika loved that sensory element of the craft.

Smelly Christmas Tree (6)

We ended up just using this activity for the fun and sensory aspects. That said, it can make a nice keepsake! You could mail it to a relative for a delicious-smelling Christmas card. Or, punch a hole near the top and hang it as an ornament from the tree. That said, ours had so much powder on it (Veronika sprinkled it on liberally!) that I worried it would make a mess in either of those scenarios.

Extra-Easy Melting Snowman

Easy Melted Snowman (3)

Veronika has enjoyed snowmen crafts lately, but since she’s too young to draw a snowman shape herself, the activities have required a lot of mommy guidance. The solution to letting her paint her own way? A melted snowman!

We made puffy paint yesterday that she loved so much I decided to use it again for this craft, although you can use regular white paint in a pinch. In a tray, I mixed up equal parts white glue and shaving cream until we had a puffy, sticky mixture.

Easy Melted Snowman (1)

She immediately started brushing it over a piece of construction paper. Anywhere at all was fine; this snowman has melted under the winter sun!

Easy Melted Snowman (2)

I made a second messy painting alongside her so we could have companion snowmen. Once the puffy paint dried, we used a glue stick to attach all of the accessories. Again, these can go anywhere on the paper that your toddler wants!

We added hats, carrot noses, and mittens cut from construction paper, and red pom poms for buttons.

Baked Pita Chips

Baked Pita Chips (1)

These easy homemade chips are a delicious alternative to store-bought ones, and perfect for dipping in hummus.

Ingredients:

  • 3 whole wheat pitas
  • 1/4 cup olive oil
  • 1/4 teaspoon garlic salt
  1. Brush the olive oil evenly over the pitas, coating both sides.
  2. Cut each pita into 8 wedges and transfer to a baking sheet. Sprinkle evenly with the garlic salt.
  3. Bake at 400 degrees F for 6 minutes, just until browned.

Baked Pita Chips (2)

Dancing Puppets

Dancing Puppet (8)

After engineering puppets for his latest Kiwi Crate, Travis had fun making this super-simple version from supplies we had around the house.

Dancing Puppet (1)

To start, all he needed was an empty toilet paper tube. Punch two holes near the top; they’ll look almost like eyes at this point, but aren’t for that purpose.

Dancing Puppet (2)

For the arms, cut two strips of construction paper that are the same length as the tube. Punch two holes near one end of each strip, and attach a paper clip to the other end.

Line up the bottom hole of each arm with the holes in the tube; insert a brad, and fasten. Loop string through the top hole of each arm, and secure at the top with a knot.

Dancing Puppet (4)

Now all Travis had to do was pull down on the string to make the arms rise!

Dancing Puppet (5)

This made a funny, wobbly puppet, and Travis knew exactly how he wanted to decorate the face: as a “Shadowtrooper” from Star Wars.

Dancing Puppet (7)

No wonder he chose black paper for the arms! Your kids can have fun making a whole bunch of these simple puppets and decorating any way they choose.

Dancing Puppet (6)