Coloring the Snow with Droppers

Coloring Snow with Droppers (11)

We have snow, but it’s not the soft fluffy kind you’d want to roll around in. This snow iced over pretty quickly in a thin layer on the ground. So it was the kind of snow to take inside!

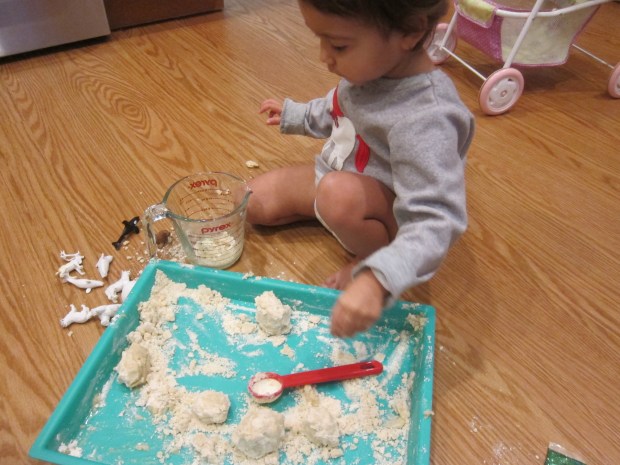
I scooped some of the snow onto a tray, and set it out alongside pipettes and liquid watercolors (in the compartments of an ice cube tray). Because I only had 3 colors of liquid watercolor, I added food coloring to a few compartments, too.

Coloring Snow with Droppers (1)

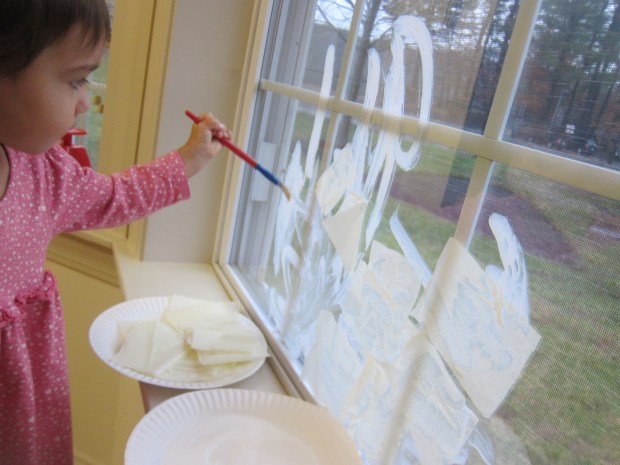
I showed Veronika how to dip a pipette in one of the colors, squeeze to fill it up, and then squeeze again to release the color over the snow.

Coloring Snow with Droppers (2)

She loved watching the colors appear against the white snow. “It’s yellow!” she exclaimed with delight for her favorite color.

Coloring Snow with Droppers (5)

It was hard for her to get the mechanics of filling and releasing the pipette, but that was totally fine since this is the first time I’ve introduced her to the tool.

Coloring Snow with Droppers (4)

She was so proud of her work nonetheless and did a lot of simply stabbing at the snow, or dipping the tip of the pipette into the colors and brushing it over the snow like a paintbrush.

Coloring Snow with Droppers (6)

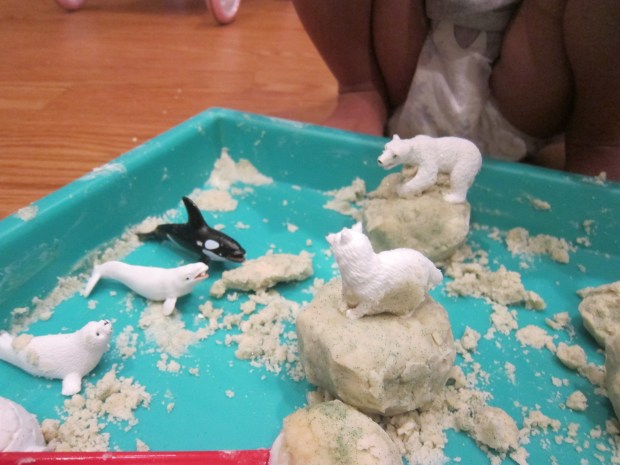
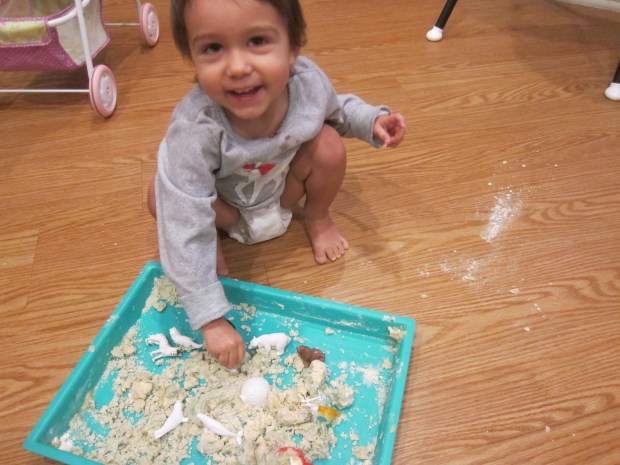
We mixed colors, too, (although our mix of red and blue looked more black than purple), which was good for a quick art lesson. After she tired of that, we put small chunks of snow directly into the ice cube tray, which now only had a shallow layer of each color. The color would saturate the snow immediately, which was fun to watch.

Coloring Snow with Droppers (9)

Veronika worked so seriously to move the snow pieces over to the ice cube tray with tongs; another tool to hone her fine motor skills!

Coloring Snow with Droppers (8)

When your toddler tires of the play, clean up couldn’t be easier. Simply put your snow in the sink and let it melt!

Coloring Snow with Droppers (10)

Make a Snowscape Window

Snowscape Window (8)

We had a rain storm today, but the kids definitely wished it was snow instead. Luckily, I had a quick way we could turn at least one window into a snowy landscape.

I set out two paper plates, one filled with torn pieces of white tissue paper and the other with watered down Mod Podge. I showed Veronika how to dip a paintbrush in the Mod Podge mixture and then smear it all over the window of the playroom.

Snowscape Window (2)

She loved doing this, and was also thrilled that she got to stand on a chair while doing so. My big girl!

Snowscape Window (5)

As we covered the window in the Mod Podge, we then added pieces of tissue paper which will stick right on. I guided the placement of the tissue paper only slightly so it roughly formed a bell curve, mimicking the look of a snowdrift.

Snowscape Window (4)

If your kids have crafted any small Christmas trees from foam or felt this holiday season, you can tape these up to your snowy landscape. In a pinch, we added a few tree with washable green paint.

Snowscape Window (7)

The internet leads me to believe all of this will wash off easily once December is over, and my fingers are crossed!

Snowscape Window (6)

But in the meantime, Veronika’s artwork now makes the perfect backdrop for the rest of our Christmas decor.

Snowscape Window alt

Christmas Sparkle Cloud Dough

Christmas Cloud Dough (10)

Cloud dough is a great alternative to homemade play dough since it comes together from just two ingredients. Plus it’s one of those great sensory materials that you can vary only slightly to make it fit each season!

To wit, today it was time for sparkly Christmas cloud dough. I added 2 cups flour and 1/2 cup vegetable oil to a craft tray, and simply mixed it all together with my hands. (Note: You can use an equal amount of cornstarch in place of the flour if you want the dough to be a more pure snow white).

Christmas Cloud Dough (2)

We then added green glitter for some Christmas spirit! Veronika was thrilled to see the sparkles and began spooning through the mixture with a little scoop.

Christmas Cloud Dough (3)

I showed her that she could squeeze it into balls, which we called “Christmas cakes”.

Christmas Cloud Dough (5)

It also made great snowmen if we piled a few atop each other.

Christmas Cloud Dough (6)

We then pulled out an arctic set of plastic animals she loved tromping them through the dough, adding an imaginative element to the sensory play.

Christmas Cloud Dough (7)

Overall, this was very simple but clearly great fun!

Christmas Cloud Dough (8)

Creamy Spinach Pita Pizza

Spinach Pita Pizza (1)

A creamy spinach sauce takes the place of tomato sauce in this recipe, which is perfect for the next time you need a novel spin on pizza night.

Ingredients:

  • 2 tablespoons olive oil
  • 2 minced garlic cloves
  • 1 tablespoon flour
  • 4 tablespoons plain non-dairy milk
  • 5 ounces fresh baby spinach, finely chopped
  • 2 whole-wheat pitas
  • 4 slices tomato
  • 2 tablespoons shredded vegan Parmesan
  1. Heat the olive oil in a large skillet over medium-high heat. Add the garlic and saute for 2 minutes.
  2. Whisk in the flour, then add the milk 1 tablespoon at a time, stirring to combine.
  3. Add the spinach and cook for about 2 minutes, just until wilted.
  4. To prepare the pizzas, spread each pita with about 1/3 cup spinach mixture. Top evenly with the tomato slices and sprinkle evenly with the Parmesan.
  5. Broil for 2 minutes, checking to make sure the pitas don’t burn. Cut into wedges to serve.

National Sock Day

National Sock Day (2)

December 4 is National Sock Day, celebrating the glory that is a pair of matching socks. Today was not about lost socks from the dryer, or old socks turned into crafts, but all about a lasting matched pair.

We love celebrating silly holidays like this, so of course I treated everyone to a new pair today! I got Christmas bows, Veronika got little elephants, and Travis received Darth Vader.

National Sock Day (1)

The kids immediately wanted to race around the house in their slippery new socks.

National Sock Day (3)

Just in time, Travis’s Highlights magazine had a sock-matching puzzle to find 8 matching pairs. In a pinch, you can have fun with the real thing; do a load of laundry and have your happy helpers match up all the socks!

National Sock Day (4)

Then finish your celebration by dining on a famous pair: Peas and carrots? Peanut butter and jelly? Here’s to perfect pairs!

Painting with Baby Food

Painting with Baby Food (4)

We had a few leftover jars of early-stage baby food (i.e. smooth purees) that Veronika will never eat at this point. So we decided to paint with them instead!

I laid down a long piece of butcher paper and poured two colors (er, flavors) of baby food onto paper plates. We had yellow/peach paint and purple paint.

Painting with Baby Food (3)

At first I thought we would use this like finger paint, but Veronika was already playing with her toy cars this morning and it turned into car painting, instead! I showed her how to drive a car through a plate, and then along the paper.

She didn’t waste any time, and soon was happily vrooming. I loved that she talked about colors while she played, too. “Red car makes yellow tracks! Blue car makes purple tracks!”

Painting with Baby Food (2)

Your child might want to get in there with fingers instead of cars, which of course is perfectly fine since this is an edible paint. And there’s a high probability that the paint might turn into snack time, too!

Painting with Baby Food (5)

After she was done driving the cars around, Veronika decided they needed a car wash. I set down a tray filled with a little sudsy water and she spent arguably just as long driving the cars through the wash as she had painting with them. All in all it was a nice activity for our morning.

Painting with Baby Food (7)

Tape Resist Candy Cane Painting

Tape Resist Candy Cane (7)

Tape resist is a great art method for toddlers because they get to make a mess but still wind up with a recognizable image or picture. This candy cane version is just right around the holidays!

I first placed horizontal strips of masking tape on white construction paper, then squirted generous blobs of red fingerpaint all over it. I was glad we did this in a craft tray, because it definitely got messy.

Tape Resist Candy Cane (1)

All Veronika had to do now was smear! She quickly decided she wanted to use yellow paint instead, so I let her play with that on the side and finished off the red version, making sure to wipe off excess paint.

Tape Resist Candy Cane (3)

Immediately peel off the strips of tape, then let the paint dry completely. “Look what I made!” Veronika proudly said when she spotted it drying on the table.

Tape Resist Candy Cane (4)

Once dry, I cut the paper into candy cane shapes and glued them against a green paper backdrop. You can hang these from a door if you attach a loop of ribbon, or simply tape to a wall as holiday decor.

Tape Resist Candy Cane (6)

No one will believe your toddler can make such straight lines, but they can!

Wrapping Paper Stocking

Wrapping Paper Stocking (8)

As you wrap gifts this holiday season, no doubt you’ll end up with just as many scraps and small bits of wrapping paper as I do. So after some early gift wrapping today, I gave Veronika the leftovers!

She loved looking at all the different patterns before we even started crafting with them, particularly seeing images of Santa Claus and Christmas trees.

Wrapping Paper Stocking (1)

I then gave her a glue stick to smear all over a piece of green construction paper and showed her how to add the scraps of wrapping paper any which way.

Wrapping Paper Stocking (4)

I made sure to leave a little space blank at the top, but other than that, all the placement was up to her!

Wrapping Paper Stocking (5)

Once the glue dried, I cut out a simple Christmas stocking shape, and wrote her name at the top.

Wrapping Paper Stocking (6)

This makes a great decoration to hang around the holidays and is great for early name recognition, too!

Wrapping Paper Stocking (7)

Easy Snowflake Craft

Easy Snowflake Craft (4)

Here’s a quick snowflake craft for toddlers to put together. Depending how many your child wants to make, you can hang just one in a window or create a whole snowstorm of them!

Ideally I would have had two shades of blue paper for this project, but since I only had dark blue, we scribbled all over a piece of white paper with blue crayon. Of course Veronika was a very happy scribbler! Now we had two shades of blue, which I then cut into strips about 1-inch wide.

Easy Snowflake Craft (1)

Use a glue stick to arrange 5 or 6 strips of paper into a snowflake shape.

Easy Snowflake Craft (2)

Next, I poured a little white paint into a paper plate and showed Veronika how to dip in a q-tip and dot onto the snowflake. She loved this painting method!

Easy Snowflake Craft (3)

Let dry, then hang in the window like a giant snowflake drifting down. This is the perfect craft to look at while we wait for winter to give us the real thing!

Easy Snowflake Craft (5)

Cotton Ball Snowman, Two Ways

Cotton Ball Snowman Craft (11)

A snowman made of cotton balls is a toddler classic for a reason; after all every toddler seems to love soft, puffy cotton balls, and they really do make adorable snowmen!

The first version Veronika and I made today involved more parental work than the second. I traced 3 sizes of circle cookie cutters on contact paper, then cut out. Tape down to a piece of construction paper with double-sided tape so that the sticky part of the contact paper faces up. Now have your toddler cover with cotton balls!

Cotton Ball Snowman Craft (1)

The three circles will immediately resemble the head, torso, and bottom of a snowman. This was a great opportunity to point out the relative sizes of the circles.

Cotton Ball Snowman Craft (3)

I then cut a few additional details from construction paper which Veronika could help glue on, including an orange carrot nose, a red scarf, and black circles for buttons and eyes. Make sure to have your toddler help squeeze out the glue, which is great for those little finger muscles!

Cotton Ball Snowman Craft (6)

The second version we made allowed Veronika to be more in charge. This time, we simply smeared a glue stick onto construction paper in circular motions, a big circle on the bottom and smaller on top.

Cotton Ball Snowman Craft (7)

After sticking on cotton balls for the body, I then gave Veronika pom poms to add for decorations. This was a great way to give her agency over how the snowman turned out.

Cotton Ball Snowman Craft (8)

If your child wants to add a background, use a white crayon for a snowy scene. For all that, Veronika’s favorite part of the whole activity was dumping cotton balls from one container to another, which was just fine.

Cotton Ball Snowman Craft (4)

As I said, toddlers love those fluffy little cotton balls!

Cotton Ball Snowman Craft (10)